Boiled Broccoli: the Secret to Bright Green Flavor
- The Bright Green Secret: Perfectly Boiled Broccoli with Zesty Finish (No More Mushy School Dinner Fare!)
- Unlocking the Secret to Vibrant, Tender-Crisp Broccoli
- Essential Components for Zesty Boiled Broccoli
- The Science Behind Perfect Texture: Blanching and Shocking Explained
- The Method: How to Achieve Perfectly Boiled Broccoli (In 3 Simple Steps)
- Troubleshooting and Expert Secrets for Bright Green Results
- Prep Ahead: Storing and Reheating Cooked Broccoli
- Creative Pairings: Elevating Your Boiled Broccoli Side Dish
- Recipe FAQs
- 📝 Recipe Card
The Bright Green Secret: Perfectly Boiled Broccoli with Zesty Finish (No More Mushy School Dinner Fare!)
Have you ever sliced into a head of fresh broccoli, anticipating that perfect tender crisp bite, only to end up with dull, greyish mush that smells vaguely of the cafeteria? I get it. We’ve all been there.
But mastering the art of truly Boiled Broccoli isn't about time; it’s about technique.
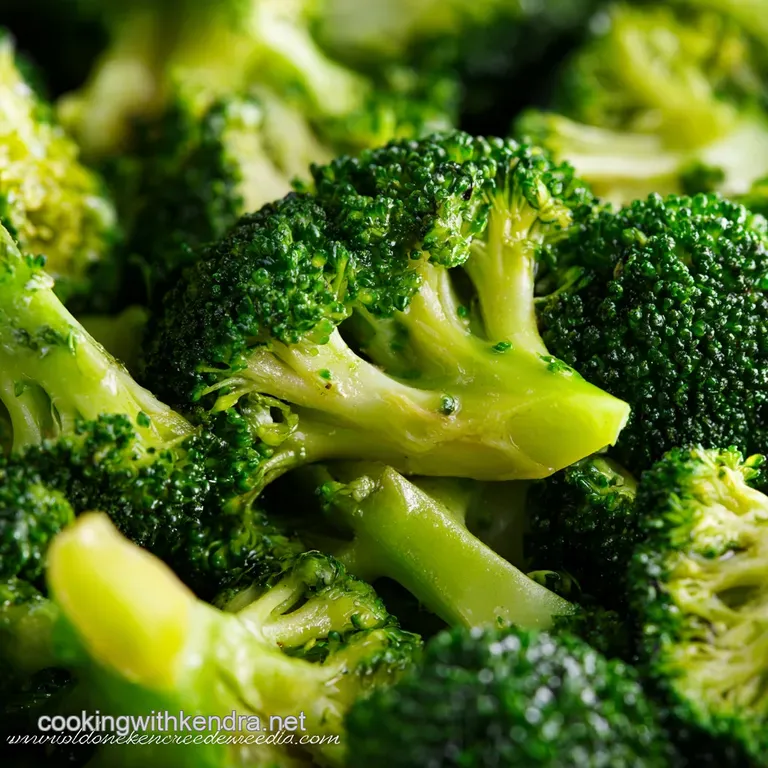
This isn't a fancy restaurant trick it’s a fundamental cooking skill that takes three minutes flat. It turns a necessary, healthy side dish into a vibrant showstopper that maintains its stunning emerald green color and delightful al dente crunch.
Learning how to properly prepare Boiled Broccoli is the foundation for a dozen other fantastic dishes.
Ready to forget everything your grandmother taught you about just leaving vegetables simmering until they’re soft? We’re going to use professional blanching and shocking to guarantee success every time. Trust me, once you see the vivid color pop, you will never go back.
This Boiled Broccoli recipe is a game changer.
Unlocking the Secret to Vibrant, Tender Crisp Broccoli
For years, I approached broccoli with fear. I either steamed it until it was tough, or I boiled it until it was sad and soggy. The perfect texture, the one that snaps slightly when you bite it, seemed impossible to achieve at home until I learned the simple principle of stopping the cooking process dead in its tracks.
Moving Beyond Soggy: Defining the Ideal Texture
The texture we are aiming for is tender crisp , or al dente , which means "to the tooth." It’s cooked enough to be easily digestible and release its slightly sweet flavor, but it retains structural integrity.
If you want truly delicious Boiled Broccoli , you need to ensure the interior is still slightly firm when you pull it out of the heat.
If you skip the crucial shocking step, the residual heat inside the florets continues to cook them, dissolving the cell walls. That slow cooking turns the gorgeous green pigment (chlorophyll) into a drab, olive color, giving you mushy Boiled Broccoli that no one wants to eat.
We are using massive temperature swings to control the outcome precisely.
What Makes This Blanching Technique Superior?
Blanching simply means submerging a vegetable briefly in intensely boiling water. The heat activates an enzyme called chlorophyllase, which stabilizes the green color temporarily. When you immediately plunge the vegetable into an ice bath, you halt that activation and lock in the color and the nutrients.
This is how you achieve perfectly Boiled Broccoli that looks magazine ready.
This is fundamentally different from steaming, which is a gentler, slower process. When you truly want maximum color and a snappy texture quickly, boiling is the way to go, provided you use enough salt and follow up with the shock.
Achieving Perfectly Boiled Broccoli hinges entirely on that rapid temperature control.
Required Kitchen Equipment for the Shock
You absolutely must set up your mise en place before the water starts boiling. This is a crucial mistake many home cooks make they wait until the broccoli is cooked to grab the ice, and by then, it’s too late. You need three things ready to make flawless Boiled Broccoli :
- A massive stockpot : This ensures the water temperature doesn't drop too much when you add the cold broccoli.
- A colander or spider strainer : Speed is essential for the transfer. A spider strainer works best for removing the florets quickly without pouring out the water.
- A giant bowl of ice water : This must be very cold, packed with ice, and deep enough to fully submerge the florets.
Essential Components for Zesty Boiled Broccoli
I’m a firm believer that the finishing touches are what transform a basic side into something craveable. Boiled Broccoli is inherently healthy, but it needs acid and fat to truly sing. Don't underestimate the power of these final components.
| Ingredient | Role | Why It Matters | Substitute Option |
|---|---|---|---|
| Coarse Salt | Flavor & Color Stabilizer | Flavors the vegetable from the inside out; required for the blanching water. | Kosher salt (adjust volume slightly) |
| Fresh Broccoli | The Star | Look for tight, dark heads. | Broccolini or thick cut green beans |
| Butter/Olive Oil | Fat/Mouthfeel | Carries flavor and prevents a dry, chalky texture. | Plant based butter or walnut oil |
| Lemon Zest & Juice | Acid Kick | Brightens the flavor and enhances the brilliant green color. | White wine vinegar or lime juice |
The Science Behind Perfect Texture: Blanching and Shocking Explained
This section is for the science geeks (like me!) who want to know why we do what we do. Understanding the chemistry behind your Boiled Broccoli time helps you instinctively know when it’s ready.
Selecting the Freshest Broccoli Crowns
The quality of your finished dish is only as good as its starting point. When shopping for ingredients for your Boiled Broccoli , look for crowns that are deep green or even purplish green never yellow! The florets should be tightly packed, not spread out or loose.
Pro Tip: Feel the stem. If the cut end looks dry, woody, or feels squishy, move on. A fresh head of broccoli should feel heavy and the stem should look slightly pale and moist. A good start makes achieving the Perfectly Boiled Broccoli texture effortless.
Detailed Notes on Salt Ratios (The Pasta Water Rule)
When I say "salt the water aggressively," I mean it. Think pasta water, not soup stock. You should use about 2 tablespoons of coarse salt per 4 quarts of water.
Why so much salt for Boiled Broccoli Time ? Two reasons: First, seasoning the water penetrates the vegetable as it cooks, resulting in perfectly seasoned florets throughout, not just on the surface.
Second, the salt helps raise the boiling point of the water slightly, which results in faster cooking and better texture retention. This is one of the keys to successful Easy Broccoli Recipes .
Butter vs. Olive Oil: Finishing Decisions
Once your florets are shocked and drained, they need a touch of high-quality fat. I usually reach for a tablespoon of good European style unsalted butter because the richness perfectly complements the slightly earthy flavor of the brassica. The butter melts over the warm florets, coating them beautifully.
If you’re keeping this vegan, or just prefer a Mediterranean twist, use high-quality, peppery Extra Virgin Olive Oil. The flavor should be assertive because you’re only using a small amount. Both choices ensure your Boiled Broccoli isn't dry.
Halting the Cooking Process: The Ice Bath Mandate
I once thought the ice bath was an unnecessary extra step. What’s the worst that could happen, right? Turns out, the worst that can happen is dull, sulphurous, overcooked vegetables. The second the broccoli comes out of the boiling water, it needs to stop cooking.
This is the non-negotiable step for How to Boil Broccoli . The instant submersion in ice water rapidly drops the internal temperature, preserving the vibrant green color and that crisp bite we are aiming for.
If you skip this, even five minutes of residual heat will turn your brilliant green into drab grey.
The Role of Acid (Lemon Zest and Juice) in Color Brightness
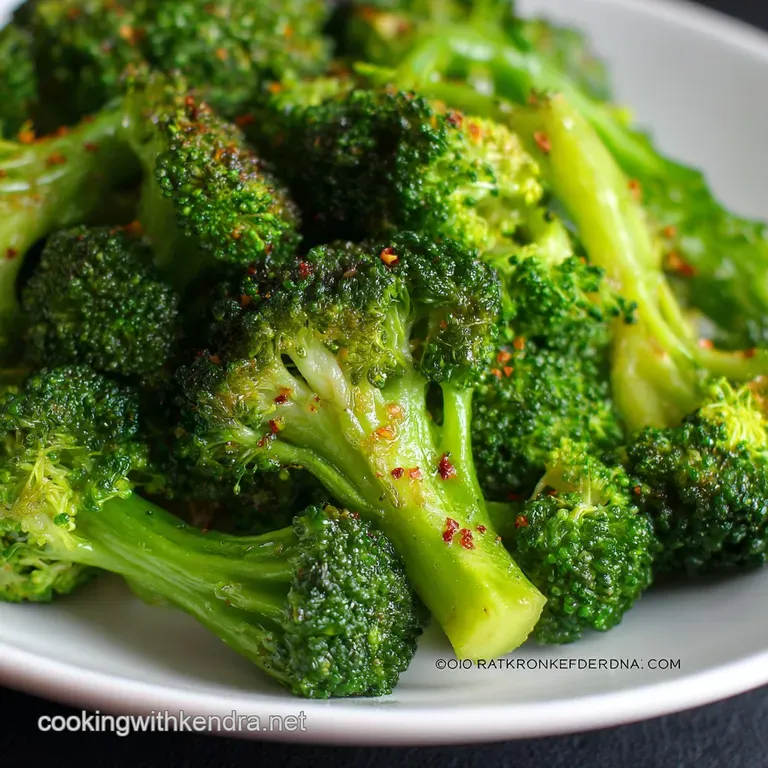
We finish this particular Boiled Broccoli preparation with acid for two reasons. First, the squeeze of fresh lemon juice cuts through the richness of the butter or oil, making the dish feel fresh and light.
Second, the lemon acid is essential because it enhances the brightness of the green color we worked so hard to preserve. Adding the zest introduces powerful aromatic oils. Never skip the zest; it provides more concentrated citrus flavor than the juice alone.
The Method: How to Achieve Perfectly Boiled Broccoli (In 3 Simple Steps)
Making Perfectly Boiled Broccoli is less about monitoring a timer and more about mastering the flow of preparation. Follow these steps exactly, and you will win the broccoli game.
Preparation: Cutting Florets for Even Cooking
Start by washing your broccoli well. Cut the head into uniform, bite sized florets, aiming for about 1 inch pieces. Consistency is key here! If you have large pieces and tiny pieces, you'll end up with some undercooked and some mushy.
Chef's Note: Don’t waste the stem! Peel the tough outer skin it tastes awful then slice the tender inner core into thin coins. These can be blanched right along with the florets.
Step 1: The over High heat Blanch Time
Bring your heavily salted water (remember: taste like the sea!) to a raging, rolling boil. When you add the broccoli, the water temperature will drop rapidly. This is why you need a big pot of water so it can return to a boil quickly.
Add the florets and immediately start your timer. Cook for exactly 2 to 3 minutes. The moment the water returns to a vigorous boil and the color shifts from dull green to an electric emerald, it’s done.
If you want true al dente , stick to the two-minute mark. This is the only acceptable Boiled Broccoli Time .
Step 2: Immediate Transfer to the Ice Bath
This step requires speed. Using a spider strainer or slotted spoon, scoop the broccoli out of the boiling water and drop it immediately into the bowl of ice water. Don't mess around!
I once tried to cheat the system by just holding the broccoli under cold running water in the sink. Do not do this. It doesn't drop the temperature fast enough, resulting in a slightly soft product.
Submerge the florets for 60 to 90 seconds until they are fully chilled to ensure the gorgeous green of your Boiled Broccoli sets permanently.
Step 3: Draining, Drying, and Final Seasoning
Drain the chilled broccoli well. This is vital, especially if you plan to toss it with butter or oil. Water repels fat, so if your florets are still dripping wet, the delicious seasoning won't adhere properly. I sometimes lightly pat them down with a clean paper towel.
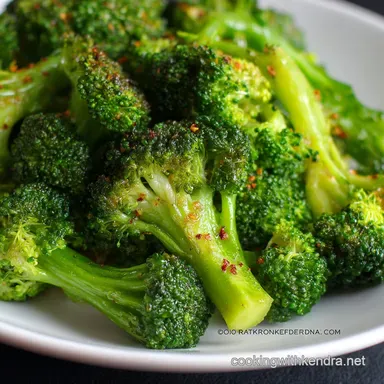
Transfer to a serving bowl. Add the butter/oil, a few twists of fresh black pepper, the lemon zest, and the juice. Toss everything gently to ensure every piece is coated in that zesty finish. Taste and adjust the final seasoning with a tiny pinch of fine sea salt.
Your perfect batch of Boiled Broccoli is ready!
Troubleshooting and Expert Secrets for Bright Green Results
Even with the right method, sometimes things go sideways. Most failures when preparing Boiled Broccoli stem from one of three common issues.
Preventing Sulphurous Odors (The Overcooking Warning)
If your kitchen smells strongly of sulfur or rotten eggs after cooking, you have overcooked the broccoli. This smell is a byproduct released when brassicas are cooked too long. The fix is simple: cut your boiling time in half next time and be obsessive about the ice bath transfer.
Three minutes is the absolute maximum, folks.
How to Fix Under Seasoned Florets
Did you forget the salt in the boiling water? Or maybe you skimped on the finishing salt? Don’t worry, you can salvage it. Toss the broccoli with a splash of high-quality broth (chicken or vegetable) and a generous pinch of fine sea salt. This reintroduces moisture and flavor.
Alternatively, melting some grated Parmesan cheese over the top usually masks any blandness. This is key to making Boiled Broccoli Nutrition taste incredible.
Maximizing Crispness: The Importance of Thorough Drying
If you find that your beautiful florets are slippery or that the oil and seasoning immediately pool at the bottom of the bowl, you didn't dry them enough. If serving immediately, drain them completely and then give them a quick tumble in a salad spinner (yes, really!).
Removing that excess surface water is crucial for maximizing the crispness, which is essential for the Best Way to Cook Broccoli .
Prep Ahead: Storing and Reheating Cooked Broccoli
One of the best things about this technique is that you can prep ahead for the week. Blanched and shocked broccoli stores beautifully, making it perfect for quick weekday meals or as an ingredient in other recipes.
Refrigeration Guidelines for Cooked Florets
After you have completed the blanch and shock, drain the Boiled Broccoli thoroughly, pat it dry, and store it in an airtight container lined with a paper towel. The paper towel absorbs any residual moisture and prevents sliminess.
Properly stored, cooked, and shocked broccoli will last 4 to 5 days in the refrigerator. Wait to add the finishing fat and lemon until just before serving.
The Best Way to Freeze Blanched Broccoli
Freezing is excellent for long term storage, especially if you are using the broccoli for cooked dishes later, like my famous Chicken Broccoli and Rice Casserole: The Creamy, Cheesy, No-Canned Soup Version . Spread the completely chilled and dried florets in a single layer on a sheet pan and flash freeze them for 2 hours. Once frozen solid, transfer them to a freezer safe bag, pushing out all the air. They will keep for up to 6 months.
When ready to use, throw the frozen Boiled Broccoli directly into your cooking application (like stir fries or soups) without thawing first.
Creative Pairings: Elevating Your Boiled Broccoli Side Dish
Once you have mastered the simple perfection of Boiled Broccoli with lemon and butter, you can start layering on the flavors.
Simple Tosses: Cheese and Spice Variations
Sometimes the plain lemon finish is exactly what you need, but sometimes you want a little extra oomph . Here are a few fantastic variations you can try once the Boiled Broccoli is drained and warmed slightly:
- Pinch of Heat: Toss the warm florets with 1 tablespoon of olive oil, 1 teaspoon of minced garlic, and a generous pinch of red pepper flakes. The heat of the broccoli is enough to lightly "cook" the raw garlic aroma.
- Umami Bomb: Skip the lemon and toss with sesame oil, rice vinegar, and toasted sesame seeds. A dash of fish sauce or tamari for depth is optional but glorious.
- Cheesy Crowd Pleaser: Toss the warm broccoli with a mix of shaved Parmesan cheese (the real stuff!) and a small handful of toasted pine nuts. The heat of the cooked Boiled Broccoli melts the cheese just enough.
No matter how you finish it, mastering the blanch and shock method ensures you'll serve vibrant, tender crisp, truly delicious Boiled Broccoli every single time. Enjoy!

Recipe FAQs
Why did my broccoli turn mushy or grey, despite the short cooking time?
Mushiness occurs when the cooking time is too long, breaking down the cell walls excessively, while a grey or dull green color often results from skipping the essential ice bath shock. The ice bath immediately stops the cooking process and halts the enzymatic breakdown of chlorophyll, locking in the vibrant colour.
Ensure your water is at a rolling boil and that the transfer to the ice bath is instantaneous after draining.
Why is it important to use aggressively salted water for boiling?
Salt serves two critical functions in this technique: it significantly enhances the flavor saturation, preventing the broccoli from tasting bland or watery, and it raises the boiling temperature of the water.
Higher heat accelerates the initial cooking process, allowing the outside to cook quickly while maintaining a perfectly crisp interior texture. The goal is water that tastes distinctly of the sea.
How do I know exactly when the broccoli is perfectly cooked (tender crisp)?
The ideal texture is described as al dente or tender crisp, meaning it yields easily to a fork but still offers slight, satisfying resistance when chewed. The best method is to taste a small floret right at the 2-minute mark; if it feels too tough, give it another 30 seconds before immediately removing it from the heat.
Since the cooking window is so short, tasting is the most reliable measure of perfection.
Can I use frozen broccoli florets instead of fresh in this recipe?
Yes, you can use frozen, but the technique must be slightly adjusted because frozen broccoli has typically been blanched already before freezing. Skip the shocking step, as the freezing process provides a similar effect, and only boil the frozen florets for about 60 to 90 seconds.
This brief cooking time is just long enough to heat them through while preventing the texture from becoming too soft.
I don't have an ice bath setup; how else can I preserve the bright green color?
If you cannot create a proper ice bath, drain the broccoli and immediately transfer it to a colander positioned in the sink. Run the broccoli under a powerful stream of very cold tap water for at least 60 seconds to rapidly bring down its temperature.
While this is less effective than ice water, fast cooling is crucial to stop the cooking and preserve the vibrancy.
What other flavor variations or seasonings work well besides lemon and butter?
For an Asian profile, try tossing the warm florets with toasted sesame oil, a dash of soy sauce, and a sprinkle of black sesame seeds or chili flakes. Alternatively, for a quick Italian finish, toss the drained broccoli with quality extra virgin olive oil, minced garlic, and a generous grating of fresh Parmesan cheese.
The versatility of perfectly boiled broccoli allows for numerous simple, effective finishes.
How long can I store the boiled broccoli, and is it suitable for freezing?
Leftover boiled and fully chilled broccoli should be stored in an airtight container in the refrigerator for up to 3 to 4 days. While technically safe to freeze, freezing and subsequent thawing significantly degrades the crisp texture, leaving the broccoli excessively soft and watery.
If possible, avoid freezing for the best eating experience.
Perfectly Boiled Broccoli Secret
Ingredients:
Instructions:
Nutrition Facts:
| Calories | 96 kcal |
|---|---|
| Protein | 4.0 g |
| Fat | 5.2 g |
| Carbs | 8.4 g |
