Photography Feast: Tips for Capturing Stunning Food Images
- Let’s Get Cooking and Capturing
- The Recipe Rundown
- Key Benefits of Food Photography
- Let’s Get Ready to Click
- Essential Ingredients Guide
- Professional Cooking Method: A Behind-the-Scenes Look
- Pro Tips & Secrets
- Perfect Presentation
- Storage & Make-Ahead
- Creative Variations
- Complete Nutrition Guide
- Bringing It All Together
- Frequently Asked Questions
- 📝 Recipe Card
Let’s Get Cooking and Capturing
Oh my goodness, have you ever sat down to a beautiful home cooked meal and thought, “this is too good not to share!”? i know i have! one time, i whipped up a decadent chocolate cake so pretty, i was practically drooling just looking at it! i grabbed my phone, but all i got were blurry, sad photos.
Can you relate? well, fear not! i’m here to help you unlock the secrets with some awesome photo tips: capture stunning food images .
The Recipe Rundown
Food photography is like a secret art form, and it’s been around since the first cookbook was published. from old-school cookbooks to social media feeds, people love sharing mouthwatering images.
With the rise of instagram and tiktok, everyone’s snapping pictures of their meals. it’s not just about eating anymore; it’s about how we capture those food images !
No need to stress this recipe guides you through simple techniques without making it feel like you’re taking a photography class.
We’re talking about around 15 minutes of time to prep and set up your shot. easy, right? plus, you don’t need fancy gear to get stunning results; even your smartphone can work wonders! it’s all about knowing some tricks of the trade.
And trust me, taking lovely food photos won’t break the bank; it can even be done on a budget!
Key Benefits of Food Photography
So, why should you bother with food photography? well, for starters, it’s an excellent way to share your love for cooking.
Let’s be real showing off your amazing dishes on social media can boost your confidence, too! and it's not just about looks; cooking and photography can improve your focus on health.
Creating vibrant, colorful dishes makes you more aware of the ingredients you’re using.
Plus, if you have a special occasion coming up like a birthday or holiday gathering what better way to remember those moments than by preserving the beauty of your carefully prepared meals? think of it as visual storytelling.
You can showcase seasonal ingredients and highlight how they come together in a beautiful dish. imagine scrolling through your own feed and reliving those tasty memories!
But there’s more! food photos are great for engaging your friends and family or for posting themed dinner parties. you’ll become the talk of the town when folks see your stunning dishes on social media!
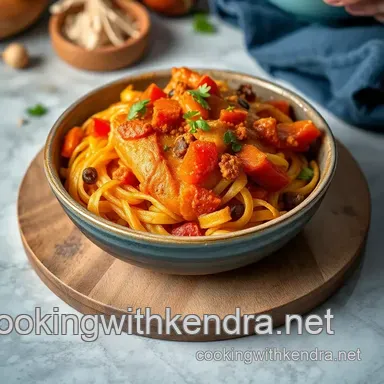
And with a few simple food photography tricks , you can make that plate of spaghetti look like it belongs in a magazine.
Did I mention that with the right techniques, you can enhance those textures and colors? That’s what separates good food photos from jaw-droppingly beautiful ones!
Let’s Get Ready to Click
Alright, let’s set the stage for some culinary magic. You’ll want a few items to bring your setup together:
- A nice plate of food (pick something colorful!)
- Natural Light or LED photography lights to brighten things up
- A simple backdrop (think neutral colors or a classic wooden board)
- A reflector to bounce light back onto your dish and bring out those beautiful details
You just need a decent camera so you can click away! tripods are super handy, especially if you don’t want shaky photos.
And if editing is your thing, tools like snapseed can take your shots to the next level without too much hassle.
Next up, we’ll dive into all those nitty gritty details about preparing your food and capturing that picture perfect shot. Get ready to level up your food photography styling and snap some mouthwatering images!
Essential Ingredients Guide
When it comes to cooking, having the right ingredients can make all the difference. you ever make a dish and think, “something’s missing,” and you realize you forgot that one key element? yeah, we've all been there.
Let’s break down the essentials so you won’t just whip something together your meals will shine!
Premium Core Components
Let’s talk about the premium core components . First, you need accurate measurements. Here’s a quick cheat:
- 1 cup is about 240 milliliters .
- 1 tablespoon ? That’s about 15 milliliters .
Make sure to pick out quality ingredients . Check for freshness fruits should be bright, herbs vibrant, and spices aromatic. You wanna savor flavors, not have your dish taste like a cardboard box!
Storage guidelines are key. most spices last about 1-3 years , while oils can go rancid after about 6 months .
Keep your herbs in the fridge, and store dry goods in airtight containers. as a tip for freshness, whenever you’re at the store, give herbs a gentle squeeze to see if they’re still fragrant.
Signature Seasoning Blend
Now let’s jazz things up with your signature seasoning blend . think of the classic combos salt, pepper, and garlic powder. those three can enhance almost any dish.
You might also wanna play with other spices. a dash of cumin adds a nice warmth, while paprika can bring a lovely smoky flavor.
Herbs are your friends too! basil and tomatoes are a match made in heaven, while rosemary and chicken sing a duet that will make your taste buds dance.
Don’t forget about those regional variations ; a sprinkle of curry powder can transport your dish straight to india!
Smart Substitutions
If you realize you’re out of something, don’t panic! there are plenty of smart substitutions out there. for instance, if a recipe calls for buttermilk, you can mix a cup of plain milk with a tablespoon of vinegar.
Bam! buttermilk on the fly.
For those on special diets, almond milk can replace dairy milk in most dishes. got a craving for sugar but need alternatives? grab honey or maple syrup instead.
Emergency replacements like greek yogurt for sour cream can also save the day.
Kitchen Equipment Essentials
Alright, now onto the must have kitchen equipment essentials . you don’t need a fancy chef’s knife, but having a good knife is crucial.
Pair that with a solid cutting board , and you’re golden.
A sturdy pot and pan are foundational. got a non-stick skillet? great! now, if you can’t find a blender, don’t sweat it.
A food processor or even a good old-fashioned whisk can get the job done.
And remember: storage solutions matter! Use clear containers for easy visibility, and label everything. Nothing’s worse than searching for that elusive spice jar.
Now that you have the lowdown on essential ingredients, seasonings, and equipment, let’s talk about how to make those scrumptious dishes look just as beautiful as they taste!
Photography Feast: Tips for Capturing Stunning Food Images
This links right to our next stop capturing stunning food images! ready to step up your food photography game? stick around because i’ve got just the tips you need to turn that homemade goodness into instagram worthy masterpieces.
Whether you want to showcase seasonal ingredients or play around with colors, you’re in for a treat! think natural lighting, smart composition, and the art of food styling all coming together.
And don’t worry, i'll drop in some photo tips to help you capture textures in food images .
So grab your camera, put on that apron, and let’s get ready to shoot some eye candy. your friends (and followers) won’t know what hit them! stay tuned for the next section where we'll dive into step-by-step instructions for snapping those drool worthy shots.
Professional Cooking Method: A Behind the-Scenes Look
Cooking like a pro isn't just about fancy kitchens or culinary school degrees. trust me; it’s all about preparation and knowing the right steps.
Let's dive into the professional cooking method together in a way that feels like we’re hanging out over some good home cooked food.
Essential Preparation Steps
A key player in the culinary world is mise en place . this snazzy french term just means “everything in its place.
” before you even think about turning on the stove, gather all your ingredients and tools. it saves time and keeps your kitchen from looking like a tornado hit it.
Seriously, who wants to dig through a flour bag searching for the paprika, right?
Next up: time management ! Set a timer for every task. The last thing you want is to burn your signature dish while you're distracted. Cook smarter, not harder!
Now, let’s get organized. keep your workspace clean, and clear any clutter. and yes, please wash those cutting boards as you go, or you'll end up knee deep in a mess.
Safety considerations can’t be overlooked either. always, and i mean always, use cutting boards and keep knives away from the edge of the counter.
Trust me shattered glass and band aids don’t make great ingredients.
Step-by-step Process
Ready for the fun part? Here’s how a professional chef navigates the kitchen:
- Prep Everything : Chop, slice, and measure each item beforehand. It makes a world of difference.
- Temperature Control Points : Get that oven preheated to 375° F before you even think about baking. Nothing worse than waiting around, right?
- Timing Precision : Keep an eye on the clock, especially when frying or boiling. If a recipe says 10 minutes on medium heat, stick with it.
- Visual Cues for Doneness : Use your eyes! That golden brown on your roast? It’s a sign it’s ready.
Expert Techniques
So, what separates the novices from the pro chefs? Expert techniques! One critical step is to sear your meat before braising it. It locks in flavors and makes your dish taste restaurant quality.
Quality checkpoints are a must! Always taste your food before serving. You'll catch spice missteps or maybe an overzealous dash of salt.
And hey, if things go wrong (because they might), don't sweat it! want too salty? add a splash of vinegar to balance it out.
Got a burned edge? try scraping it off; it happens to the best of us!
Success Strategies
Let’s chat about those common cooking mistakes. i’ve burned what i thought was a foolproof dish more times than i can count! a tip? keep the heat low while adding spices, so they bloom but don’t become bitter.
For quality assurance, consider a little prep for the next day. make-ahead options like marinating overnight can elevate a simple meal to the next level.
Capture Your Culinary Arts: Photo Tips
So you’ve cooked up a storm now what? let’s not forget about food photography tips ! your dish deserves to shine on social media.
Utilize natural lighting in food photography for those instagram worthy shots. play with angles. overhead usually works, but a three quarter shot can add depth.
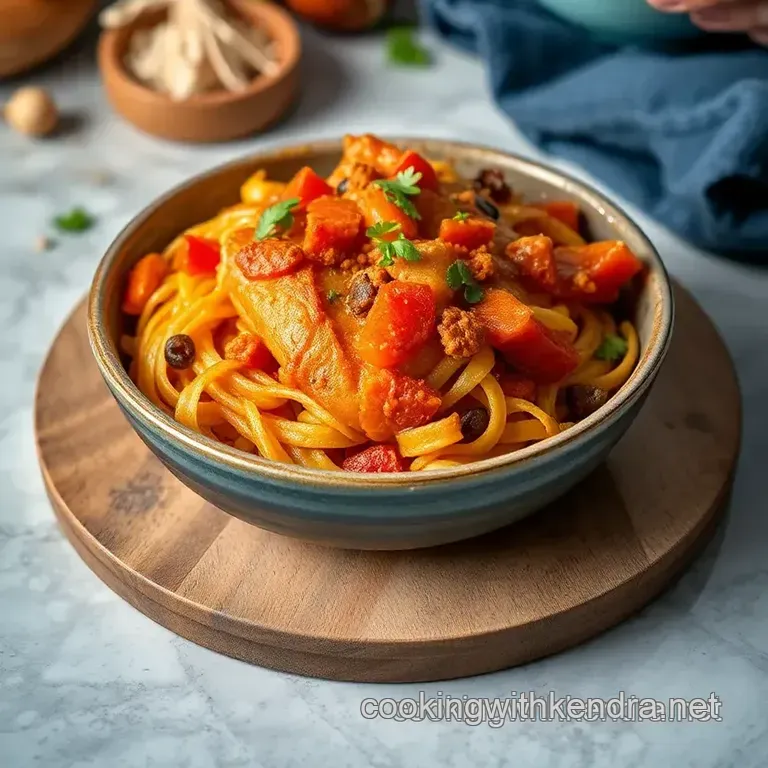
If you want extra flair, use some props or backdrops that don’t steal the limelight. a simple wooden board can do wonders to enhance your dish's visual appeal.
When editing food photos, consider some snapseed food editing tips . brightening the colors can make your vibrant meals pop! and if you need some basics, check out simple food photography tricks and invest in a good smartphone camera .
Trust me; your meals will thank you!
Final Thoughts
With all these tips, you’re on your way to cooking like a pro and presenting your dishes like an artist! whether you're making dinner for yourself or prepping for a gathering, these methods and photo tips will serve you well.
As we wrap up, remember, cooking and photography can truly be a synergy that enhances your love for food. Capture those vibrant food colors and textures to share with the world!
Ready for more? Let’s explore Additional Information to take your culinary and photography skills to new heights!
Pro Tips & Secrets
Cooking is an art, and so is the photography of your culinary masterpieces! here are a few pro tips i’ve picked up over the years to make your food pop in every photograph.
First off, light is your best friend . natural lighting brings out the vibrancy of colors, especially in dishes bursting with ingredients.
If you're shooting indoors, try to snag a spot near a window. trust me, your photos will thank you. i remember the first time i shot my famous spaghetti.
The sunlight streaming through the window illuminated it perfectly i could almost see the flavors oozing off the plate!
Another killer tip is to keep your backgrounds simple . clutter can ruin a great food shot. recently, i used a nice wooden board as a backdrop for a salad i made, and it elevated the whole picture.
It didn’t take long, but it made my instagram post jump out.
Ready to save some time? prep all your materials before cooking ; this includes your backdrop and props. when the food is ready, your setup is already good to go.
If you're anything like me, the last thing you want is to be scrambling for ingredients after you've plated the dish!
Perfect Presentation
Plating is like the cherry on top of your delicious creation. garnish with herbs or colorful veggies to create that visual appeal.
It’s like dressing up for a photoshoot everyone looks better when they’re spiffed up!
Don’t underestimate the power of color combinations . the contrast of a vibrant red salsa on a crisp white plate? chef's kiss! aim for at least three colors in your plate to draw the eye in, creating an inviting feast for the senses.
When you’re at it, remember the rule of thirds for plating. this means dividing your plate into three sections both horizontally and vertically, giving your food the star treatment it deserves.
It’s like arranging your favorite snacks for movie night everything just looks more appetizing when styled right.
Storage & make-ahead
Let’s talk about how to keep your food fresh if you’re not photographing right away. store leftovers in airtight containers to lock in flavor and moisture.
Plus , you can always reheat them in a microwave or oven for that fresh out-of-the-kitchen feel. most foods are good for about 3-4 days in the fridge.
If you want to photograph later, set the cooked dish aside and cover it, but avoid stacking anything it could stick to.
Nothing worse than a beautiful dish ruined by a cling film fiasco!
Creative Variations
Get creative! change the flavors based on what’s in season or what’s in your pantry. have leftover grilled veggies? toss ‘em into your next pasta; it’s like giving your dish a second life.
Not to mention, dietary modifications are key. whether you’re going gluten-free, vegan, or keto, there's always a tweak you can make.
I once made a killer vegan taco you'd never guess it wasn’t packed with meat!
For some fun, why not switch up your regional ingredients? Use local spices or sauces for that eclectic and global vibe. Your food can tell stories that cross borders.
Complete Nutrition Guide
Here’s where you take a closer look at what you’re eating. Pay attention to portion sizes; your Instagram feed might love those colorful ingredients, but your tummy prefers moderation, right?
Think about the nutritional benefits of your dish. Did you toss in extra veggies? Awesome! You just made your meal healthier. Balance is key.
In your culinary photography, vividly capture those textures and vibrant colors. A close-up of a melting piece of chocolate cake, for instance, tells its own delicious story.
Bringing It All Together
So, there you have it! with these tips, you’ll be ready to capture stunning food images that make every dish look as tasty as it actually is.
Whether you’re photographing home cooked meals or fancy, plated dinners, it’s all about that visual storytelling .
Next time you whip up a meal, don’t just chow down. snap a pic! use these little nuggets of wisdom to turn your food shots into envy inducing posts.
And remember, practice makes perfect, so get out there, cook, and shoot! you’ll find your unique style and voice as you go.
Happy cooking and snapping!
Frequently Asked Questions
What are the best lighting conditions for food photography?
The ideal lighting for food photography is natural light, preferably from a window. Aim for soft, diffused light, which helps highlight colors and textures without creating harsh shadows. If shooting indoors, consider using sheer curtains to diffuse strong sunlight.
How can beginners use the photo tips: Capture stunning food images effectively?
Beginners should start with the fundamentals: choose a well lit location, keep the background simple, and play with different angles. Utilize props sparingly to enhance but not distract from the main dish. Practice makes perfect, so take plenty of shots to learn which aspects work best.
What types of equipment do I need for food photography?
You don’t need expensive gear to start; a good smartphone camera can work wonders. However, for better control, a DSLR or mirrorless camera, along with a tripod for stability, can enhance your results. Editing software like Adobe Lightroom or Snapseed can also make a significant difference post shoot.
Can I use artificial lighting for food photography?
Yes, artificial lighting can be used effectively, especially in low-light conditions. Experiment with LED lights and soft boxes to replicate natural light. It’s crucial to avoid harsh, direct lighting which can create unappealing shadows on your food.
How should I edit my food photos?
When editing, focus on enhancing the colors and brightness of your photos to make the dish pop. Crop the images for better composition and remove distractions. However, avoid over editing; the goal is to maintain the natural look and feel of the food.
How should I store leftover food after a photoshoot?
If there are leftovers, ensure they are stored in airtight containers in the refrigerator to maintain freshness. Most dishes can last a few days; however, ingredients like salads may wilt and lose appeal quickly. Always consider the storage method based on the specific dish to avoid spoilage.
Photo Tips Capture Stunning Food Images