Pioneer Woman Chili Recipe
- Time: Active 15 minutes, Passive 1 hour 15 mins, Total 1 hour 30 mins
- Flavor/Texture Hook: Smoky, thick, and velvety
- Perfect for: Stress free weeknight dinners and game day crowds
- Master the Smoky Hearty Pioneer Woman Chili
- The Secret Science of Texas Heat
- Quick Specs and Beefy Benchmarks
- Selecting the Right Pantry Elements
- Essential Tools for One Pot Success
- Stepped Guide to the Perfect Bowl
- Solving Common Chili Texture Issues
- Tasty Twists for Any Crowd
- Maximizing Freshness and Leftover Flavor
- Best Sides for a Family Feast
- Recipe FAQs
- 📝 Recipe Card
Master the Smoky Hearty Pioneer Woman Chili
The first time I tried making a big pot of beef chili, it was an absolute disaster. I remember standing over the stove, staring at what looked like a greasy orange lava lamp. The oil had separated, the meat was grainy, and the spices tasted like raw dust.
It was one of those "maybe we should just order pizza" moments that every home cook knows all too well. I realized then that a great chili isn't just about dumping cans into a pot; it's about how you treat the beef and how you bind the liquid.
We've all been there, trying to find that one meal that everyone in the family will actually eat without complaining. This Pioneer Woman Chili is that "unicorn" recipe for me. It uses a very specific trick with masa harina corn flour that fixes that greasy separation problem I used to have.
It creates this silky, thick consistency that makes the bowl feel heavy and satisfying. If you're looking for a meal that feels like a warm hug after a long day of errands or work, this is the one you'll keep on your permanent rotation.
It's brilliant because it doesn't require any fancy equipment or rare ingredients you can't find at a local grocery store. We're going to use simple, reliable steps to get a result that tastes like it's been bubbling on a ranch stove all day long.
Right then, let's get into the "how" and "why" so your next pot turns out exactly the way you want it. Trust me on this, once you try the masa trick, you'll never go back to watery chili again.
The Secret Science of Texas Heat
Understanding why certain steps matter helps you avoid those kitchen "lava lamp" moments I mentioned earlier. This isn't just about mixing; it's about a few core chemical reactions that happen in your pot.
- Maillard Reaction: Searing the 2 lbs Lean Ground Beef (90/10) at a high heat creates hundreds of different flavor compounds that simply don't exist in raw meat.
- Aromatic Softening: Sautéing the dice of Large Yellow Onion and Green Bell Pepper breaks down cellulose, releasing natural sugars that balance the heavy spices.
- Starch Gelatinization: The 1/4 cup Masa Harina contains starches that, when hydrated, swell and trap fat droplets, creating a permanent emulsion.
- Spice Volatility: "Blooming" the 1/4 cup Chili Powder and 1 tsp Ground Cumin in hot fat before adding liquids helps release fat soluble flavor molecules for a deeper aroma.
| Servings | Ingredient Adjustments | Pan Size | Cook Time |
|---|---|---|---|
| 4 people | 1 lb beef, 15 oz tomato sauce, 1/8 cup masa | 3 quart pot | 1 hours 10 mins |
| 8 people | 2 lbs beef, 30 oz tomato sauce, 1/4 cup masa | 5 quart Dutch oven | 1 hours 30 mins |
| 16 people | 4 lbs beef, 60 oz tomato sauce, 1/2 cup masa | 10 quart stockpot | 1 hours 45 mins |
When you are cooking for a crowd, the liquid takes longer to reach a simmer, so you have to be patient with that initial heat up. If you're scaling up, don't just double the cayenne pepper immediately start with 1.5x and taste. You can always add heat, but you can't take it away! This dish pairs beautifully with a side of cornbread, similar to how I serve my Pioneer Woman Sausage Gravy recipe with warm biscuits for that ultimate comfort feel.
Quick Specs and Beefy Benchmarks
When you're in a rush, you might be tempted to cut corners. It’s helpful to see how the faster method stacks up against the slow simmered classic version.
| Feature | The Fast Method | The Classic Method |
|---|---|---|
| Total Time | 45 minutes | 1 hours 30 mins |
| Texture | Thinner sauce, distinct chunks | Velvety, integrated sauce |
| Beef Flavor | Bold and meaty | Deep, savory, and complex |
Chef's Tip: To get a "shatter" of flavor, toast your 1/4 cup Chili Powder in a dry pan for 30 seconds before adding it to the meat. It wakes up the oils in the spice and prevents that "raw pepper" taste.
Selecting the Right Pantry Elements
Picking your ingredients is where the magic starts. I always go for 90/10 lean ground beef because it gives you plenty of flavor without leaving a half inch of grease floating on top of your bowl.
If you use a fattier blend, you'll definitely want to drain the excess liquid after browning, or the masa won't be able to keep up with the oil.
| Ingredient | Science Role | Pro Secret |
|---|---|---|
| 2 lbs Lean Ground Beef | Primary protein and umami source | Brown in two batches to avoid steaming the meat. |
| 1/4 cup Masa Harina | Emulsifier and thickener | Mix with warm water first to prevent clumping. |
| 1.5 cups Beef Broth | Liquid medium for braising | Use low sodium to control the final seasoning. |
| 30 oz Tomato Sauce | Acidic base for tenderizing | Scrape the pan bottom to incorporate browned bits. |
For the Protein & Aromatics
- 2 lbs Lean Ground Beef (90/10): This is the heart of the dish. Why this? Leaner beef means less grease to drain and a cleaner beef flavor.
- Substitute: Ground Turkey. Adds a lighter flavor but needs an extra splash of oil.
- 1 Large Yellow Onion: Adds essential sweetness. Why this? Yellow onions have a higher sugar content that balances the spices.
- Substitute: White onion for a sharper, more aggressive bite.
- 3 Cloves Garlic, minced: The aromatic backbone.
- Substitute: 1 tsp Garlic powder if you're in a pinch.
- 1 Green Bell Pepper: Provides a fresh, earthy contrast.
- Substitute: Poblano pepper for a subtle, smoky upgrade.
The Signature Spice Blend
- 1/4 cup Chili Powder: The main flavor driver.
- Substitute: Ancho chili powder for a sweeter, fruitier profile.
- 1 tsp Ground Cumin: Adds that classic "taco" earthiness.
- 1 tsp Dried Oregano: Brings a herbal high note.
- 1/2 tsp Cayenne Pepper: For a gentle back of-the throat heat.
- Substitute: Red pepper flakes for a different kind of spice.
- 1/2 tsp Sea Salt: To wake up all the other flavors.
The Braising Base & Beans
- 30 oz Tomato Sauce: Use two 15 oz cans. Why this? Sauce provides a smoother texture than diced tomatoes.
- Substitute: Crushed tomatoes for a slightly more rustic, chunky feel.
- 15 oz Kidney Beans: Rinsed and drained.
- Substitute: Pinto beans or black beans work just as well.
- 1.5 cups Beef Broth: Low sodium is best.
- 1/4 cup Masa Harina: The secret thickening weapon.
- Substitute: Finely crushed corn chips (like Fritos) for a similar corn flavor.
- 1/2 cup Warm Water: For the masa slurry.
Essential Tools for One Pot Success
You don't need a kitchen full of gadgets for this. I'm a big believer in the "less is more" philosophy when it comes to weeknight cooking. A heavy bottomed pot, like a cast iron Dutch oven, is your best friend here because it holds heat evenly.
This prevents the bottom from scorching while the rest of the pot is barely simmering.
- 5 Quart Dutch Oven or Stockpot: Heavy bottoms prevent "hot spots" that burn the sauce.
- Wooden Spoon or Sturdy Spatula: Crucial for scraping the "fond" (the brown bits) off the bottom.
- Colander: For rinsing those 15 oz Kidney Beans to remove the metallic canning liquid.
- Small Mixing Bowl: To whisk the 1/4 cup Masa Harina and 1/2 cup Warm Water into a smooth slurry.
Stepped Guide to the Perfect Bowl
1. The Lean Sear
Place your large pot over medium high heat. Add the 2 lbs Lean Ground Beef and cook until the meat is browned and no longer pink, about 8 minutes. Use your spoon to break it into small, uniform crumbles.
If there's an excess of liquid fat, spoon most of it out, but leave about a tablespoon for the veggies.
2. Sauté and Bloom
Add the diced Large Yellow Onion, diced Green Bell Pepper, and minced 3 Cloves Garlic. Sauté for 5 minutes until the onions are translucent and fragrant. Toss in the 1/4 cup Chili Powder, 1 tsp Ground Cumin, 1 tsp Dried Oregano, 1/2 tsp Cayenne Pepper, and 1/2 tsp Sea Salt.
Stir constantly for 1 minute to toast the spices without burning them. Note: This "blooming" step is what separates good chili from a flat tasting one.
3. The Long Simmer
Pour in the 30 oz Tomato Sauce, 15 oz Kidney Beans, and 1.5 cups Beef Broth. Stir well, scraping the bottom of the pot to lift any browned bits. Bring the mixture to a gentle boil, then reduce the heat to low. Cover and simmer for 1 hour until the flavors have fully melded.
4. The Masa Magic
In a small bowl, whisk the 1/4 cup Masa Harina into 1/2 cup Warm Water until smooth. Pour this slurry into the pot and stir. Simmer for an additional 10 to 15 minutes uncovered until the sauce is thick and velvety.
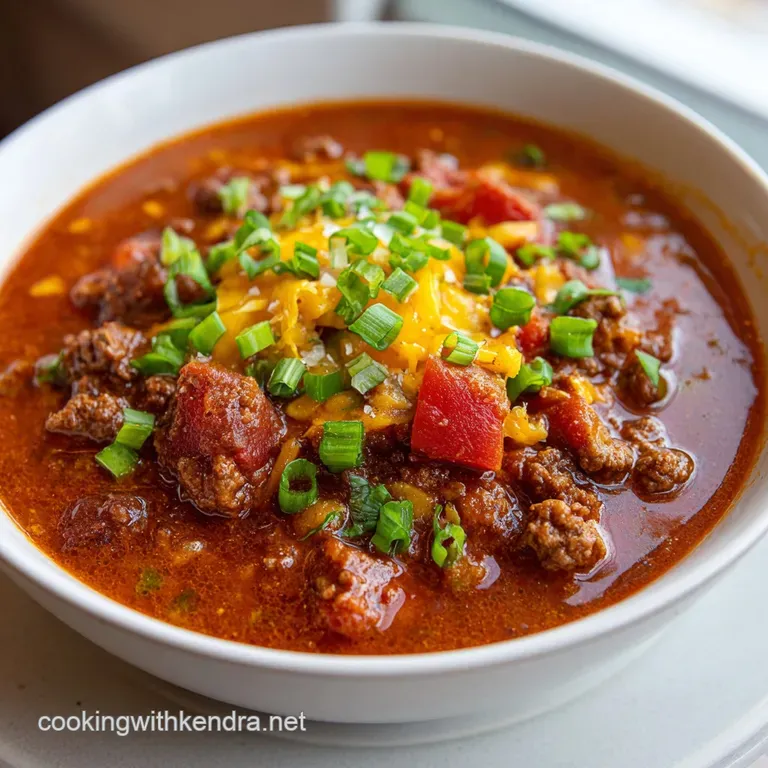
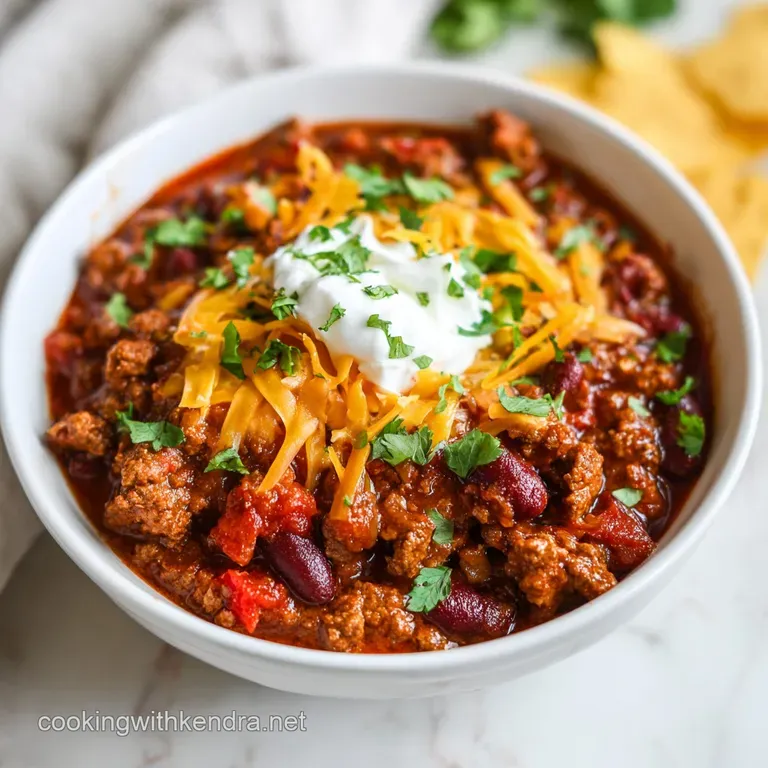
5. The Cowboy Finish
Taste the chili and adjust the salt or cayenne if needed. Ladle into deep bowls while steaming hot. Top with a mountain of shredded cheddar cheese, a dollop of sour cream, and maybe some sliced jalapeños if you're feeling brave.
Solving Common Chili Texture Issues
Sometimes things don't go exactly to plan. Maybe the stove was too hot, or the beans were a bit stubborn. Don't panic; most chili problems are easily fixed with a little kitchen chemistry.
Why is my chili too thin?
If your chili looks more like soup, it usually means the liquid didn't reduce enough or the masa hasn't had time to work its magic. Make sure you're simmering uncovered for those last 15 minutes. The evaporation is just as important as the thickener.
| Problem | Root Cause | Solution |
|---|---|---|
| Greasy surface | Meat wasn't drained enough | Blot surface with a paper towel or stir in extra masa. |
| Bitter aftertaste | Spices were scorched | Add a teaspoon of brown sugar to balance the bitterness. |
| Tough beans | Acid (tomatoes) added too early | Simmer longer or add a pinch of baking soda to soften. |
One mistake I once made was adding the masa harina directly to the pot without making a slurry first. I ended up with little white "dumplings" of raw flour floating in my sauce. It was embarrassing, but it taught me that hydration is key. If you are making this for a big game day party, you might want to try The Southern Hot recipe for a beanless topping version that works great on franks.
Common Mistakes Checklist:
- ✓ Brown the beef in batches if your pot is small to ensure a good sear rather than steaming.
- ✓ Always rinse your beans to avoid that starchy, metallic "can" flavor in your sauce.
- ✓ Don't skip the "blooming" of spices; it's the only way to get that deep, smoky aroma.
- ✓ Make sure the water for your masa slurry is warm, not cold, to prevent lumps.
- ✓ Let the chili rest for 5 minutes before serving so the sauce can fully set.
Tasty Twists for Any Crowd
If you're looking for something a bit different, you can easily adapt this base. Chili is one of the most forgiving dishes in the world, which is why I love it.
- If you want a lighter meal, use the Pioneer Woman Turkey Chili variation by swapping ground beef for ground turkey and using chicken broth.
- If you want more texture, add a can of sweet corn or diced zucchini during the last 20 minutes of simmering.
- If you want a "Cowboy" kick, add a tablespoon of instant espresso powder along with the spices to deepen the color and savory notes.
Pioneer Woman Chili Slow Cooker Method
For those days when you're out of the house, you can still get this done. Brown the beef and sauté the aromatics in a skillet first this is non negotiable for flavor! Then, dump everything except the masa slurry into your slow cooker. Cook on LOW for 6 to 8 hours.
Stir in the masa slurry 30 minutes before serving and crank it to HIGH to thicken it up.
Maximizing Freshness and Leftover Flavor
Chili is famous for being better the next day. As it sits, the proteins in the meat continue to break down, and the spices fully permeate every bean.
- Storage: Keep it in an airtight container in the fridge for up to 4 days. It will thicken up significantly as it cools, so you might need a splash of broth when reheating.
- Freezing: This recipe freezes like a dream. Put it in heavy duty freezer bags (lay them flat to save space) for up to 3 months.
- Reheating: Thaw overnight in the fridge. Reheat on the stovetop over medium heat, stirring frequently to prevent the bottom from sticking.
- Zero Waste: If you have a small amount of leftover chili, don't toss it! Use it as a topping for baked potatoes, or fold it into an omelet the next morning for a hearty breakfast. You can even use the leftover meat to create a simplified version of an Instant Pot Chili recipe if you need to stretch a meal.
Best Sides for a Family Feast
While a bowl of this chili is a meal on its own, the right side dishes turn it into a full blown event. Since we're keeping things simple and practical, I usually go for items that I can prep while the chili is doing its long simmer.
A pan of buttery cornbread is the classic choice, but don't overlook a simple side of white rice. The rice acts as a sponge for that velvety sauce, making every bite incredibly filling.
If you're looking for a fresher contrast, a crisp green salad with a lime vinaigrette can cut through the richness of the beef and spices. Honestly, don't even bother with low-fat cheese for the topping; go for the sharpest cheddar you can find to really make the flavors pop.
It's these little touches that make a weeknight dinner feel special without adding a ton of extra work to your schedule. Enjoy your cooking, and don't be afraid to make this recipe your own!

Recipe FAQs
What is the "secret" ingredient that makes this chili velvety?
Masa Harina. This finely ground corn flour acts as an essential starch and emulsifier, trapping fat and creating a smooth, non-greasy texture during the final simmer.
Do I need to brown the ground beef in batches?
Yes, browning in batches is highly recommended. Overcrowding the pan causes the meat to steam instead of sear, leading to a less flavorful, gray result.
How to properly incorporate the Masa Harina to avoid clumps?
Whisk the Masa Harina with warm water first to create a thin slurry. Add this mixture during the last 15 minutes of cooking; adding dry flour directly results in pockets of raw starch.
Can I use canned chili seasoning instead of individual spices?
No, use the whole spices for best flavor. Pre-mixed seasonings often lack the fresh potency needed to bloom correctly with the hot fat, resulting in a flat taste.
Is it true that chili is better the next day?
Yes, chili always improves overnight. The flavors continue to meld and deepen as the spices fully hydrate and permeate the meat and beans, making it perfect for meal prepping.
How can I make this recipe suitable for a slow cooker?
Brown the meat and sauté aromatics first, then transfer to the cooker. Add the masa slurry only in the last 30 minutes on high heat to ensure the sauce thickens properly.
If I use ground turkey instead of beef, do I need to change anything else?
Yes, add extra fat for flavor depth. Turkey is leaner than 90/10 beef, so sauté the aromatics in a tablespoon of oil or butter to mimic the rich flavor base you lose.
Pioneer Woman Chili

Ingredients:
Instructions:
Nutrition Facts:
| Calories | 285 kcal |
|---|---|
| Protein | 28.6 g |
| Fat | 8.2 g |
| Carbs | 23.4 g |
| Fiber | 6.8 g |
| Sugar | 6.2 g |
| Sodium | 542 mg |
