Red Velvet Cake Pops: Cream Cheese Recipe
- The Ultimate Guide to Homemade Red Velvet Cake Pops
- The Chemistry of Color and Cocoa: Why This Recipe Works
- Essential Ingredients and Smart Substitutions
- Step-by-Step Guide to Perfect Cake Pop Construction
- Expert Tips, Troubleshooting, and Common Cake Pop Mistakes
- Storage, Freezing, and Advance Preparation
- Creative Serving Ideas and Presentation
- Recipe FAQs
- 📝 Recipe Card
The Ultimate Guide to Homemade Red Velvet Cake Pops
When that unmistakable aroma of tangy buttermilk and deep cocoa starts filling your kitchen, you know you’ve hit red velvet gold. We are tackling the classic party treat that everyone tries (and often messes up): Red Velvet Cake Pops .
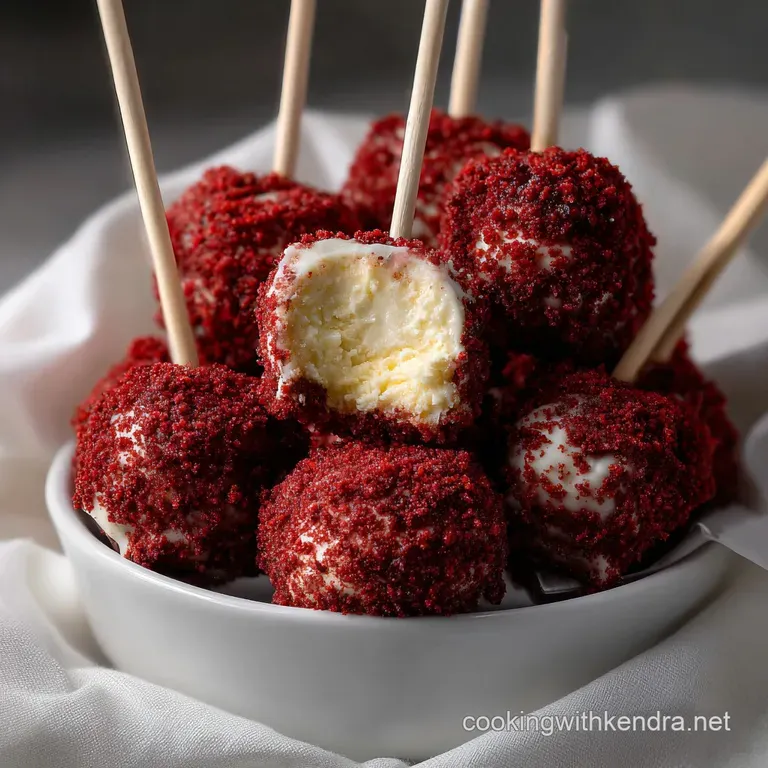
Forget those dry, cracked supermarket versions; we’re making smooth, perfectly dipped bites that shatter beautifully when you take a bite.
Yes, I know, they look intimidating. But trust me, learning how to make Red Velvet Cake Pops is easier than you think, provided you stick to three crucial rules: temperature, consistency, and patience.
I’ve battled cracked coatings, crumbling centers, and sticks falling out mid-dip, so I’ve simplified the entire process just for you. This Red Velvet Cake Pops recipe uses specific food science tricks to guarantee a perfect presentation every single time.
The Chemistry of Color and Cocoa: Why This Recipe Works
What Defines the Red Velvet Flavor Profile?
Red velvet isn't just chocolate dyed red; it's a specific chemical reaction. The classic profile demands a low amount of cocoa powder paired with buttermilk and vinegar. The acidity of the buttermilk and vinegar reacts with the baking soda, resulting in two things: a tender crumb and a deepening of the reddish hue in the cocoa powder (anthocyanins).
When we turn that cake into Velvet Cake Pops , we use an authentic cream cheese frosting binder, which adds the necessary tanginess to balance the sweetness of the candy coating.
Why Cake Pops Are the Perfect Portable Dessert
The secret to amazing Red Velvet Cake Pops isn't the cake itself it's the ratio of cake to frosting binder. When you break the cake down and mix in the rich cream cheese frosting, you are essentially creating a thick, cohesive dough.
This dense, fudgy center doesn't require a knife or fork, making it the ideal grab and go sweet. Because the cake is fully crumbled, it eliminates dry edges, guaranteeing a moist, decadent bite every time.
Achieving the Optimal Cake Dough Consistency
Think "Play Doh," not "pancake batter." If your mixture is too sticky, the final pops will look greasy and won't hold their shape when chilling. If it's too dry, the pops will crumble when you insert the stick or fall apart in the dipping chocolate.
We stop mixing the dough the second it holds its shape when gently squeezed.
Essential Ingredients and Smart Substitutions
Whether you’re aiming for authentic Red Velvet Cake Pops From Scratch or optimizing speed with a boxed mix, the quality of your binder is non-negotiable.
Choosing the Right Cake Base (Box vs. Scratch)
Starting from scratch gives you better flavor control, especially balancing the cocoa and acid. However, a box mix is totally fine for Red Velvet Cake Pops with cake mix !
Just make sure to reduce the liquid called for in the box instructions by about 1/4 cup to keep the resulting cake slightly denser, which helps with crumbling.
The Importance of Authentic Cream Cheese Frosting Binder
The binder is the glue. We use a simple blend of cream cheese, butter, and powdered sugar. This creates a dense, velvety texture, much like what you'd find in a good Chocolate Fondue Recipe: The Ultimate Velvet Smooth Classic . If you use plain store-bought icing, ensure it's cream cheese flavor, but note that it tends to be softer, so you might need less of it.
Ingredient Swaps for Cake Pop Success
| Ingredient | Substitute (Same Volume) | Notes on Substitution |
|---|---|---|
| Buttermilk | Whole Milk + 1/2 tsp White Vinegar | Allow to sit for 5 minutes before adding; replicates the necessary acid. |
| All-Purpose Flour | 1:1 gluten-free Baking Blend | Ensures the cake crumbs remain cohesive and prevents a gummy texture. |
| Cream Cheese/Butter | high-quality Vegan Cream Cheese Block & Vegan Butter | Necessary for a truly dairy-free binder; avoid whipped/softened tubs. |
| Candy Melts | Tempered White Chocolate + 1 tsp Coconut Oil | Requires precise tempering; candy melts are easier for beginner cake pops . |
step-by-step Guide to Perfect Cake Pop Construction

1. The Fine Crumble
Bake and cool your red velvet cake completely. This is critical warm cake equals mushy dough. Break the cake into chunks and pulse them in a food processor until you have very fine, uniform crumbs. This should smell richly of cocoa and vanilla.
2. Crafting the Dough
In a large bowl, mix the finely pulsed cake crumbs and your prepared cream cheese binder. Start slow. Use your hands; you need to feel the consistency. You are looking for a cohesive dough that easily rolls into a ball without sticking excessively to your palm.
This is how we ensure perfect Red Velvet Cake Pops With Cream Cheese Frosting .
3. Roll and Chill (The First Rest)
Use a small cookie scoop (about 1.5 Tbsp) to ensure uniform sizes this makes dipping easier later. Roll each portion into a tight, smooth ball. Place them snugly on a parchment lined baking sheet. Chill them for a minimum of 30 minutes. They must be firm.
4. Stick Security is Non-Negotiable
Melt a small amount of your candy coating. Dip the tip of your cake pop stick about half an inch into the melted coating. Immediately insert that sticky end into the center of a chilled Red Velvet Cake Pops ball, pressing about halfway in.
Return these assembled pops to the fridge for another solid hour. That little bit of cooled coating acts like rebar, locking the stick in place.
5. Thinning and Melting the Coating
Melt the rest of your white candy coating slowly, either in 30 second bursts in the microwave or over a double boiler. Add a tiny bit of shortening or coconut oil. Why? The Science: Thinning the coating reduces its viscosity and weight.
A thick coating cracks the cold cake ball and is more likely to slide off the stick. The coating should flow easily, like warm honey.
6. The Perfect Dip
Working quickly, take a pop from the fridge. Fully immerse the cake ball into the coating until the stick is covered. Pull it straight out. Hold the pop vertically and gently tap your wrist not the stick against the edge of the bowl. This allows the excess coating to shatter off evenly.
7. Setting and Decorating
While the coating is still wet, add any festive sprinkles or contrasting red sugar. Place the finished Red Velvet Cake Pops upright in a Styrofoam block or specialized stand. Let them set completely at room temperature (about 15- 20 minutes). Done!
Expert Tips, Troubleshooting, and Common Cake Pop Mistakes
Making Dessert Recipes Cake Pops involves temperature management. When things go wrong, it's usually due to a thermal shock or a consistency issue.
Troubleshooting Your Red Velvet Cake Pops
| Mistake | Cause | Solution |
|---|---|---|
| Pops Cracking Post Dip | Cake ball was too cold; thermal shock when meeting warm coating. | Let the chilled balls sit at room temp for 5- 10 minutes before dipping. Ensure coating is warm, not hot. |
| Pop Falling Off Stick | Stick wasn't glued correctly, or ball wasn't chilled enough. | Re-chill the entire pop (step 4) for a full hour before dipping. Dip immediately after removing from fridge. |
| Coating is Lumpy/Thick | Coating overheated, or water got in. | If overheated, add a teaspoon of shortening/coconut oil and stir vigorously. If water got in, it is ruined; start a new batch. |
| Drips on the Finished Pop | Coating was too thick, or insufficient tapping. | Thin the coating slightly more. Tap your wrist against the bowl, allowing gravity to pull the excess off cleanly. |
Storage, Freezing, and Advance Preparation
These Red Velvet Cake Pops are fantastic make-ahead treats, which is great because they actually improve slightly overnight as the flavors meld. If you are looking for other fast, no-bake solutions, you might also love my simple Oreo Balls: Easy 3 Ingredient No-Bake Truffles .
How Long Do Cake Pops Last?
Because this Red Velvet Cake Pops recipe uses a cream cheese binder, storage is important.
- Room Temperature: If stored in an airtight container away from direct sunlight, they will last about 2 3 days, though the coating is best on day one.
- Refrigerator: Store them in an airtight container for up to 7 10 days. The cold helps maintain the structure and freshness of the cream cheese binder.
Best Way to Freeze Finished Treats
Yes, you can freeze them! Place the finished Red Velvet Cake Pops on a baking sheet (uncovered) for 30 minutes until flash frozen. Then, transfer them into a large Ziploc bag or airtight container, separated by parchment paper. They will last up to 3 months.
Thawing and Refreshing Frozen Items
To avoid condensation and cracking, thaw them slowly. Move the frozen container directly into the refrigerator overnight. Once they are fully thawed, you can move them to room temperature 30 minutes before serving.
Creative Serving Ideas and Presentation
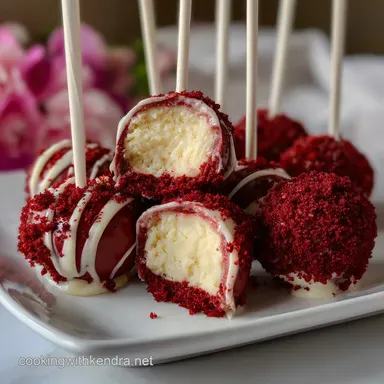
For a beautiful presentation, try placing the Red Velvet Cake Pops upright in a vase filled with clear glass beads or red and white shredded paper. They make a striking centerpiece.
These Easy Red Velvet Cake Pops are perfect for Valentine's Day, Christmas, or any celebration where a pop of color is needed. Nothing beats the smooth, rich interior and the satisfyingly crisp shell of the perfect Red Velvet Cake Pop .
They are always the first thing to disappear from the dessert table!

Recipe FAQs
Why is red velvet supposed to have a slight tangy flavor?
The authentic red velvet tang comes primarily from the chemical reaction between buttermilk, vinegar, and baking soda (or baking powder) within the cake base. This slight acidity is essential, as it balances the intense sweetness of the cocoa and the richness of the cream cheese frosting binder.
If your pops lack this signature tang, ensure your cake recipe incorporates these acidic elements.
My cake pop mixture is either too sticky or too crumbly what should I do?
If the mixture is too sticky, you may have added too much frosting; try adding a small amount of extra crumbled cake to absorb the excess moisture. If the mixture is too dry and crumbly, slowly incorporate an extra half teaspoon of frosting binder until the mixture holds its shape firmly when pressed.
The ideal consistency should resemble moldable cookie dough.
What is the best way to melt the white confectionery coating without burning it?
Use a double boiler or melt the coating in the microwave set to 50% power, working in short 30-second intervals and stirring thoroughly between each session. Avoid overheating the coating, as it will scorch quickly, leading to a thick, lumpy, and unworkable consistency.
If the coating is too thick for easy dipping, thin it slightly with a teaspoon of shortening or coconut oil.
Can I use standard buttercream frosting instead of cream cheese frosting to bind the pops?
While buttercream will successfully bind the cake crumbs, using it will significantly change the iconic flavor profile of the dessert. Cream cheese frosting provides the specific tanginess characteristic of authentic red velvet cake pops.
If substituting, ensure you use a very stiff buttercream recipe to maintain the necessary structure and prevent the finished balls from collapsing.
How long do Red Velvet Cake Pops last, and how should I store them?
Due to the cream cheese binder, these cake pops must be stored in an airtight container in the refrigerator. They generally maintain peak freshness and flavor for 5 to 7 days when properly chilled.
If you need longer storage, they can be frozen for up to one month; thaw them overnight in the refrigerator before serving.
How can I achieve a smooth, crack free coating on my cake pops?
Cracking often occurs if the cake balls are too cold or if the melted confectionery coating is too hot. Ensure the cake balls are only well chilled, not frozen solid; let them sit out for about 10 minutes before dipping.
Dip quickly and allow the excess coating to drip off completely before inserting the stick and letting the pop set.
Are these Red Velvet Cake Pops suitable for individuals avoiding gluten?
Traditional Red Velvet Cake Pops are typically not gluten-free as they rely on standard wheat flour for the cake base component. However, the recipe can be adapted easily by substituting a reliable certified gluten-free flour blend when preparing the cake.
Always verify that the confectionery coating and other binders are also confirmed gluten-free.
Red Velvet Cake Pops Recipe
Ingredients:
Instructions:
Nutrition Facts:
| Calories | 165 kcal |
|---|---|
| Protein | 2 g |
| Fat | 9 g |
| Carbs | 19 g |
| Fiber | N/A |
