Mug Cake: Rich Speedy Fudge Chocolate Fix
- The Ultimate 5 Minute Dessert: Rich Chocolate Fudge Mug Cake
- Pantry Staples for Perfection: Ingredients & Smart Swaps
- Mastering the Microwave: The Science Behind the Fudgy Texture
- From Bowl to Bliss: The Quickest Way to Bake
- Troubleshooting Your Single-Serving Cake: Chef’s Secrets
- Freshness and Beyond: Storing Leftovers (If Any!)
- Elevate the Experience: Presentation and Toppings
- Recipe FAQs
- 📝 Recipe Card
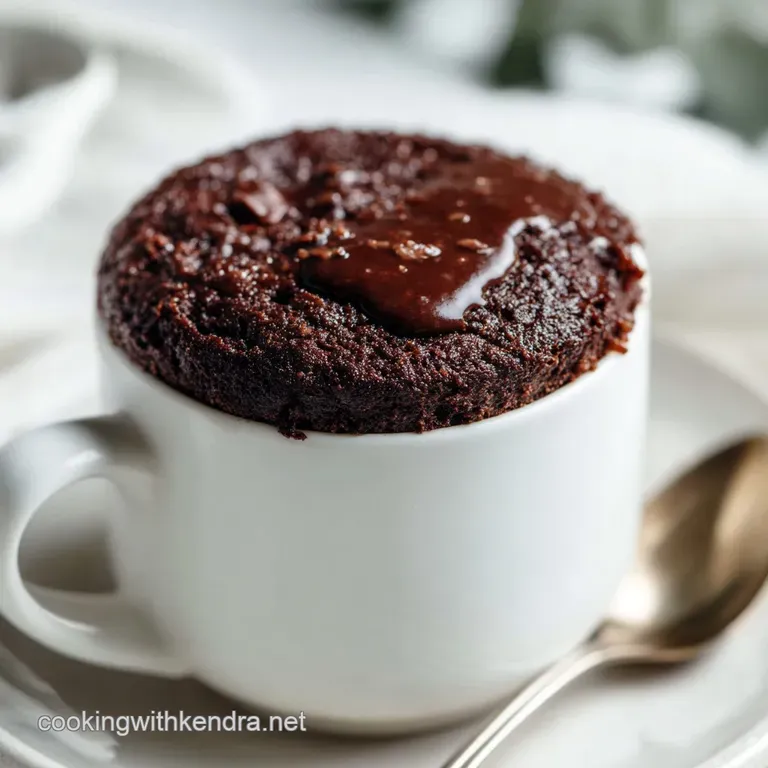
The Ultimate 5 Minute Dessert: Rich Chocolate Fudge Mug Cake
You know that moment? The one where your brain demands deep, dark chocolate, and it needs it right now, preferably without generating a mountain of dishes. The aroma of rich cocoa filling the kitchen after just one minute of cooking is honestly witchcraft.
This perfect single serving Mug Cake recipe is the only one you'll ever need.
Forget pulling out ten bowls and preheating the oven; that’s a whole production I simply do not have time for most nights. This genius little dessert is the emergency fix, the cheap thrill, and the glorious, gooey answer to life's immediate chocolate needs. It uses standard pantry staples, costs pennies, and prevents you from eating an entire Chocolate Strawberry Cake: Ultimate Layered Showstopper Recipe all by yourself.
Over the years, I've battled the rubbery texture, the dry edges, and the explosive overflow mess that plagues so many internet recipes. We are skipping all those common pitfalls today. I finally cracked the code to the perfect moist, fudgy, one-minute Mug Cake .
Let’s crack on!
The History of Microwave Baking: Instant Gratification
Microwave baking has certainly had a rough reputation, mainly because we all tried it with terrible results back in the 90s. The idea of baking a cake in a mug originated from the desire for small, controlled portions and immediate gratification.
It’s a testament to rapid microwave technology, but it requires specific chemistry to avoid that characteristic spongey, dry texture. Our recipe respects the science involved.
Why This Recipe Outperforms All Others
The secret sauce here is balance, my friend. Most quick recipes load up on flour, which immediately leads to that awful spongy dry texture we associate with bad microwave desserts.
Our ratio of cocoa to flour, plus the crucial addition of oil instead of melted butter, keeps the crumb incredibly tender and dense, leaning towards a molten lava cake vibe rather than a typical sponge. This is a true chocolate Mug Cake experience.
Essential Equipment Check: Choosing the Right Mug
This seems simple, but it’s critical. You absolutely need a large, heavy bottomed coffee mug, 12 ounces minimum. My first few attempts ended with batter exploding all over the microwave interior because I used a tiny, cute tea cup don't be me, always use a big boy mug.
Bigger is always better when making a quality Mug Cake because the mixture rises dramatically before it sets, and overflow is a messy tragedy.
Pantry Staples for Perfection: Ingredients & Smart Swaps
Accuracy matters here because we are working with such small measurements. Think of this as tiny, high stakes chemistry. When making a reliable, quick dessert, knowing your swaps is just as important as knowing your original ingredients.
Dry Essentials: Flour, Sugar, and the Baking Powder Boost
Use all-purpose flour, making sure to spoon it lightly into the measuring cup and level it off; scooping directly compacts it, which ultimately makes your finished cake dense and heavy. The baking powder is the engine for the swift rise we need in the microwave.
Ensure your baking powder isn't ancient, or your Mug Cake will be disappointingly flat.
Wet Components: Milk, Oil, and the Egg Conundrum
We are happily skipping the egg completely in this quick Mug Cake recipe, which is key to preventing that dry, spongy texture that eggs often introduce in microwave baking. The milk provides moisture and tenderness, helping everything fuse together deliciously.
We use a neutral oil, like canola or sunflower, because its liquid state means it tenderizes the cake crumb better than melted butter ever could.
Intensifying the Flavor: Choosing Your Chocolate Depth
Don't skimp on the cocoa powder! It’s the main star here, so use the best quality unsweetened cocoa powder you can afford for that deep, rich colour and flavour profile. If you want true fudgy bliss in your quick dessert, throw in a spoonful of high-quality dark chocolate chips they melt down and create gorgeous molten pockets inside the Chocolate Mug Cake .
dairy-free and gluten-free Alterations
I get it; dietary needs shouldn't stop you from immediate dessert gratification. Here are the simple swaps that still result in a phenomenal Mug Cake :
| Ingredient | Substitute | Chef’s Note |
|---|---|---|
| All-Purpose Flour | 1:1 gluten-free Blend | Add 1 tsp extra milk, GF flour absorbs more liquid. |
| Whole Milk | Almond, Soy, or Oat Milk | Ensure it's unsweetened plain milk. |
| Neutral Oil | Melted Unsalted Butter | Melt and cool slightly; cake may be slightly less tender. |
| Granulated Sugar | Coconut Sugar | Results in a slightly more rustic, less moist crumb. |
Mastering the Microwave: The Science Behind the Fudgy Texture
The Role of Cocoa Powder and Fat Ratios
Cocoa powder naturally absorbs moisture more aggressively than standard flour, which is precisely why poorly formulated Mug Cake recipes are always dry and sad. To compensate, this recipe uses a slightly higher fat ratio via the oil and a small, precise amount of leavening.
This delicate balance ensures the steam created in the microwave lifts the cake rapidly and efficiently before it has a chance to fully dry out.
Controlling Moisture: Preventing a Dry Sponge
The key to a successful, incredibly moist Mug Cake is the careful balance of liquid and dry ingredients. If you decide to swap out whole milk for skim or accidentally use less oil, you risk a dry result and a sad dessert experience.
If you live somewhere incredibly dry, you might even need half a teaspoon of extra milk; trust your gut and the batter's consistency before you zap it.
Understanding Power Levels and Zapping Time
Microwaves are wildly inconsistent beasts, which is why nailing the timing is the trickiest part of making a single serving Mug Cake . I always advise starting with 60 seconds on high power (1000W).
If your microwave is low wattage (around 700W), you’ll definitely need 80 to 90 seconds to achieve doneness. Always err on the side of caution and undercook slightly. A slightly soft Mug Cake is infinitely better than one that has been nuked into submission.
From Bowl to Bliss: The Quickest Way to Bake
Phase 1: Combining the Dry Ingredients Directly in the Mug
Take your clean, slightly greased mug and add the flour, sugar, cocoa, baking powder, and salt right in there. Use a small fork or a mini whisk and mix vigorously for about 30 seconds straight. This step is completely non-negotiable!
You are thoroughly aerating the dry mix and ensuring that the baking powder is ready to activate and lift this delicious Mug Cake when the heat hits.
Phase 2: Whisking in the Wet Mixture for a Smooth Batter
Pour in the milk, oil, and vanilla extract. Now, listen closely: gently stir until just combined we are talking 15 to 20 gentle strokes, maximum. If you mix too hard or too long, you activate the gluten in the flour, and you'll end up with a tough, chewy Mug Cake texture that no one wants.
Stop mixing as soon as the last remnants of dry flour streaks disappear.
Phase 3: The Microwave Cook Time Calculation
Center the mug in the microwave; this ensures the most even cooking possible. Cook for your calculated time, usually somewhere between 60 and 75 seconds. Watch it rise in amazement! When the cake’s top looks mostly set but the centre still looks slightly moist or glossy, that's your definitive cue to stop.
Remove it carefully and let it rest for two minutes. This brief resting period is critical for setting the structure of your quick dessert.
Troubleshooting Your Single Serving Cake: Chef’s Secrets
Avoiding the Rubbery Texture Trap
This is the number one complaint I hear about Microwave Mug Cakes . The solution is usually one of two simple things: You overmixed the batter, or you aggressively overcooked it.
Use oil instead of butter, mix minimally, and always remove the mug when the centre still looks just a little bit glossy and not completely dry on top.
Chef's Note: If your Mug Cake always turns out dry, reduce your cook time by exactly 10 seconds next time. The cake will set up fully during the resting period.
The Ultimate Mix-In Strategy (Beyond Chocolate Chips)
I love adding a touch of something extra to customize my Mug Cake beyond simple chocolate chips. Try dropping a teaspoon of smooth peanut butter, a dollop of caramel sauce, or a spoonful of good jam into the very centre right before zapping for an extra gooey surprise.
Frozen raspberries are also fantastic and add a lovely tartness that cuts beautifully through the richness of the chocolate.
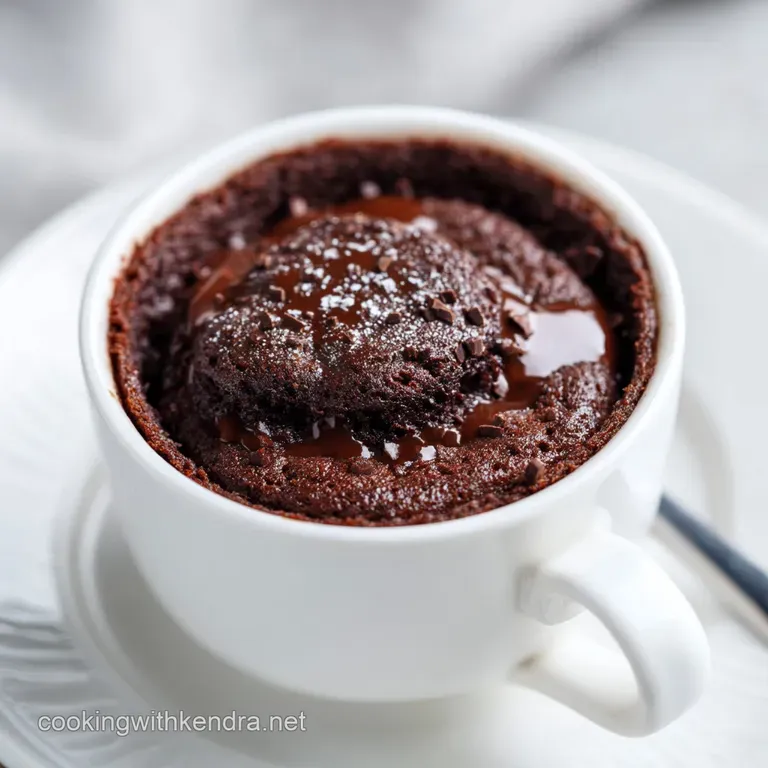
Achieving a Molten Center Every Time
The trick here is strategic placement. If you are using chocolate chips, stir most into the batter for texture, but save 3 or 4 chips and press them lightly right into the top-centre of the batter before cooking.
Because this exact area cooks last in the microwave, these particular chips will melt into a perfect, oozing, molten pocket. This makes the ultimate rich Chocolate Mug Cake .
Freshness and Beyond: Storing Leftovers (If Any!)
Safe Cooling and Short Term Storage
Let’s be honest: this single serving Mug Cake is designed and portioned to be eaten immediately upon resting. But if you must store it (maybe you made two and the dog stole your appetite?), allow it to cool completely.
Then, transfer it gently from the mug to a small, airtight container and place it in the fridge. It will stay fresh for about 2 days, though the texture will be slightly denser upon reheating.
Freezing the Batter for Future Cravings
Here’s a fantastic hack for the truly organized craving haver! You can absolutely make the batter ahead of time for your future self. Mix the dry and wet ingredients separately, then combine them in the mug. Cover the mug tightly with plastic wrap and freeze it.
When the sudden 9 PM craving hits, just remove the plastic wrap and zap the Mug Cake straight from the freezer. You’ll need an extra 30 45 seconds of cook time for the frozen batter, but it totally works and is so satisfying.
Elevate the Experience: Presentation and Toppings
Recommended Ice Cream and Sauce Pairings
While a basic, fudgy Mug Cake is amazing alone, the right topping elevates it and makes it feel like a real dessert production, not just a quick fix. I love a simple scoop of quality vanilla bean ice cream, obviously. But if you want something a little brighter to cut the richness, try drizzling on some tart Blueberry Compote: Easy Recipe for Cheesecake Pancakes . The combination of the hot cake and the cool, tart berries is a phenomenal pairing.
My Worst Mistake: The Frosting Disaster
Once, I tried to make a huge batch of Microwave Mug Cakes for a party and piped buttercream on top immediately after they came out of the microwave. The buttercream melted instantly, turning into a greasy, sweet puddle that slid right down the side of the mug.
Crucial Tip: Always let your cake cool for at least five full minutes before adding any temperature sensitive topping, like frosting, heavy cream, or whipped cream.
The Single Serve Takeaway
Whether you’re in a dorm, a tiny apartment, or just committed to realistic portion control, this rich chocolate Mug Cake is your secret weapon against complicated desserts. It delivers maximum flavour with literally zero fuss and minimal washing up.
Trust the process, use a big mug, and time it right, and you will have the perfect instant dessert every single time. It truly is the quickest and easiest way to satisfy that deep, desperate, delicious craving for a perfect, fudgy Mug Cake .

Recipe FAQs
Why is my mug cake tough, rubbery, or dry?
The primary culprit is usually over microwaving; this dessert cooks extremely quickly, and even 10 extra seconds can dry it out completely. Start with the minimum cooking time and look for a texture that is set on the edges but still slightly gooey in the center.
Additionally, excessive stirring can overdevelop the gluten, resulting in a rubbery consistency.
Can I make this Chocolate Fudge Mug Cake vegan or dairy-free?
Absolutely; this recipe is highly adaptable to dietary needs. Substitute standard milk with plant based alternatives like oat or almond milk, and use oil (such as canola or coconut) or a vegan butter replacement for the fat component. Ensure that any chocolate chips or cocoa powder used are certified dairy-free.
What is the ideal mug size and power level for cooking?
Use a standard 12 to 14-ounce mug with relatively straight sides to accommodate the rise and prevent overflow. For best results and the fudgiest texture, cook at 70% power if your microwave is 1000W or higher, or stick to full power if your microwave is below 900W.
Can I prepare the batter ahead of time for later use?
It is not recommended to pre-mix the complete batter, as the baking powder will lose its potency quickly once it hits the wet ingredients, leading to a flat cake. However, you can mix all the dry ingredients and store them in a tightly sealed container; simply add the milk and fat right before microwaving.
I don't have self rising flour. What should I substitute?
You can easily create a reliable substitute using basic pantry staples. For the amount of flour typically used in a mug cake, simply combine all-purpose flour with a pinch of salt and a slightly reduced amount of baking powder (about 1/2 teaspoon).
Be sure to mix these dry components very well before adding the wet ingredients.
How can I ensure my mug cake has a molten or gooey chocolate center?
To achieve a delicious molten core, reserve one square of quality chocolate or a small tablespoon of hazelnut spread (like Nutella). Push the chocolate deep into the center of the prepared batter just before placing it into the microwave.
The direct heat will melt the core, ensuring it remains liquid while the rest of the cake sets.
My cake rose high but then sank completely after cooling. Why?
Immediate collapse typically means the cake was either undercooked or suffered from thermal shock upon removal from the microwave. Ensure the top appears set and glossy before taking it out, and allow it to rest inside the microwave for 30 seconds after the timer stops before serving.
Excessive moisture from liquid ingredients can also sometimes contribute to a collapse.
Rich Chocolate Mug Cake Recipe

Ingredients:
Instructions:
Nutrition Facts:
| Calories | 184 kcal |
|---|---|
| Protein | 2.1 g |
| Fat | 9.0 g |
| Carbs | 20.5 g |
