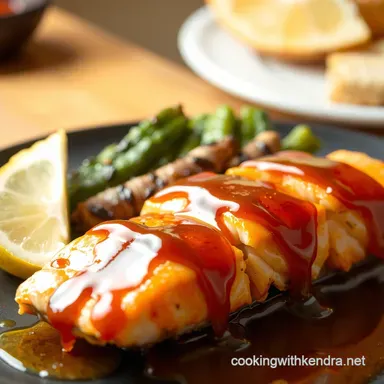
Sticky Fingers Salmon Perfect Panseared Honey Garlic Glaze
- The Ultimate Weeknight Win: Why This Honey Garlic Glaze Rules
- Unlocking That Perfect Sticky Caramelization
- Assembling Your Glaze Arsenal: Essential Components
- Prepping Your Salmon Fillets for Maximum Flavor Absorption
- Executing the Sear: Achieving Golden-Brown Perfection
- Glazing Masterclass: Building Layers of Sticky Flavor
- Pro Chef Hacks for Next-Level Honey Garlic Glazed Salmon
- Creative Ways to Customize Your Sticky Fingers Salmon
- Serving Suggestions: Pairing Sides That Shine
- Recipe FAQs
- 📝 Recipe Card
The Ultimate Weeknight Win: Why This Honey Garlic Glaze Rules
Welcome to the definitive guide for creating what might just become your signature weeknight meal: Honey Garlic Glazed Salmon . This isn't just another recipe; it’s a blueprint for achieving that elusive balance: restaurant quality shine and flavour coupled with astonishing speed.
Forget those tedious, multi step dinners; this flavour combination sweet, salty, pungent, and utterly addictive is ready in under 30 minutes. We are aiming for succulent, moist fish encased in a sticky, caramelized shell.
This particular rendition, which I call "Sticky Fingers Salmon," manages to be both sophisticated enough for guests yet simple enough for a Tuesday night when you’re running on fumes. It is, without a doubt, the Best Easy Salmon Recipe you will encounter this year.
Unlocking That Perfect Sticky Caramelization
The key to elevating simple baked or pan-seared fish lies entirely in the glaze. A perfect Honey Garlic Glazed Salmon sings because the glaze doesn't just sit on the surface; it actively interacts with the heat to form a beautiful, burnished coating.
To achieve this stunning texture, we need technique paired with quality ingredients.
Why Pan-Searing Guarantees Crispier Edges
While many recipes suggest baking, I strongly advocate for pan-searing, especially if your fillets have the skin on. Pan-searing, using a heavy bottomed skillet like cast iron or quality stainless steel, provides intense, direct heat.
By patting the salmon fillets aggressively dry before they hit the shimmering oil, we force the Maillard reaction to occur instantly, resulting in wonderfully rendered fat beneath the skin or a deeply golden crust on the flesh side. This initial searing sets the stage for the delicate finish that follows.
From Zero to Hero: Simplicity Meets Sophistication
The beauty of this dish is its deceptive simplicity. With only about 10 minutes of active prep time, you are gathering components that pack an enormous flavour punch. We utilize pantry staples honey, soy sauce, and garlic but we enhance them with key acidic and aromatic elements.
This approach means you are creating a genuinely Sweet And Savory Salmon experience without needing a long grocery list or hours of marinating time.
The Magic Behind a Flawless Honey Garlic Glazed Salmon Finish
The magic happens at the end. We construct the glaze separately and introduce it to the pan after the salmon is nearly cooked through. This timing is non-negotiable. Honey, being a sugar, burns rapidly.
If you attempt to cook the fish in a thick glaze from the start, you end up with acrid, blackened edges and raw middles. By finishing with the glaze, we ensure it thickens, clings beautifully, and achieves that signature glossy look that makes this Honey Garlic Glazed Salmon so iconic.
Assembling Your Glaze Arsenal: Essential Components
A great sauce starts with great components. For this glaze, we are focusing on balancing sweetness with umami depth and sharp acidity to cut through the richness of the fish.
The Sweet & Savory Ratio: Precision Measurement Guide
To create the base for our glaze, we need a robust foundation. We combine 1/3 cup of rich, golden honey with 1/4 cup of low-sodium soy sauce (or Tamari for gluten-free needs). This sweet-to-salty ratio is crucial for that compelling flavour profile.
For acidity, we introduce 1 tablespoon of apple cider vinegar (or rice vinegar), which brightens the overall taste and prevents the glaze from tasting heavy or cloying.
Secret Weapons: Garlic Varieties and Honey Types That Elevate the Dish
Don't skimp on the aromatics here. You’ll need 4 large cloves of fresh garlic , minced finely. While pre-minced garlic is convenient, the volatile oils released by freshly cut garlic are essential for the punchy flavour we seek.
For a subtle background heat, 1/2 teaspoon of Sriracha or red pepper flakes can be included. As for honey, choose one you enjoy the taste of, as it is the dominant sweet note.
Must Have Kitchen Tools for Seamless Preparation
While you can technically use a non-stick pan, a sturdy large, heavy bottomed skillet (cast iron is my preference) ensures even heat distribution, which is vital for that perfect sear.
You will also need a small bowl and a whisk for quickly combining the glaze ingredients, and tongs for carefully flipping those delicate fillets.
Prepping Your Salmon Fillets for Maximum Flavor Absorption
Success in cooking salmon begins before it even enters the heat source. We are preparing four 6-ounce center cut fillets today, aiming for uniform cooking.
First and foremost, moisture is the enemy of crispiness. Take your time to pat the salmon fillets thoroughly dry using paper towels. This step is non-negotiable for achieving that desirable crust. Once dry, season them lightly but evenly with salt and freshly ground black pepper.
Avoid over seasoning at this stage, as the soy sauce in the glaze provides significant salinity later.
Related Recipes Worth Trying
- The Ultimate 30Minute Honey Garlic Chicken Recipe — Whip up this Easy Honey Garlic Chicken in just 30 minutesa weeknight hero with a truly glossy irresistible sauce Guaranteed to become your new favourite...
- Foolproof Honey Garlic Chicken Breasts Recipe — Need an easy chicken dish for dinner This Honey Garlic Chicken Breasts Recipe delivers a glossy flavourpacked glaze in under 35 minutes A simple weeknight...
- Easy Shrimp Scampi Bake 30Minute Lemon Garlic Dinner — Skip the pan and bake the best Shrimp Scampi Bake This easy recipe features plump shrimp in garlic butter topped with crispy breadcrumbs in under 35 minutes
Executing the Sear: Achieving Golden Brown Perfection
Heat your skillet over medium high heat. Add 1 tablespoon of olive oil (or avocado oil) and wait until it shimmers, indicating it’s ready for searing. Carefully place the salmon fillets into the hot oil, skin side down if you are using skin-on cuts.
Allow them to sear undisturbed for about 4 to 5 minutes. You are looking for the skin to become deeply golden and crisp, or for the flesh side to develop a visible, opaque crust about a quarter of the way up the fillet.
Once seared, gently flip the fish. Reduce the heat immediately to medium low. Continue cooking the second side for another 3 to 5 minutes, depending on the thickness of your fillets.
The goal is for the fish to be nearly done it should flake easily but still retain a slight translucence in the very centre. Remove the fish from the pan and set it on a clean plate, loosely covered with foil to rest while you tackle the final step.
Glazing Masterclass: Building Layers of Sticky Flavor
This is where we transform the pan drippings into that irresistible coating. Because the honey is about to hit the heat, precision is key to avoid scorching.
Step-by-step: Creating the Base Honey Garlic Sauce
First, prepare the thickener. Whisk 1 teaspoon of cornstarch (or arrowroot powder) with 1 tablespoon of cold water until fully incorporated, forming a smooth slurry. Set this aside.
In a small bowl, combine the honey, soy sauce, minced garlic, vinegar, grated ginger, and optional Sriracha. Whisk this mixture thoroughly.
The Critical Timing for Introducing the Glaze to the Pan
Return the skillet to medium heat. You do not need to clean out the pan; those caramelized brown bits left from the fish are pure flavour boosters! Pour the prepared honey mixture directly into the pan. Allow it to warm up and gently simmer.
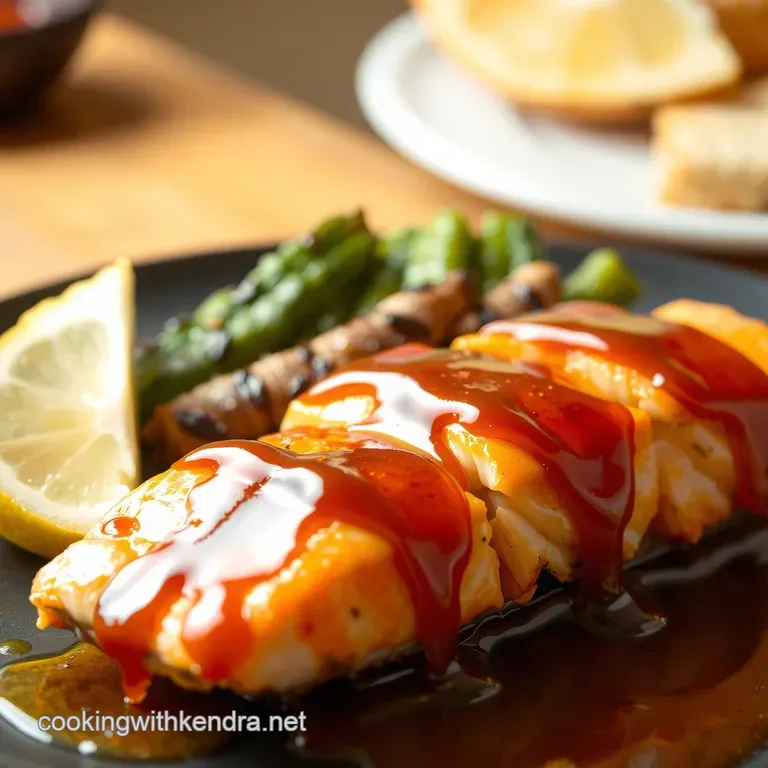
Basting Techniques for Even Coating and No Burning
Once the glaze is simmering, it's time to activate the slurry. Whisk that cornstarch slurry one last time, then pour it slowly into the simmering sauce while whisking constantly. Continue simmering for about 1 to 2 minutes.
You will notice a dramatic change as the sauce transforms from liquid to a thick, glossy syrup this is your perfect Sweet Glaze For Salmon . Now, swiftly return the rested salmon fillets to the pan.
Use a spoon to gently coat the tops of the fish with the thick glaze, allowing it to bubble and adhere for just 30 seconds before removing them immediately from the heat source.
Determining Doneness: Ensuring a Moist Interior
When testing for doneness, a fork inserted into the thickest part should separate the flesh easily with gentle pressure. If you are using an instant read thermometer, aim for an internal temperature of 135° F ( 57° C) before glazing; the carryover heat during the final 30 seconds in the glaze will bring it up to a perfect medium ( 145° F/ 63° C), ensuring a juicy result.
Pro Chef Hacks for Next Level Honey Garlic Glazed Salmon
To truly elevate this dish, consider these small additions during the glaze stage. Adding 1 teaspoon of toasted sesame oil right as you take the pan off the heat provides a beautiful, nutty aroma that perfectly complements the garlic and honey.
On top of that,, before serving, a heavy sprinkle of toasted sesame seeds and thinly sliced green onions adds essential textural contrast and vibrant colour, making your Honey Garlic Glazed Salmon Bites (if cutting them up for appetizers) or fillets look incredibly appealing.
Creative Ways to Customize Your Sticky Fingers Salmon
While the classic pairing is impeccable, this glaze is highly adaptable. For a vibrant twist, incorporate the juice of half a lime into the sauce base. If you prefer a richer flavour, substitute a portion of the honey with maple syrup for a deeper, woodsy sweetness.
For those who enjoy textural components, finely diced water chestnuts can be folded into the finished glaze right before you coat the fish, offering a wonderful crunch.
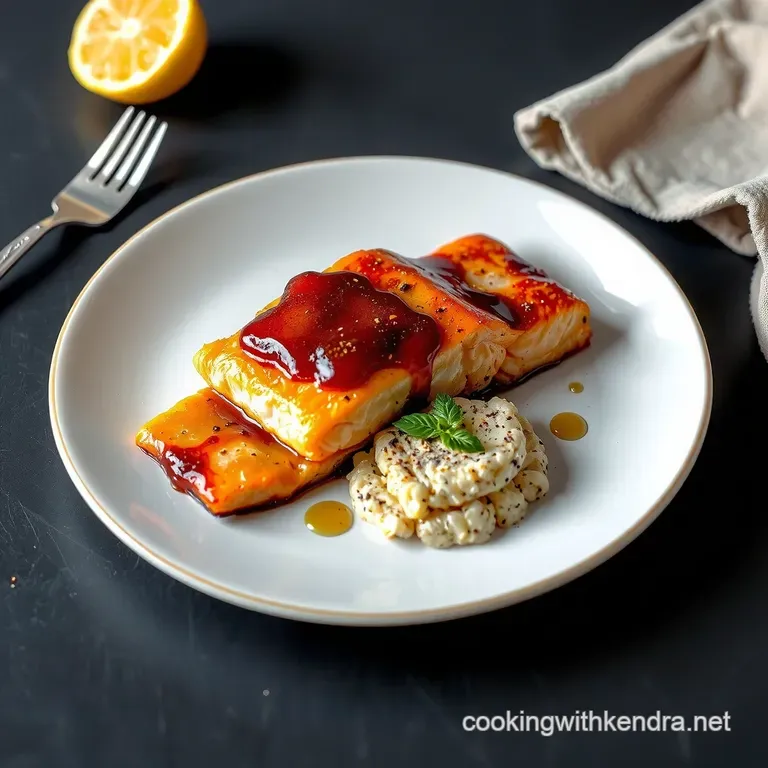
Serving Suggestions: Pairing Sides That Shine
The richness of the glaze demands sides that can either complement the flavour or provide a clean canvas. The classic choice is perfectly steamed Jasmine Rice or Brown Rice , essential for soaking up any residual sauce.
For vegetables, think simple and green: lightly blanched or roasted broccoli florets tossed simply with lemon zest, or quick sautéed bok choy seasoned only with salt.
These provide the necessary fresh counterbalance to the intensity of the Honey Garlic Glazed Salmon Sides .
Troubleshooting: What To Do If Your Glaze Gets Too Thick
If, by chance, your cornstarch slurry was too heavy handed, or you let the sauce simmer too long, resulting in a paste rather than a sauce, don't panic. Simply whisk in a teaspoon of hot water or low-sodium chicken broth at a time until you achieve the desired pourable, glossy consistency.
The glaze will still adhere beautifully to the fish.
Optimal Storage and Reheating for Leftovers
This dish travels well! Store leftover Honey Garlic Glazed Salmon in an airtight container in the refrigerator for up to three days. The best way to reheat is gently in a non-stick skillet over medium low heat with a tiny splash of water or broth to reintroduce moisture and prevent the sugars in the glaze from burning.
Avoid the microwave if you want to preserve any textural integrity.
Nutritional Insights: Keeping it Light While Keeping it Delicious
While honey is a sugar, this recipe utilizes a relatively small amount, spread across four generous portions. The primary nutritional benefits come from the salmon itself packed with high-quality protein and essential Omega-3 fatty acids.
By focusing on searing rather than deep frying and using a moderate amount of healthy cooking oil, this remains a wonderfully nutritious meal, delivering high flavour without excessive unhealthy fats.
Beyond Salmon: Applying This Glaze to Other Proteins
The versatility of this Sweet And Savory Salmon preparation means you can apply the exact same sauce technique to other proteins with fantastic results. Try using it on thick cut pork chops (ensure they cook through completely), chicken thighs, or even shrimp.
For chicken or pork, you may need to increase the initial cooking time slightly or finish them in the oven after searing to guarantee safe internal temperatures before introducing that final, glorious glaze.
Recipe FAQs
My Honey Garlic Glazed Salmon turned out too thin and sticky; how do I get that perfect thick, glossy coating?
Ah, a common pitfall that happens when the cornstarch slurry isn't quite right or isn't simmered long enough! Make sure you whisk the cornstarch with the cold water first to create a proper slurry, and then introduce it slowly to the simmering glaze while whisking constantly.
Simmer for a good minute or two until it coats the back of a spoon before you add the fish back in.
Can I bake or air fry the Honey Garlic Glazed Salmon instead of pan-searing it?
Absolutely, you can! For baking, place the seasoned salmon on a lined sheet pan and bake at 400°F (200°C) for about 10 12 minutes. Brush on about half the glaze halfway through cooking, then brush the rest on in the final 2 minutes to prevent the honey from burning.
My salmon fillets were quite thick; how long should I cook them to avoid drying them out?
If you have champion sized fillets, the key is to manage the heat. Sear them briefly on the skin side, flip, and then immediately drop the heat to medium low. You're aiming for an internal temperature of about 135 140°F (57 60°C) before glazing at the very end.
If you're unsure, use a meat thermometer it’s the difference between perfectly succulent fish and something resembling old leather!
I don't have fresh ginger; what can I use instead in this glaze?
While fresh is best for that bright zing, if you're in a pinch, you can substitute the fresh ginger with about half a teaspoon of dried ground ginger. Just be aware that the flavour profile will be slightly earthier, rather than sharp and fresh.
Alternatively, you can omit it entirely if you don't have any on hand; the honey and garlic will still make a cracking sauce!
How should I store leftovers of this Sticky Fingers Salmon?
Store any leftover salmon in an airtight container in the fridge for up to three days but honestly, it rarely lasts that long in my house! To reheat, it's best to gently warm it in a covered skillet over low heat with a tablespoon of water or chicken stock to help steam and reintroduce moisture without burning that gorgeous glaze.
Sticky Honey Garlic Salmon