Inside Outside Burger: the Ultimate Cheese-Stuffed Patty
- Introducing the Inside Outside Burger: The Ultimate Cheese-Stuffed Patty Showstopper
- The Science of the Melt: Why Stuffed Patties Deliver Superior Flavour
- Gathering Your Supplies: Key Ingredients and Essential Swaps
- Crafting the Perfect Patty: Step-by-Step Method
- Troubleshooting Your Cook: Expert Tips and Avoiding Disasters
- Prep Ahead: Storing and Freezing Stuffed Patties Safely
- Mastering the Sides: Perfect Pairings and Toppings
- Recipe FAQs
- 📝 Recipe Card
Introducing the Inside Outside Burger: The Ultimate Cheese Stuffed Patty Showstopper
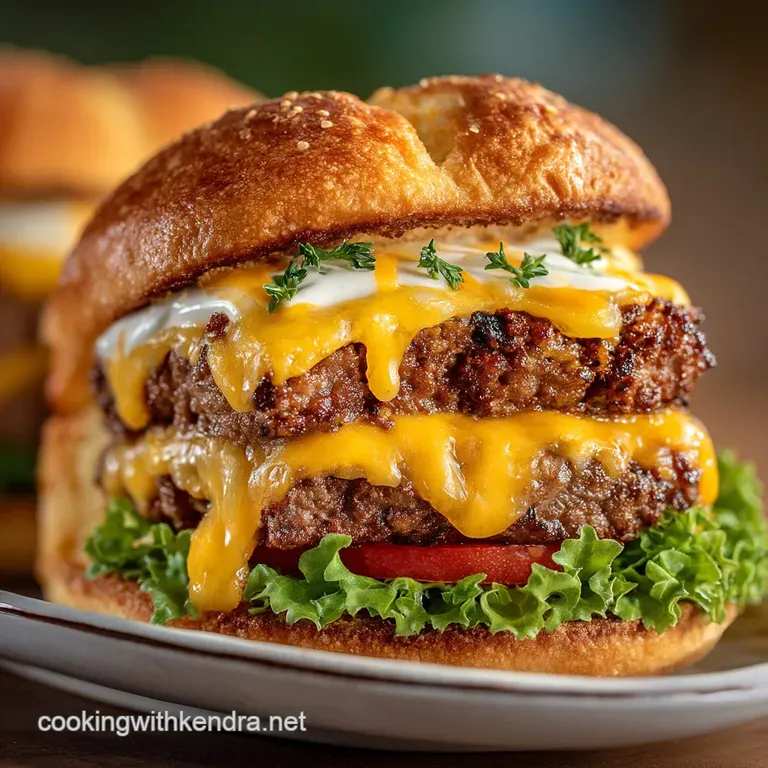
Right, listen up. Forget everything you thought you knew about simple cheeseburgers. When that sizzle hits the pan and the rich, savoury aroma of ground meat mixed with sea salt starts filling your kitchen, you know you are making something glorious.
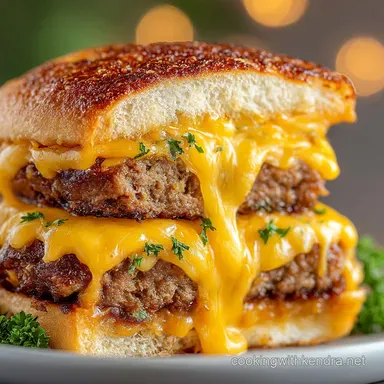
But the real magic happens when you cut into it and that molten core of salty, sharp cheese spills out like liquid gold. This, my friend, is the magic of the Inside Outside Burger . It’s the ultimate comfort food hack.
I love this method because it turns a boring weekday dinner into a total event, and honestly, it’s ridiculously forgiving. It might look fancy, but this Inside Outside Burger recipe is a lifesaver because the prep is quick, the ingredients are cheap, and the clean-up isn't too brutal (unless you manage to explode the cheese core, which we will work very hard to avoid!).
It’s fast, deeply satisfying, and hits every flavour note perfectly.
I used to just slap cheese on top like everyone else, but once I figured out the perfect technique for stuffing and sealing the patty, there was no going back. Get ready to ditch those sad, dry burgers forever and learn how to make the best Inside Outside Burger you will ever taste.
Let’s crack on!
The Science of the Melt: Why Stuffed Patties Deliver Superior Flavour
The reason a true Inside Outside Burger crushes a standard cheeseburger comes down to moisture and thermal dynamics. When you simply place a slice of cheese on top, it acts as an insulator, and much of the delicious fat drips away before the cheese melts fully, often creating a greasy pool rather than a luscious coating.
But when you stuff the cheese inside the patty, you create a steaming, molten core that keeps the surrounding meat incredibly moist while simultaneously flavouring it from the inside out.
What Makes Our Version 'Bangers & Mash' Worthy
Our specific technique focuses on three things: minimal handling, the mandatory chill, and high fat content. We treat the ground mixture gently, ensuring the final texture isn't tough or dense.
The chilling process is non-negotiable; it’s what gives the patty the structural integrity needed to survive the searing heat of the grill. You end up with a beautifully caramelised crust and a perfectly tender middle that’s the signature of a great Inside Outside Burger .
Essential Kitchen Tools for Patty Success
You really don't need much fancy gear, but a few tools make making the Inside Outside Burger much easier. A heavy bottomed cast iron skillet is the undisputed champion for achieving that deep, crusty sear (the Maillard reaction).
Don't skip the baking sheet lined with parchment paper; this is essential for chilling without sticking. And please, use a meat thermometer. Taking the guesswork out of internal temperatures prevents dry, overcooked patties and guarantees a safe, juicy result.
Achieving the Perfect Lava Flow Centre
The secret to a truly molten centre is twofold: the type of cheese and the cooking duration. We use a blend of sharp mature cheddar and Monterey Jack because the combination offers both flavour depth and superior meltability. Crucially, the final stage of cooking must be low and slow.
If you rush the cook time, the outside will burn before the interior cheese has time to fully liquefy and become that delicious lava flow we are aiming for in a perfect Inside Outside Burger .
The Critical Role of Fat Content in Patty Formation
If you use lean ground meat, you’re basically signing up for dry burgers and catastrophic cheese leakage. I learned this the hard way once when I tried making a ‘healthy’ version. Spoiler alert: it was awful. The Inside Outside Burger demands an 80/20 ratio (80% meat, 20% fat).
The fat renders slowly during cooking, keeping the patty juicy, and it also forms a crucial buffer that helps protect the molten cheese core from escaping too quickly. Embrace the fat; it’s flavour and moisture insurance.
Gathering Your Supplies: Key Ingredients and Essential Swaps
Making an epic Inside Outside Burger starts with quality ingredients. Everything we use here is focused on amplifying the rich, savoury flavour of the beef and ensuring that the cheese core delivers maximum impact.
| Ingredient | Why We Use It | Substitution Suggestion |
|---|---|---|
| Ground Meat (80/20) | Essential for moisture and flavour. | If 80/20 isn't available, add 1 tbsp of finely chopped, chilled butter per pound to a leaner cut. |
| Mature Cheddar/Monterey Jack | Excellent flavour and high melt factor. | Provolone or American slice cheese (the kind sold in blocks, not processed singles) works wonders if you need high meltability. |
| Worcestershire Sauce | Adds umami depth and aids browning. | Soy sauce or a dash of Marmite diluted in water can provide a similar savoury kick. |
| Brioche Buns | Soft texture and slightly sweet counterpoint. | Use a sturdy pretzel bun or a quality seeded roll; the bun needs to hold up to the molten filling of the Inside Outside Burger . |
Selecting the Best Cheese for Optimal Melt and Texture
Do not, under any circumstances, use pre-shredded cheese for your Inside Outside Burger . Those shreds are coated in starches to prevent clumping, which inhibits proper melting. We need block cheese, cut into precise cubes.
Monterey Jack is soft and melts beautifully, while the mature cheddar brings the requisite sharp, tangy flavour. If you want a fun variation, mix in a few chunks of pepper jack for a spicy kick!
Choosing the Right Ground Mixture for Maximum Juiciness
We’ve already talked about 80/20, but let's reiterate: juiciness is paramount. You want meat that’s freshly ground, if possible. If the meat has been tightly packed for a long time, it becomes dense.
For the best Inside Outside Burger , look for ground mixture that looks loose and bright red. This minimizes the risk of overworking the mixture later.
Essential Seasoning Ratios for the Patty
Keep it simple. Seriously. A high-quality Inside Outside Burger doesn't need 15 different spices. Our ratio salt, pepper, and Worcestershire sauce is perfect.
The salt is crucial; it helps break down the muscle fibres slightly, leading to a more tender finished product, and the Worcestershire adds that deep, meaty umami.
Substitutions for Breadcrumbs or Binders
Notice there are no breadcrumbs or eggs in this recipe. That’s intentional! We rely solely on the beef mixture and the required chill time to hold the patty together. Binding agents tend to make the texture more meatloaf like, and we want a proper, traditional patty experience.
If your mixture feels exceptionally loose, add just a tiny splash of cold water, about 1 teaspoon per pound, to help hydrate and bind the proteins slightly.
Crafting the Perfect Patty: step-by-step Method

This is where technique separates the amateur cook from the home chef. Shaping and sealing the Inside Outside Burger is the make-or-break moment.
Preparing the Patty Shells for Stuffing
Once you’ve gently seasoned your meat, divide it perfectly into eight equal portions. Precision here helps ensure even cooking times. Now, flatten each portion into thin, round discs. I find the bottom of a bowl or a small plate helps make them perfectly uniform.
These discs should be thinner than you think, about 1 cm thick, because we are stacking them. They also need to be slightly wider than your bun patties shrink significantly when cooked!
Sealing the Cheese Centre: The Crucial Pinch Technique
This is the most critical step for a successful Inside Outside Burger . Place your cubed cheese right in the centre of one disc. Place the second disc directly on top. Now, using your fingertips, start pressing the edges together, moving around the patty perimeter.
Think of it like sealing a giant ravioli or a pasty. You must pinch and fold the edges so they are seamlessly fused. I often crimp them gently with a fork just to be extra sure the seal is tight and ready for the grill.
A tiny hole means a cheese blowout, which ruins the surprise and leads to a dry Inside Outside Burger .
Chef's Note: If the meat starts getting sticky or too warm while you’re sealing, pop it back in the freezer for five minutes. Cold meat seals far better than warm meat.
Grilling vs. Pan-Frying the Inside Outside Burger
I prefer pan-frying in a cast iron skillet for the sheer consistency of the crust, especially if you want that true smash burger style sear. However, grilling imparts incredible smoky flavour. If grilling, ensure your grates are meticulously clean and well oiled to prevent sticking and tearing the fragile seal.
Start with high heat for the sear, then move the patties to a cooler zone, covering them to finish the internal cook and melt the core.
Resting the Patty Post Cook for Optimal Results
Do not skip the rest. I know you’re hungry, and the Inside Outside Burger smells incredible, but resting for five minutes allows the internal juices, which have been driven to the centre by the heat, to redistribute evenly throughout the patty.
This step locks in the moisture, making the finished burger impossibly juicy. It’s worth the short wait, I promise.
Troubleshooting Your Cook: Expert Tips and Avoiding Disasters
Even the most experienced home cooks run into issues, especially when dealing with high stakes, cheese stuffed projects like the Inside Outside Burger . Here are the most common pitfalls and how we fix them.
Preventing Cheese Leakage During Cooking
The number one disaster when making the Inside Outside Burger is a massive cheese explosion. Leakage usually happens for two reasons: a bad seal or not chilling the patties long enough. Fix the seal by taking your time and crimping the edges properly.
Fix the chilling by ensuring the burgers stay in the fridge for a minimum of 30 minutes. If you see a tiny seep beginning during cooking, don't panic! Gently press down on the exposed spot with the back of your spatula for a moment to help seal it temporarily with rendered fat.
Handling Overly Sticky Ground Meat Mix
If your ground mixture feels too tacky or sticky, it means you've probably worked the protein too much, or it's simply too warm. If you are struggling to shape the discs for your Inside Outside Burger , pop the entire mixing bowl into the freezer for 10 minutes.
This firms up the fat, making the mixture easier to handle and less prone to sticking to your hands. Remember: the colder the beef, the better the final texture.
Adjusting Cook Time for Different Patty Thicknesses
Our recipe targets a fairly large patty. If you decide to make smaller or thinner patties, you must significantly reduce the searing time. Always, always check the internal temperature, which should reach 71°C (160°F) for safety.
Thicker patties (say, 1.5 inches) will require more time under the covered, medium low heat stage to ensure the heat penetrates deep enough to melt the cheese core of the Inside Outside Burger .
Prep Ahead: Storing and Freezing Stuffed Patties Safely
Can you make these ahead of time? Absolutely! The Inside Outside Burger is an ideal candidate for meal prepping or preparing for a big barbecue bash.
Safe Storage of Uncooked Stuffed Patties
You can prepare the stuffed and sealed patties up to 24 hours in advance. Line an airtight container with parchment paper, place the patties in a single layer, and cover them tightly. Store them on the coldest shelf of your refrigerator (usually the bottom shelf).
This extended chill time actually helps solidify the seal even more, making them structurally sound for cooking.
Best Practices for Freezing the Mixture
The Inside Outside Burger freezes beautifully. Once the patties are completely shaped and sealed, place them on a parchment lined tray and flash freeze them for two hours until solid.
Then, stack them in a freezer bag or container, separating each patty with wax or parchment paper to prevent sticking. They will last safely for up to three months. To cook, thaw them overnight in the fridge before proceeding with the searing instructions.
Never cook a stuffed, frozen patty directly from the freezer; the outside will burn before the core thaws and melts properly.
Mastering the Sides: Perfect Pairings and Toppings
A showstopper like the Inside Outside Burger deserves equally brilliant accompaniments. While our special sauce is mandatory, the sides bring textural contrast and balance.
The Best Bun for Structural Integrity
We specified brioche, but the key word is structural integrity . That molten core is heavy and messy. You need a bun that can absorb a little juice without disintegrating, while still being soft enough to compress easily when you bite down. Toasting the bun is non-negotiable; it helps create a barrier against the juicy patty. If you like to load up on starch, these go beautifully alongside crispy Air Fryer Baked Potatoes Crispy Skins Fluffy Inside .
Topping Ideas for Your Inside Outside Burger
Don't overcomplicate the toppings. The cheese is the star. Focus on texture and acidity.
- Acidity: Crisp dill pickles and thinly sliced tomato.
- Crunch: Iceberg lettuce provides a brilliant, crisp cold element.
- Balance: Consider adding caramelized onions for sweetness, but keep them thinly sliced so they don’t push the patty apart.
Sometimes, if I have leftovers from a big batch of these, I chop them up and turn them into a totally different meal, like my indulgent Cheeseburger Pasta: The Ultimate Creamy, One-Pot Skillet Recipe .
This Inside Outside Burger recipe is a game changer because it delivers that intense, comforting flavour and that spectacular molten reveal every single time. Get cooking, and remember: chill your patties!
That is the secret to success with the glorious Inside Outside Burger . You’ll never go back to boring burgers again.

Recipe FAQs
Why did all the cheese leak out during cooking?
Cheese leakage usually indicates that the edges of the patty were not fully sealed before cooking. Ensure you press the two halves of the patty firmly together, creating a complete, tight seal around the cheese filling before placing it on the heat.
Additionally, avoid pressing down on the burger while it cooks, as this puts pressure on the internal molten centre.
What type of mince (ground beef) is best for achieving a juicy Inside Outside Burger?
The best choice is typically mince with an 80/20 fat ratio (80% lean, 20% fat), as the rendered fat is crucial for flavour and maintaining moisture within the patty. If you use a very lean meat, the patty may dry out before the internal cheese is fully melted and hot.
Always use cold meat straight from the fridge for forming the patties.
Can I prepare the patties ahead of time, and how should I store them?
Absolutely; preparing the raw stuffed patties up to 24 hours in advance is an excellent way to save time. Simply wrap each assembled patty tightly in parchment paper or cling film and store them in an airtight container in the refrigerator. Cook them directly from the fridge, as they hold their shape better when cold.
How do I ensure the cheese fully melts without burning the exterior of the burger?
Cook the burgers over medium heat rather than high heat, which allows the internal temperature to rise gradually. If you are using a grill, cover the burgers with a metal dome or use the grill lid during the last few minutes of cooking to trap heat and perfectly melt the cheese centre.
My cooked burger patty feels dense and tough. What caused this?
A dense burger is almost always the result of overworking the ground meat, which develops the proteins and makes the final product springy and tight. Mix the seasoning in very lightly until just combined, and handle the meat as gently and minimally as possible when forming the patties.
What are the best cheese substitutions for the stuffing?
The ideal stuffing cheese must melt beautifully and resist becoming too oily. Classic American or mild Cheddar slices are always reliable choices, but you can also experiment with pepper jack for heat or a good quality Swiss for a nuttier flavour.
Ensure the cheese is cold and placed in the very centre of the patty before sealing.
Can I adapt this 'Inside Outside' method for a vegetarian or vegan burger?
Yes, the technique works well with many plant based meat substitutes, provided they have enough binding ability to form a stable patty. Simply use vegan mince, form the halves, and stuff the centre with a high-quality vegan cheese slice that melts effectively.
You may need to cook it for slightly less time than the beef version.
Ultimate Inside Outside Burger Recipe
Ingredients:
Instructions:
Nutrition Facts:
| Calories | 779 kcal |
|---|---|
| Protein | 84.8 g |
| Fat | 36.3 g |
| Carbs | 32.7 g |
