The Wakeywakey Restaurantquality Cold Brew Concentrate

- Why Homemade Cold Brew Crushes Coffee Chain Standards
- The Science Behind Silky, Non-Acidic Iced Coffee
- The Essential Arsenal: Building Your Concentrate Base
- Mastering the Immersion Phase: The Cold Steep Timeline
- Elevating Your Brew: Creative Ways to Utilize Concentrate
- Longevity & Storage Secrets for Peak Freshness
- Recipe FAQs
- 📝 Recipe Card
Why Homemade Cold Brew Crushes Coffee Chain Standards
There is a distinct difference between grabbing a quick, pre-made glass of something labeled "iced coffee" from a major vendor and crafting the real deal in your own kitchen. The chain store version often relies on dumping hot espresso shots over ice, leading to that disappointing watery dilution or an overly acidic burn.
When you master the Iced Coffee at Home , particularly using the cold brew method, you unlock a depth of flavour that simply cannot be achieved with heat. This foundational recipe The "Wakey Wakey": Restaurant Quality Cold Brew Coffee Recipe —is designed specifically to avoid those harsh, bitter notes.
By using time instead of temperature, we extract the smooth chocolate and nutty undertones of your favourite roast, resulting in a naturally sweet, robust base perfect for any chilly beverage application.
The Science Behind Silky, Non-Acidic Iced Coffee
The magic of superior Iced Coffee lies in chemistry. Hot water aggressively strips flavour compounds from coffee grounds, including those acidic oils responsible for that sharp, sometimes sour taste we associate with weak or poorly made brews. Cold water, however, works slowly and deliberately.
This gentle extraction process pulls out the desirable flavour elements while leaving most of the chlorogenic acids behind. This results in a final product that is significantly smoother and far less taxing on the stomach.
Ditching the Watery Compromise: Our Concentrate Promise
To ensure longevity and flexibility, we are intentionally creating an Iced Coffee Concentrate . This is key to achieving the Best Iced Coffee at Home .
We use a high ratio of coffee grounds to water specifically 1 part coffee to 4 parts water which yields a brew so intense it needs dilution before drinking. This concentrate is the secret weapon that keeps your home supply potent and ready for instant mixing, far superior to trying to brew a single serving on demand.
Prep Time Versus Steep Time: What to Expect
While the active work involved is minimal, patience is your most valuable ingredient here. The entire process involves about 15 minutes of active preparation that’s grinding the beans, measuring the water, and gently combining the mixture.
However, the infusion, or steeping time, is significant, requiring 12 to 18 hours entirely undisturbed in the refrigerator. This passive soaking period is non-negotiable for true cold brewing success.
Serving Size Snapshot: Yield Per Batch
This recipe is scaled to produce a substantial supply, perfect for stocking your fridge for the week ahead. Expect to yield approximately 5 cups (about 1.2 litres) of potent concentrate from a single batch.
When diluted according to preference, this concentrate is generous enough to supply 8 to 10 standard servings of perfectly chilled coffee.
The Essential Arsenal: Building Your Concentrate Base
Creating exceptional Iced Coffee With Foam And Ice starts with the correct raw materials. We are aiming for quality, starting with fresh, whole beans and pristine water.
Selecting the Optimal Coffee Grind (Coarse is King)
The grind size is arguably the most critical factor in this process. You must grind your whole beans to a very coarse consistency think large breadcrumbs or coarse sea salt.
If the grind is too fine (like standard drip or espresso grind), the surface area will be too large for the long steep time. This will lead to over extraction, resulting in a gritty, bitter, and cloudy final Iced Coffee Concentrate .
Water Quality Matters: Temperature and Type
Since coffee is 98% water, the quality of your liquid profoundly impacts the final flavour. Always use cold, filtered water. Filtered water removes unwanted minerals and chlorine that can interfere with the delicate flavour extraction process.
The water must be cold right from the start; we introduce no heat whatsoever.
Required Hardware: Steeping Vessels and Filtration Gear
For steeping, you will need a large, non-reactive container, such as a glass pitcher or ceramic crock, with a capacity of at least six cups to accommodate the slurry. For filtration, prepare a fine mesh sieve.
Crucially, you will need secondary filtration materials, such as several layers of cheesecloth, a nut milk bag, or high-quality paper coffee filters, to catch the finer particles later on.
Related Recipes Worth Trying
- The Best Roasted Pumpkin Soup Recipe Velvety Maple Spiced — This Simple Roasted Pumpkin Soup recipe delivers a rich velvety texture you wont forget Roasting caramelises the sugars for the Best Roasted Pumpkin Soup...
- SunSoaked Sweet Tea The Perfect ColdBrew Iced Tea Recipe — Ditch the bitter brew Learn how to make homemade iced tea using a simple coldbrew method for a truly refreshing perfect summer drink
- Cappuccino Cookies A Coffee Lovers Dream — Fancy a coffee break These Cappuccino Chocolate Chunk Cookies are the perfect homemade treat Rich coffee flavour meets dark chocolate in an easy recipe Get...
Mastering the Immersion Phase: The Cold Steep Timeline
Once your components are prepared, the immersion phase begins. This is where the slow, silent extraction takes place, drawing out the deep coffee essence without the accompanying acid load.
Step-by-step Brewing: Combining Coffee Grounds and Water
Begin by placing your measured, coarse grounds into your steeping vessel. Next, gently pour the 4 cups of cold, filtered water over the top. If you are using the optional flavour enhancer, add a tiny pinch of salt now; this subtly boosts perceived sweetness and rounds out any edge.
Use a wooden spoon to stir the mixture very briefly just enough to ensure every single ground particle is saturated. Avoid vigorous stirring, as this can break down the grounds prematurely.
Patience Pays Off: Ideal Resting Duration (Beyond 12 Hours)
Cover the container loosely to allow for minor air exchange but keep contaminants out. Place the entire vessel into the refrigerator. The standard resting duration for a balanced flavour profile is between 12 and 18 hours.
If you prefer a slightly lighter brew, pull it closer to the 12-hour mark; for an intense, bold flavour suitable for mixing with lots of cream, let it steep toward the 18-hour mark.
Filtration Tactics: Achieving a Grit Free Iced Coffee Concentrate
When the time is up, you must separate the solids from the liquid carefully. First, strain the entire mixture through a standard fine mesh sieve set over a clean pitcher to catch the bulk of the grounds. Discard this slurry.
Now comes the crucial second pass: line that same sieve with damp cheesecloth or a paper filter. Slowly pour the strained liquid through this finer layer. Do not rush this secondary filtration; gravity needs time to pull the micro fines through.
Squeezing the filter bag releases bitter, undesirable compounds, so let it drip naturally. The result is a clean, clear Iced Coffee Concentrate .
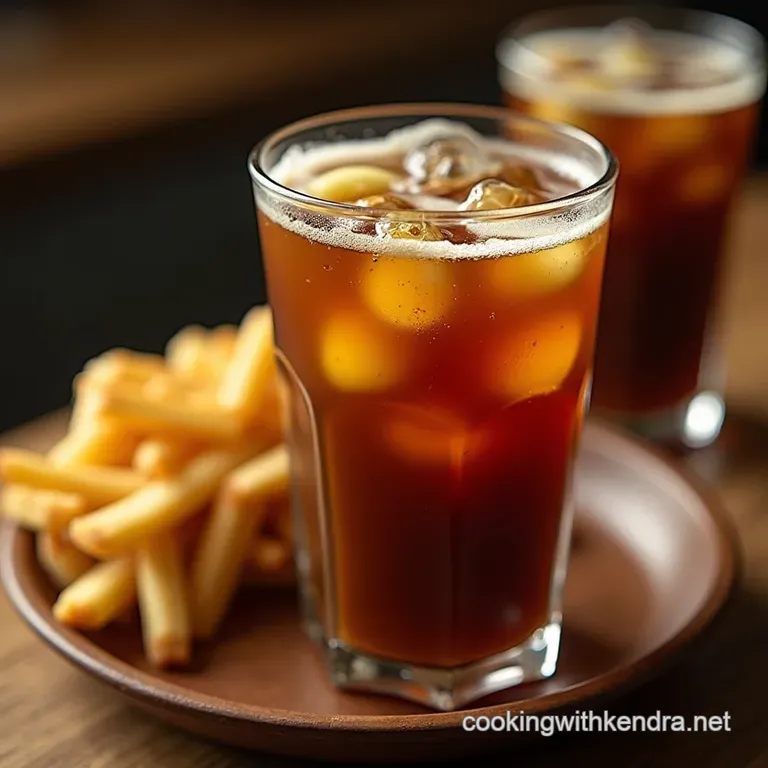
Elevating Your Brew: Creative Ways to Utilize Concentrate
This concentrate is the versatile cornerstone of your Iced Coffee repertoire. Beyond the classic milk and ice combination, this potent brew opens doors to exciting variations. Use it to make creamy frappes, add a robust kick to summer cocktails, or even blend it into milkshakes.
Its inherent smoothness means it pairs beautifully with vanilla, hazelnut, or caramel flavourings added either directly to the serving or during the steep itself.
Longevity & Storage Secrets for Peak Freshness
One of the greatest benefits of making a Cold Brew Coffee Recipe concentrate is its staying power. Once filtered, transfer the finished liquid to an airtight container and refrigerate immediately.
Stored properly away from strong odours, this concentrate maintains excellent flavour integrity for up to two weeks. Always give it a gentle swirl before serving, as some minor sedimentation can occur over time.
The Ultimate Iced Coffee Serving Ratio Guide
When preparing to drink, remember this is concentrate. A fantastic starting point is the 1:1 ratio: one part concentrate mixed with one part liquid (cold milk, water, or a dairy alternative). If you prefer a lighter coffee experience, scale up to 1 part concentrate to 2 parts liquid.
Adjust sweetener to taste after mixing the coffee and liquid base.
Flavor Infusions: Adding Spices During the Steep
To infuse unique notes without adding syrups later, consider flavour infusions during the main steep. For a warm flavour profile ideal for the autumn months, add one cinnamon stick and three lightly crushed cardamom pods directly into the container alongside the grounds and water.
Remember to remove these solids before you begin the straining process.
Troubleshooting Bitterness and Sour Notes After Steeping
If, upon tasting the final concentrate before dilution, you notice lingering bitterness, this is almost always due to an overly fine grind or over steeping (past 18 hours). Next time, grind significantly coarser or reduce the steep time by a couple of hours.
Conversely, if the coffee tastes flat or sour, it likely means under extraction increase the steep time slightly or ensure all grounds were fully submerged during the initial mixing phase.
Quick Navigation: Social Share Options for This Recipe
If you found this guide to making the Iced Coffee at Home invaluable, please share your results! Tag us in your photos showing off your Iced Coffee vs Cold Brew comparisons.
Your feedback helps others discover how simple it is to achieve café quality Iced Coffee Travel Tips by preparing this concentrate in advance.
Recipe FAQs
What's the trick to making sure my Iced Coffee isn't bitter?
The key to avoiding bitterness with this recipe lies in two things: grinding your beans very coarsely and keeping the steep time reasonable (12-18 hours). Coarse grounds prevent over extraction of those harsh tannins, which is what usually ruins a batch. Also, remember never to squeeze the grounds when filtering!
Can I use regular hot brewed coffee to make Iced Coffee quickly?
You certainly can, but it won't be the same quality it often tastes watered down once the ice melts, leading to that disappointing, weak brew. Our recipe focuses on Cold Brew Concentrate because the slow, cold extraction process pulls out sweeter, smoother flavours inherently, which hold up brilliantly against ice.
How long can I store this Cold Brew Concentrate, and what’s the best way?
Stored properly in an airtight container in the fridge, this concentrate is a champion and will last for up to two weeks. That’s perfect for having ready-to-go coffee for almost a fortnight! Just give it a good shake before serving, as a little sediment might settle at the bottom.
I don't have a fancy grinder; what’s the best way to get the right texture for the Iced Coffee?
If you are using a blade grinder, pulse it very briefly, checking the texture constantly you are aiming for coarse sea salt. If you are stuck with pre-ground, ask your local coffee shop if they can grind it for 'French Press,' as that's generally coarse enough for this method.
A fine grind will just result in a muddy mess, bless it.
What milk alternatives work best with this strong Iced Coffee concentrate?
Oat milk is an absolute corker when paired with cold brew; it’s naturally creamy and complements the nutty notes beautifully. Almond milk is a lighter option if you're counting calories, but do check that it’s unsweetened to keep control of the sugar.
Zerobitterness Cold Brew