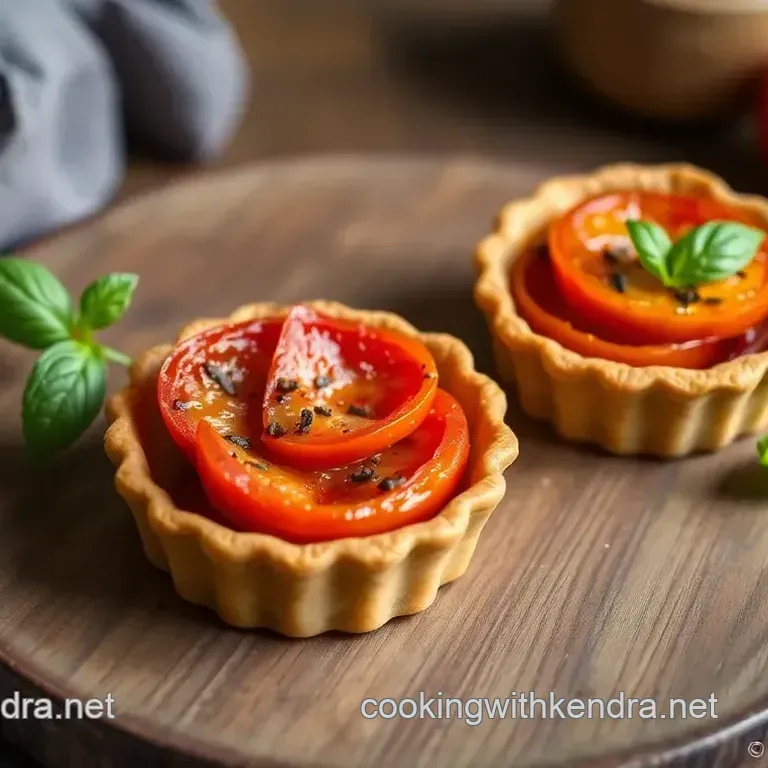
30-Minute Heirloom Tomato Tartlets
- Essential Ingredients Guide for Your Kitchen Adventures
- Professional Cooking Method
- Pro Tips & Secrets for Your Heirloom Tomato Tartlets
- Perfect Presentation: Make Them Instagram-Worthy
- Storage & Make-Ahead: Keep ‘Em Fresh
- Creative Variations: Make It Your Own
- Complete Nutrition Guide: Quick Health Check
- Expert FAQ Solutions: Your Common Queries Answered
- Conclusion: You’ve Got This!
- 📝 Recipe Card
Oh my gosh, have you ever found yourself with a pile of ripe heirloom tomatoes and zero ideas? that was me last summer, standing in my kitchen like a deer in headlights.
My neighbors had gifted me these beauties from their garden, and i knew i had to do something special. after some trial and error, bam ! i whipped up some 30-minute heirloom tomato tartlets , and let me tell you, they stole the show at my backyard bbq.
Everyone was asking for the recipe, and i couldn't help but feel like a culinary rock star for a hot minute!
So, if you’re looking for a quick appetizer that feels fancy but doesn’t take a ton of time to prepare, keep reading.
These tartlets are all about those juicy, garden fresh heirloom tomatoes, and you can whip them up in just thirty minutes.
Seriously, whether it's a weekend brunch or a last minute gathering, you gotta try these!
Recipe Overview
The beauty of heirloom tomato tartlets is that they haven’t just popped up out of nowhere they’ve got roots! heirloom tomatoes have been grown for generations, often passed down through families because of their unique flavors and colors.
While modern folks might love their uniform, store-bought varieties, there's nothing like biting into an heirloom and experiencing that burst of sweetness that speaks of summer.
Now, let’s talk real world relevance: these tartlets are not just trendy; they’re downright delicious. not to mention, 30-minute meals are a lifesaver during those chaotic weeknights.
Between soccer practice and dinner prep, who has time to fuss in the kitchen? plus, they won’t break the bank grab a sheet of puff pastry and a handful of tomatoes, and you’re set.
Making these is a cinch; even your kids could help out! this recipe falls under the “easy baking recipes” category, making it beginner friendly.
You’ll find the yield is wait for it a whopping six tartlets. just enough to feed a small crowd or keep a few for yourself (i won’t judge!).
Key Benefits
Let’s get down to the nitty gritty why make these tartlets? first off, they’re pretty darn healthy! with fresh tomatoes and ricotta, you’re packing in nutrients left and right.
We’ve got vitamins, antioxidants, and some good ol’ calcium from that cheese. i call that a win!
One of the unique selling points? they’re a great way to showcase those extraordinary heirloom tomatoes. plus, they double as elegant appetizers at dinner parties or cheerful summer gatherings.
Trust me, serving these will make your friends think you’re a gourmet chef. and they’re a lot easier than they look no one needs to know how simple they really are!
And hey, if you’re searching for finger food recipes or something to nibble on while sipping wine, these tartlets are perfect for providing a balance between fancy and casual.
You’ll want to serve them warm, with a drizzle of balsamic reduction sauce on top for that extra zing easy to impress!
You can even get creative with the filling if you want! Think spinach or caramelized onions for more depth. The options are endless!
So, who’s ready? Let’s dive into the ingredients for this breeze of a recipe!
Essential Ingredients Guide for Your Kitchen Adventures
So, you want to cook up something fabulous, huh? let's dive right into the essential ingredients you need to set yourself up for culinary success.
Knowing your staples can really make or break your kitchen skills. i learned that the hard way! picture this: you're ready to whip up a scrumptious dish like heirloom tomato tartlets , but you realize you're missing a critical item.
Ugh, the frustration!
Premium Core Components
Detailed measurements: first things first, measurements matter, folks! for instance, if you're using 2 cups heirloom tomatoes (about 300g) in your tartlets, you want to make sure you're precise.
If you’re not sure, always have a digital scale handy. trust me, it’s a game changer.
Quality indicators: next up, let’s discuss how to recognize good ingredients. when picking heirloom tomatoes, look for vibrant colors, a slightly firm but gentle feel, and no mushy spots.
Freshness is key nothing beats the taste of ripe, garden fresh tomatoes!
Storage guidelines: now, once you have your goodies, you need to know how to store them right. keep your heirloom tomatoes at room temperature.
Storing them in the fridge can ruin their flavor. for ricotta, keep it sealed tightly in the fridge for about 5-7 days .
Freshness tips: always, always check the expiration dates on dairy. and remember, if something smells "off," it's probably best to ditch it.
The last thing you want is a bad ingredient ruining your cooking vibe.
Signature Seasoning Blend
Essential spice combinations: bringing your food to life requires great seasonings. a pinch of salt and freshly cracked pepper usually does the trick, but don’t be afraid to think outside the spice rack .
For our tartlets, fresh herbs like basil or thyme are your best friends!
Herb Selections: Speaking of herbs, basil pairs beautifully with the sweet acidity of heirloom tomatoes. Feel free to mix it up oregano works too if you're feeling adventurous.
Flavor enhancers: and let’s not forget a drizzle of balsamic reduction sauce! it adds a lux touch to any dish.
Honestly, why didn’t i think to use it earlier in my cooking journey?
Smart Substitutions
Common Alternatives: Sometimes you just can’t find heirloom tomatoes no worries! You can easily substitute with whatever fresh tomatoes you find. Grape tomatoes are a great option, too.
Dietary Modifications: For those avoiding dairy, try a plant based ricotta alternative. There are so many available now that taste just as good. Your taste buds won't even know the difference!
Emergency Replacements: Out of puff pastry for those quick tartlet recipes? You can improvise! Use a tortilla as a base for a rustic tart . It's not traditional, but it works!
Kitchen Equipment Essentials
Must have tools: you really can’t go wrong with a solid mixing bowl, whisk, and some tartlet pans. if you don’t have tartlet pans, don’t stress a muffin tin does the job just fine.
Alternative Equipment Options: Rolling pins? Nah! You can use a wine bottle if needed just make sure it’s clean. Trust me, it’ll work like a charm!
Preparation Tips: Prep your ingredients first. It streamlines everything. Especially when you’re planning to Bake Heirloom Tomato Tartlets in 30 Minutes . Time is of the essence!
Storage solutions: finally, remember to store your ingredients properly! i can't tell you how many herbs i've had to toss because i stored them willy nilly.
Stick 'em in a glass of water in the fridge. they’ll last longer.
Now that you’re armed with all these savvy tips and tricks, you’re more than ready to tackle your heirloom tomato tartlets ! grab those ingredients, assemble your tools, and get ready for a delicious ride.
Trust me; once you whip these up, you’ll want to share them at every gathering. keep reading for the step-by-step instructions to make your bite sized, flaky delight come alive!
Professional Cooking Method
Cooking is like being an artist, and every good artist knows: a masterpiece starts with the right preparation! whether you’re whipping up something special for brunch or craving a quick appetizer like those bake heirloom tomato tartlets in 30 minutes there’s a method to the madness.
Let’s break it down into easy steps and tips that’ll take your cooking skills to the next level.
Essential Preparation Steps
First things first let’s talk mise en place . this fancy french term just means “everything in its place.” before you even think about turning on the oven, get your ingredients ready.
Chop those heirloom tomatoes, measure out the ricotta, and have everything at arm's reach. trust me, it’ll save you from the chaos when you’re in the middle of mixing.
Now, onto time management tips . if you’re making those mini tartlet appetizers, you’ll want to keep an eye on the clock.
I recommend setting a timer for each stage: 10 minutes for prep, 20 for baking. simple, right? this keeps you focused and less likely to start staring out the window or scrolling through your phone.
Organization strategies come next. keep your workspace tidy. a clutter free zone equals a clear mind! place all dirty dishes on one side and clean utensils on the other.
You’ll thank me later when it’s time to clean up.
Safety considerations are equally important. Remember to watch out for sharp knives and hot oven racks! And for the love of all that’s holy, don’t forget to use oven mitts.
Step-by-step Process
Now let’s dive into the juicy stuff! Here’s a straightforward, numbered process for those beautiful tartlets you’re about to create.
- Preheat Oven: Set it to 400° F ( 200° C) —this will get the crispy crust you love!
- Prepare Puff Pastry: Roll it out and cut circles to fit into your tartlet pans.
- Fit Pastry into Pans: Press the pastry into the pans and poke holes with a fork to avoid bubbling.
- Make the Filling: Combine ricotta, egg, Parmesan, basil, olive oil, salt, and pepper. Whisk until smooth it should look creamy!
- Assemble Tartlets: Pour that ricotta goodness into the pastry and layer the heirloom tomatoes.
- Bake: Pop them in the oven for 20 minutes . Keep an eye out for that golden color.
- Cool and Serve: Let them sit and enjoy the amazing smells before diving in.
Expert Techniques
If you want to make your tartlets pop, here are some professional methods . First, pre-bake the puff pastry for about 5 minutes to lock in crispiness. It’s a game changer.
Also, focus on temperature control . Baking is all about precision. If they’re too hot, you might burn the pastry; too cool, and they’ll be soggy. Aim for that sweet spot!
Timing is crucial, too. Keep a timer handy or set a reminder. And while baking, use visual cues for doneness —the dough should be golden and the filling slightly puffed.
Success Strategies
Now, a few success strategies to avoid common mishaps. Don’t overload the tartlets with tomatoes, or you’ll end up with soggy bottoms. Keep the filling balanced and light.
For quality assurance , always taste as you go. it’s not just about cooking you want those flavors to sing! and if you’re making a batch ahead of time, allow the cooked tartlets to cool, then store them in the fridge.
Before you serve, won't you drizzle some balsamic reduction sauce on top? It’ll elevate your tartlets to gourmet status trust me!
In the world of appetizers, these 30-minute meals are a winner. Whether it’s for a light meal, a summer gathering, or brunch with friends, they’ll be a delightful hit.
Overall, cooking is all about enjoying the process. so, take a breath and have fun with it! in the next section, we’ll dive into additional information , tips, and variations to keep your cooking journey thriving.
Happy baking!
Pro Tips & Secrets for Your Heirloom Tomato Tartlets
Oh my gosh, let’s talk about what makes these heirloom tomato tartlets sing! i’ve learned a few things over the years that can turn your good dish into something amazing .
First off, don’t be shy about your seasoning . a sprinkle of salt on those heirloom tomatoes before using them? yes, please! it helps to draw out their natural juices, making each bite explode with flavor.
Now, if you’re in a pinch for time, a quick tip is to prep your puff pastry ahead of time.
You can roll it out and cut it into circles a day before. just keep them wrapped tight in the fridge.
This little hack cuts down your overall prep time so you can bake heirloom tomato tartlets in 30 minutes . honestly, nobody needs to know your secret!
And let’s talk about presentation . just placing them on a plate isn't enough. drizzle a little balsamic reduction sauce around the edge.
It adds that gourmet look! plus, the sweet and tangy flavor is just perfect with the tomatoes.
Perfect Presentation: Make Them Instagram Worthy
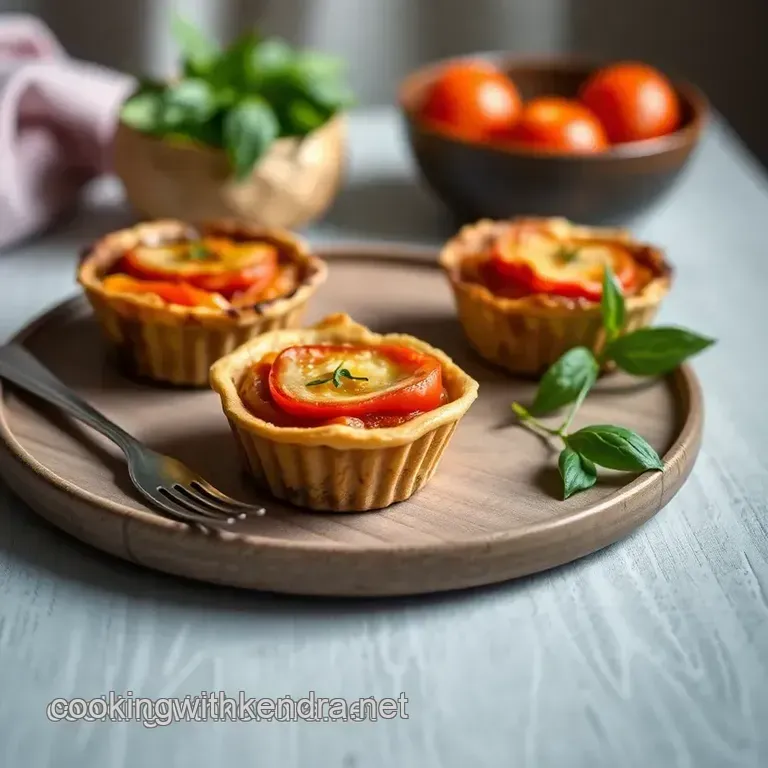
When it comes to plating, you want those tartlets to look like they belong in a fancy restaurant. layer them on a nice platter and maybe even go wild with some garnish ideas .
Chopped basil sprinkled on top gives a pop of color and makes it look like you actually know what you’re doing!
Mix up your color combinations, too. The vibrant reds, greens, and yellows of the heirloom tomatoes can be stunning. When you’re making mini tartlet appetizers , remember, you eat with your eyes first!
Storage & make-ahead: Keep ‘Em Fresh
Let’s face it; sometimes life gets busy, and you may not be able to cook everything right before guests arrive.
No worries! these tartlets are quite forgiving. store them in an airtight container in the fridge for up to three days .
You can even freeze them just pop them in the oven straight from frozen when you’re ready, and bake a couple of extra minutes.
When it comes to reheating, 10 minutes in a 350° F oven is usually all you need. Keep them uncovered, so the crust stays that flaky perfection!
Creative Variations: Make It Your Own
Want to get creative? flavor adaptations are where the fun really is! you can easily switch out ingredients based on what you have on hand or your mood.
Instead of ricotta, try goat cheese , or throw in some sautéed mushrooms. for a summer appetizer , just swap in zucchini or other seasonal veggies to keep things fresh.
If you’re feeling adventurous, you could even dive into regional variations. How about some Mediterranean tartlets with olives and feta? You do you!
Complete Nutrition Guide: Quick Health Check
Alright, i know we love delicious food, but let’s chat about what’s going into your body too. these tartlets pack in calcium from the cheese and plenty of vitamins from those garden fresh tomato dishes .
Each tartlet has around 220 calories , making them a decent option for a light meal or snack without the guilt.
Don’t stress too much over portions either; this recipe is meant to be enjoyed and shared. Just remember everything’s better in moderation!
Expert FAQ Solutions: Your Common Queries Answered
Have questions? i’ve been there! one of the most common concerns is how to ensure your savory tartlets don’t get soggy.
The key is to always prick the base with a fork, as it allows steam to escape.
Another popular issue is filling spillage. If you’re using puff pastry , make sure to give it a little edge. That way, it can hold everything in without running over.
Conclusion: You’ve Got This!
Making heirloom tomato tartlets is easier than you think, and once you nail it, you'll have a go-to recipe for any occasion be it a casual brunch with friends or a fancy dinner party.
Trust me on this; you’ll wow everyone at the table! so grab those heirloom tomatoes and get started! happy baking, folks!
Bake Heirloom Tomato Tartlets In 30 Minutes