Crispy Maple Soy Pork Belly with Sticky Ginger Glaze
- Honestly, Do You Dream of Crackling?
- The Secret to Crispy Success
- Why This Pork Belly is a Triumph
- Ingredients & Essential Kit for the Perfect Crackle
- Prep Stage Zero: The Scoring Secret
- The Critical Drying and Chilling
- Melting the Meat: Low and Slow
- Tidy Up and Tuck In: Chef’s Notes
- Frequently Asked Questions
- 📝 Recipe Card
Honestly, Do You Dream of Crackling?
Honestly, who doesn't adore perfect pork crackling technique ? Finding a way to get juicy meat AND that incredible shatteringly crunchy skin felt impossible.
It was my white whale in the kitchen for ages! I have tried countless methods, honestly. But I finally nailed it with this crispy maple soy pork belly recipe.
It is a total corker of a dish.
The Secret to Crispy Success
This method relies on careful planning. It needs to be perfectly managed . This is not a rushed meal, you know? The flavor profile is amazing.
It is salty, deeply savoury, and beautifully sticky sweet. This recipe uses the classic Dutch oven pork belly method . However, we add a necessary, modern twist.
The resulting dish is tender and rich.
This pork belly is not hard to make. It does require medium difficulty. That is mostly due to the timing needed.
We need precise cooking steps . We are going for a true masterpiece here. The whole active process takes about three hours.
But the oven does most of the heavy lifting. The key is the controlled chilling process . It is totally non-negotiable.
This recipe serves four very happy people.
Why This Pork Belly is a Triumph
Pork belly is rich in B vitamins. It is certainly a decadent treat, though! This is the perfect centrepiece for a Sunday dinner.
Or maybe a really fancy Friday night feast. What makes it unique is the texture contrast. We use a low and slow braising temperature .
This ensures the meat is spoon tender first. Then we dry the skin completely later.
The pre-cooking prep is critical. I struggled for years to figure out how to score pork belly skin . It must be cut deep, but not into the meat.
That tiny detail changes everything. This dish requires meticulous preparation dish work up front. That means the cooking itself is super relaxed.
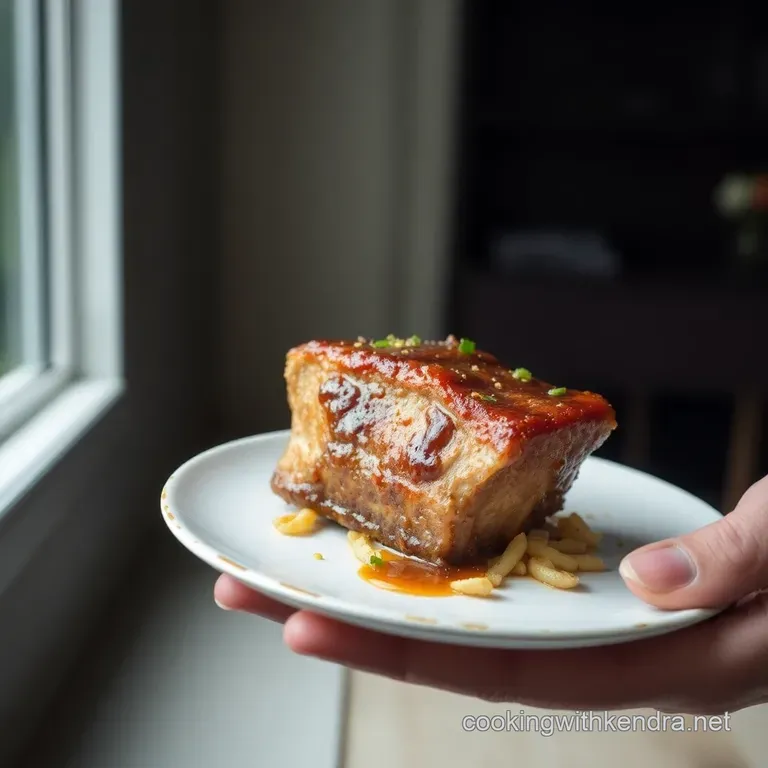
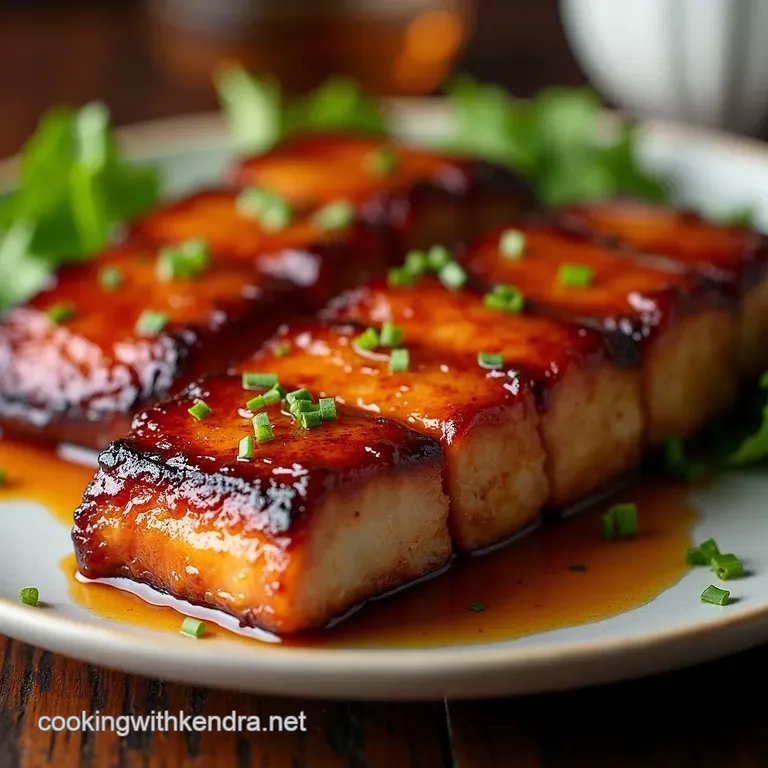
The payoff is huge! You get meat that melts away. The crackling is loud enough to wake the neighbours. Oh my gosh, and don't forget the rich, sticky ginger glaze recipe ! That sauce finishes everything beautifully.
It is simply delicious.
Ingredients & Essential Kit for the Perfect Crackle
If you want that truly shatteringly crunchy skin , we need to start strong. Honestly, the beauty of this dish, the crispy maple soy pork belly , is that the ingredient list isn't huge.
It’s a meticulous preparation dish , but the shopping is easy. It’s about how we treat these core items. We are building massive flavour here, ready for that final sticky ginger glaze recipe .
Quality Matters (A Short List)
You need a proper slab of pork belly. Go for skin-on! I learned the hard way that cheap belly doesn't render well.
Ask your butcher for a piece around 1.2 kg (2.5 lb) . Quality maple syrup is non-negotiable don't skimp. We need Grade A Dark Robust.
For the braise, use 120 ml (½ cup) of dark soy sauce and 120 ml (½ cup) of that good maple stuff.
Everything else is standard pantry fare. The spices star anise, ginger, garlic are the heart of the braising liquid. Following the precise cooking steps means respecting these measurements.
Gear for the Low & Slow Braising Temperature
This recipe is a breeze if you have the right gear. First up: the scoring. This is critical to the perfect pork crackling technique .
You absolutely need a very sharp knife. I use a fresh utility blade for how to score pork belly skin it sounds bonkers, but it gives me clean lines every time.
It's the only way I've managed to get those deep channels without slicing into the meat.
Next, the vessel. A heavy bottomed Dutch Oven is essential for the Dutch oven pork belly method . It holds that consistent, low and slow braising temperature of 150° C ( 300° F) beautifully.
If you don't have one, use a deep casserole dish with a tight lid. You need something that can handle the heat and keep the steam in.
The final bit of kit is a wire rack and baking tray. After the braise, the crucial step is the controlled chilling process .
This is where the magic happens! We slice it cold, which is key. Honestly, the first time I tried this, I rushed the chilling.
Big mistake! The meat crumbled. Now I know that properly managed time in the fridge that overnight rest is what lets us slice those beautiful, clean portions before they get their final crisp.
You’ll be thanking yourself later when you see that truly amazing result.
Oh my gosh, let’s talk crispy maple soy pork belly ! This dish is not for the faint of heart or the impatient.
It’s an absolute corker when done right. But it requires a seriously managed approach. This meticulous preparation dish guarantees incredible results.
Honestly, I learned the hard way by rushing the chilling step once. The final crackling was rubbish. Never again!
Prep Stage Zero: The Scoring Secret
This first step is the very structure of the entire dish. It's all about the initial precise cooking steps . You absolutely must nail how to score pork belly skin .
You need the sharpest thing you own. A razor blade works best, truthfully. I tried a dull knife once. It ripped the skin, tearing up the surface.
Disaster! You only want to cut the skin and the fat layer. Never touch the beautiful meat below. Aim for neat, parallel lines, about 1 cm apart.
This creates channels for the fat to escape later. It's essential for achieving true crunch.
The Critical Drying and Chilling
Want the perfect pork crackling technique ? You need dryness. Pat the whole belly completely dry, especially the skin. Then rub coarse salt deeply into those scores.
Make sure it sinks right into the crevices.
Place it uncovered in the fridge. Leave it there for at least 4 hours , preferably overnight ( 12 hours ).
This controlled chilling process pulls every last bit of moisture out of the skin. That moisture is the enemy of shatteringly crunchy skin .
Next, heat up your Dutch oven pork belly method pot. Sear the flesh side only for 3 4 minutes .
You want a deep golden colour here.
Melting the Meat: Low and Slow
Now for the real magic. This is where we build the base for the sticky ginger glaze recipe . Sauté the ginger and garlic first.
Deglaze the pot with rice wine vinegar. Then add the rest of the sweet and savoury liquids. Bring the liquid to a gentle simmer.
Place the seared pork in, skin side up. The liquid should cover two-thirds of the meat. The skin must remain exposed.
Lid on, transfer to your oven at the low and slow braising temperature of 150° C ( 300° F) . Cook for 2 hours 30 minutes .
When finished, the meat should feel completely pliable. Almost like non-human vertebrae totally tender and structure less. This managed cook time sets up the whole dish for success.
Tidy Up and Tuck In: Chef’s Notes
Honestly, after going through the Dutch oven pork belly method and executing all those precise cooking steps , the hard work is done! Seeing that glorious shatteringly crunchy skin come out of the oven is such a rewarding feeling.
Now, let’s talk about enjoying this magnificent meal and what happens to the leftovers if there are any, that is!
Serving Up the Glory
This crispy maple soy pork belly is rich. You need balance. When I first made this, I served it with heavy mashed potatoes and nearly put myself in a food coma! Lesson learned.
Now, I pair the deep flavour of the meat with something light. A fresh, sharp Asian slaw is perfect. It cuts right through the richness.
Think crunchy cabbage, lime, and a bit of coriander. Simple steamed rice is also great. Don't forget to drizzle extra of that lush, sticky ginger glaze recipe right over the top.
Just avoid coating the skin directly until the very last minute to keep that perfect pork crackling technique intact.
How to Manage Leftovers
The secret to success with this meticulous preparation dish doesn’t stop when it leaves the oven. Storage is key! We need to make sure that fantastic texture survives.
Once cooled, store the pieces in an airtight container in the fridge. They’ll keep nicely for up to four days.
If you plan to freeze it, I suggest freezing the meat before the final crisping stage. Slice it cold, glaze it separately, and freeze the meat.
When ready to eat, thaw the pork, crisp it, and reduce your reserved glaze.
For reheating, you must use the oven, not the microwave! We must make sure the reheating process is properly managed .
Preheat your oven to 180° C ( 350° F) . Place the belly pieces skin side up on a rack. Reheat for 10 to 12 minutes.
This blast of heat reactivates the fat under the skin, giving you back that satisfying crackle.
Easy Adaptations
If you need a low-sodium option, this is easy to fix. Use low-sodium soy sauce and low-sodium stock. It’s a simple swap that doesn't mess up the overall balance.
If you're swapping ingredients seasonally, try adding star fruit or orange slices to the braising liquid in winter. It gives a lovely citrus hint alongside the low and slow braising temperature .
Remember, the technique for how to score pork belly skin remains the same, regardless of the flavour profile!
A Quick Nutrition Look
Yes, this is pork belly. It is fat, flavour, and joy. But it is also a fantastic source of protein.
Pork is packed with essential B vitamins, too. This dish is hearty and incredibly filling. Because of the controlled chilling process we use, we skim off a lot of the rendered fat before serving, which helps a bit.
Treat it as a special meal, not an everyday standby.
This dish is a project, a commitment, and a complete triumph. You’ve done the hard graft. Now sit back, grab a beer, and enjoy the fruits of your culinary labour!
Frequently Asked Questions
Why is the "managed" overnight chilling step so crucial for this pork belly?
This cooling period is absolutely vital, mate! By chilling the meat and the surrounding fat, the pork belly becomes delightfully firm and much easier to handle. This firmness allows you to slice the belly neatly into perfect, even portions without it crumbling, which is essential for achieving the best final presentation and even crisping.
My crackling sometimes comes out chewy, not shattering. What’s the secret to getting a proper, crunchy crisp?
Two things are key here: the drying process and the temperature finish. Make sure the skin is bone dry before the initial seasoning and that you only salt the skin, not the meat underneath.
For the final crisping, use very high heat (220°C/425°F) and check it constantly, as it often only takes 10-15 minutes to puff up beautifully.
I’m short on time can I skip the braise and just stick this in the oven to roast?
That would be a bit of a faux pas for this meticulous method, unfortunately. Skipping the low and slow braise means you miss out on breaking down the tough connective tissues in the belly, leaving you with chewy, dry meat and a less succulent texture.
The long, controlled braise is the essential step that renders the fat perfectly, setting you up for that incredible melt-in-your mouth interior.
Can I make the pork belly ahead of time, and how should I store any leftovers?
The entire dish is fantastic for making ahead, right up to the final crisping stage. You can braise, chill, and slice the belly 2 3 days in advance and keep it sealed in the fridge until you are ready to crisp it up.
Leftovers are generally spot-on for about 3 4 days, but bear in mind that the crackling will soften once refrigerated.
What can I use instead of maple syrup if I want a less sweet glaze?
If you prefer a more savoury finish, you could swap the maple syrup for a good quality black treacle or dark brown sugar, but only use about half the specified amount. Alternatively, substitute the maple with a deeply flavoured dry sherry or port wine, which will add a lovely complexity without the intense sweetness.
I accidentally cut into the meat while scoring the skin. Have I ruined the whole dish?
Don't panic and chuck it in the bin! While ideal scoring avoids piercing the meat, a small nick won't be a total disaster. Just be careful not to rub too much salt directly into the exposed flesh, as this can draw out moisture and dry that specific area during the braise.
The slow cooking process will still tenderise the whole piece beautifully.
Crispy Maple Soy Pork Belly With Sticky Ginger G