Boiled Shrimp: Perfectly Seasoned in Minutes

- Unlocking the Secret to Flavorful Coastal Boiled Shrimp
- The Science of the Snappy Shrimp: Why Boiling Temperature Matters
- Essential Pantry Staples for Your Aromatic Boiling Liquid
- Mastering the Coastal Boil: A Quick Guide to Perfect Peeling
- Pro Tips for the Perfect Batch & Troubleshooting Common Mistakes
- Keeping Your Catch Fresh: Storage and Make-Ahead Strategies
- Delicious Pairings: What to Serve Alongside Your Seasoned Shrimp
- Recipe FAQs
- 📝 Recipe Card
Unlocking the Secret to Flavorful Coastal Boiled Shrimp
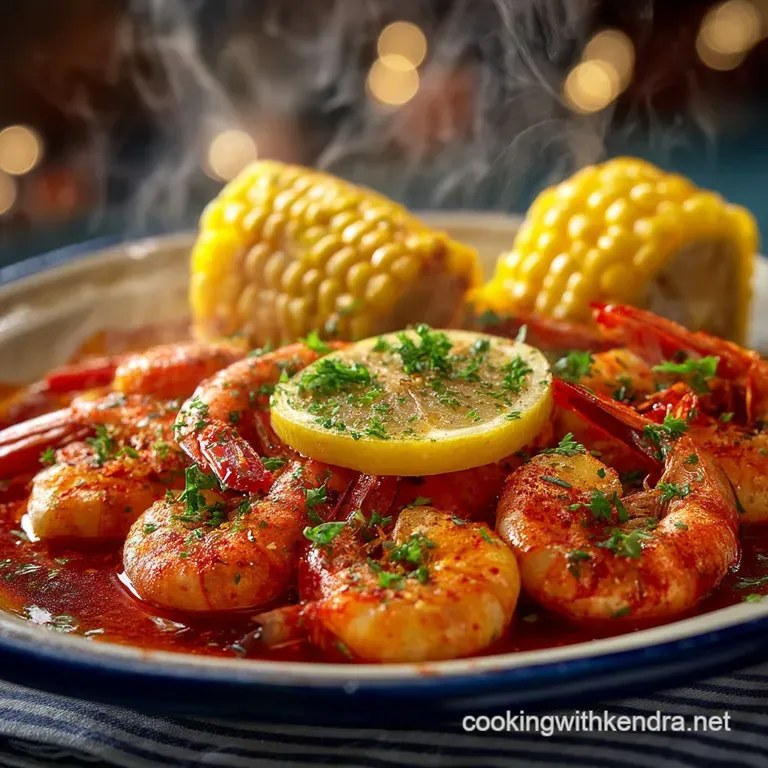
That aroma hits you first: warm, zesty, and salty, carrying the promise of the perfect bite. There’s nothing quite as satisfying as biting into perfectly cooked, snappy Boiled Shrimp . It should have a delightful pop when you chew it, not a squeaky, rubbery resistance.
I spent years making sad, gray, bland versions of Boiled Shrimp , thinking all I needed was water and a dash of salt.
But here is the truth: making great Boiled Shrimp is all about the liquid, the timing, and the shock . It’s a kitchen lifesaver because you can have a massive, impressive platter ready for guests in under 45 minutes, chilling time included.
Seriously, toss this simple, delicious appetizer out and watch it disappear faster than I ate my entire wedding cake.
This isn’t just a recipe; it’s the method that guarantees deeply flavored, perfectly textured shrimp every single time. We are bypassing the boring water method entirely and diving headfirst into the bold, beautiful world of the coastal court bouillon . Let’s get cooking!
The Science of the Snappy Shrimp: Why Boiling Temperature Matters
The biggest mistake people make with Boiled Shrimp is treating it like pasta. You can’t just let it hang out in simmering water for seven minutes. Shrimp protein is delicate and tightens up incredibly fast under heat.
If you cook it too slowly or for too long, you’ve basically created tiny rubber bands.
Defining the Perfect Texture and Deeply Infused Flavor
The perfect Boiled Shrimp has two things going for it: flavor and texture. We achieve texture by cooking fast and stopping fast. The flavor, however, is purely dependent on how aggressive your seasoning liquid is.
We are practically making a potent, concentrated shrimp spice tea, which the quick cooking shrimp will absorb in seconds. That's the secret to amazing Boiled Shrimp .
Is Court Bouillon Necessary? Understanding the Seasoned Liquid Base
Yes, the seasoned liquid base is non-negotiable for superior flavor. Court bouillon just sounds fancy, but it literally translates to "short broth" or "quickly simmered liquid." It’s basically water supercharged with spices, salt, and acidity (usually from lemons).
If you just boil the shrimp in plain water, you end up with bland shrimp that requires a bucket of sauce. We want the shrimp itself to taste fantastic, which is why we spend 5 minutes steeping the liquid before the shrimp even enter the pot.
Prep Time and Yield Overview
| Stage | Estimated Time |
|---|---|
| Active Prep (Seasonings) | 10 minutes |
| Cooking/Steeping Time | 12 minutes |
| Chilling/Infusion | 15– 30 minutes |
| Yield | 4 substantial servings |
The Critical Difference Between Simmering and Rapid Boiling
When preparing your seasoned liquid, you start with a rapid, rolling boil to dissolve the salt and activate the spices. But when the Boiled Shrimp finally goes in, you want the temperature high enough to cook quickly, but not so high that the vigorous rolling action beats up the delicate tails.
Aim for the water to return to a gentle boil or hard simmer immediately after adding the shrimp, ensuring even cooking across the batch.
Why the Ice Bath Stop is Non-Negotiable for Texture
This is crucial for the snappy texture we crave. When protein cooks, it contracts. Even after you pull the shrimp out of the boiling water, residual heat (carryover cooking) continues to tighten the protein fibers. This is what leads to rubbery, overcooked shrimp.
Whether you choose the quick ice bath or the slower flavor soak (which still requires eventual chilling), you must stop the cooking process promptly to keep the shrimp plump and tender. The best Boiled Shrimp should stop cooking the moment it turns pink.
Optimal Timing: Cooking Shrimp Based on Size
The size of your shrimp dramatically affects cook time. Small shrimp (51/60 count) take barely 90 seconds. We are using large (21/25 count) or jumbo (16/20 count) shrimp here because they handle the boiling and soaking better.
For large, shell-on Boiled Shrimp, you only need 2 to 3 minutes of actual cooking time. Remember: watch the shape. The perfect "C" shape means cooked; a tight "O" shape means rubbery tragedy.
Essential Pantry Staples for Your Aromatic Boiling Liquid
This simple list delivers complex flavor. Don't skip the seasoning! Trust me, it’s worth buying the big can of Old Bay if you love perfectly seasoned seafood.
Selecting the Best Raw Shrimp (Fresh vs. Frozen Considerations)
Always buy shell-on, raw shrimp for the best Boiled Shrimp . The shell protects the meat and traps the savory seasoning right next to the flesh as it cooks. Frozen shrimp is often superior to "fresh" shrimp displayed at the seafood counter, which has usually been thawed days ago.
Buy frozen, thaw overnight in the fridge, or place in a bowl of cold running water for 15 minutes. Substitution: If you must use peeled shrimp, cut the cook time by 30 seconds and skip the final infusion soak go straight to the ice bath to minimize flavor loss.
The Role of Acidity: Lemon and Vinegar in the Boil
Acidity is a key flavor balancer in this particular Boiled Shrimp Recipe . We are using fresh lemons, sliced in half and tossed right into the pot. The lemon oil from the rind and the tart juice permeates the water, cutting through the heavy saltiness of the seasoning blend.
Substitution: If you don't have fresh lemons, use 2 3 tablespoons of white vinegar or lemon juice concentrate in the boiling liquid instead.
Recommended Coastal Seasoning Blends (Salt and Spice)
I am an Old Bay purist for my classic Boiled Shrimp . It’s the perfect mix of celery salt, paprika, and warming spices. Make sure you use enough Kosher salt; the water should taste like the sea itself.
If it tastes palatable before the shrimp go in, it’s not seasoned enough to flavor the shrimp.
| Seasoning | Recommended Amount | Substitution |
|---|---|---|
| Old Bay | ⅓ cup | Cajun seasoning (Tony Chachere’s) or a blend of celery salt, cayenne, and paprika. |
| Kosher Salt | ¼ cup | Do NOT substitute with table salt; the flavor will be harsh. Reduce amount slightly if using fine sea salt. |
Fresh Aromatics: Onions, Garlic, and Bay Leaf
Garlic and bay leaves add depth without overpowering the shrimp's natural sweetness. I use six large cloves of garlic, smashed hard with the side of a knife no need to peel them completely.
Substitution: If you are out of fresh garlic, use a tablespoon of dried minced garlic or a few shakes of garlic powder, though fresh is always best for infusing flavor into your Boiled Shrimp .
Mastering the Coastal Boil: A Quick Guide to Perfect Peeling
The process is straightforward, but the timing needs discipline. You must have everything ready before you start the stove. This easy Boiled Shrimp Recipe hinges on preparedness.
Preparing the Aromatic Court Bouillon Base
In your large pot, combine the 8 cups of water, ¼ cup Kosher salt, ⅓ cup Old Bay, the lemon halves, smashed garlic, and bay leaves. Cover the pot and bring it to a rolling, aggressive boil over high heat. Once it hits that hard boil, remove the lid and allow it to simmer vigorously for five minutes.
This steeping time guarantees your liquid is potent and ready to flavor the shrimp.
The Precise Moment to Add the Shrimp
Once the seasoning liquid has steeped and is still boiling, increase the heat if necessary to ensure it's ripping hot. Dump the 2 pounds of raw, thawed, shell-on shrimp into the pot all at once. The boiling action will temporarily stop. Stir gently once. Start your timer immediately .
Rapid Cooling and Draining Techniques
Cook for just 2 to 3 minutes . As soon as you see the shrimp turn pink and curl into that perfect "C," turn the heat off.
Chef’s Note: For the absolute best flavor for your Boiled Shrimp , leave the pot off the heat and let the shrimp sit in the cooling liquid for 5 to 10 minutes. This allows maximum flavor absorption.
Then, strain the shrimp and transfer them immediately to the fridge or a large bowl of ice. If you are in a massive hurry, strain the shrimp right away and plunge them directly into an ice bath to stop the cooking and ensure a super snappy texture.
Shelling and Deveining After the Boil (If desired)
The biggest question about peeling is when to do it. Peel and eat shrimp are typically served shell-on, which is traditional and arguably more fun (and less work for the cook!).
However, if you are using your Boiled Shrimp for a cocktail or a salad, peel them once they are cool enough to handle. The chilled shrimp are much easier to peel cleanly.
Pro Tips for the Perfect Batch & Troubleshooting Common Mistakes
I have made every single mistake in the book, including using fully frozen shrimp (don’t do it!) and forgetting to taste the seasoned water. Learning from my failures means you get perfect results immediately.
How to Prevent Rubberiness (The Overcooked Culprit)
Rubberiness is 99% a result of overcooking. Use the visual cues: if it looks like a tight little ring, it’s done for. The second way to prevent rubberiness is the ice bath. You must stop the carryover cooking!
If you use the infusion method, don't let the shrimp sit in the warm water for more than 15 minutes total before draining and chilling fully.
Boosting the Flavor Post Boil (The Soak Trick)
As mentioned, letting the Boiled Shrimp soak in the highly seasoned liquid as it cools is the ultimate flavor boost. If you want even more coastal intensity, strain the shrimp, then put them back in the pot, pour one cup of the seasoned liquid back in, and toss with a tablespoon of melted butter and a few dashes of Cocktail Sauce Recipe: Best Homemade Shrimp Dip Easy Zesty . This adds a rich layer right before chilling.
Reviving Bland Shrimp
If you accidentally ended up with bland Boiled Shrimp , all is not lost! Create a marinade of melted butter, garlic powder, paprika, and a few drops of hot sauce. Toss the cooled shrimp in this mixture and let them sit in the fridge for 30 minutes before serving.
That little coat of seasoned fat will save the dish.
Keeping Your Catch Fresh: Storage and make-ahead Strategies
The best thing about this Boiled Shrimp Recipe is how amazing it is chilled. It’s perfect for making ahead!
Refrigeration Guidelines for Cooked Shell-On Shrimp
Once cooked and fully chilled, shell-on Boiled Shrimp will last beautifully in an airtight container in the refrigerator for up to 3 days. I find they are actually better the next day after the seasonings have had time to settle into the meat.
Do not leave them out at room temperature for more than 2 hours.
Safe Freezing Practices for Long Term Storage
While freezing cooked shrimp is technically possible, I highly discourage it if you plan to eat them as Peel and Eat Shrimp . Freezing tends to make the texture slightly mushy upon thawing. If you must freeze, drain the shrimp completely, pat them dry, and freeze them in a single layer in a freezer bag, pushing out all the air. They will last 2 to 3 months, but they should only be used in cooked dishes after thawing, such as stirred into a batch of Cajun Shrimp and Rice: Authentic, Quick Skillet Dinner in 45 Mins .
Best Way to Reheat Boiled Shrimp (Without Overcooking)
Don’t reheat Boiled Shrimp! Seriously, it's served cold. Any attempt to reheat shrimp, especially boiled shrimp, results in instant rubberiness. If you absolutely need them warm for a specific dish, toss them into a stir fry or soup at the very last second, allowing them only 30 seconds to warm through no more.
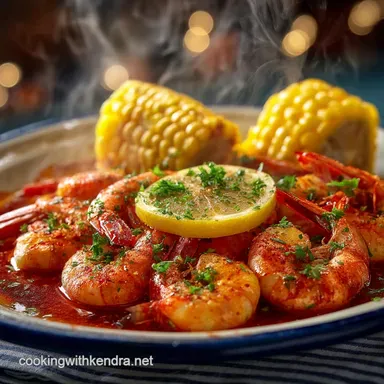
Delicious Pairings: What to Serve Alongside Your Seasoned Shrimp
This Boiled Shrimp platter is hearty enough to stand alone, but it pairs beautifully with simple sides. You don't want to overwhelm that lovely coastal flavor.
For dipping, you absolutely must serve homemade drawn butter infused with a crushed garlic clove. That richness alongside the snappy, seasoned Boiled Shrimp is pure perfection. And of course, a zesty, classic cocktail sauce is always mandatory.
Simple side dishes like coleslaw, potato salad, or some perfectly prepared cold Boiled Broccoli: Tender Crisp Perfection in 15 Minutes are all you need. Keep it light, keep it fresh, and let the incredible flavor of the perfectly cooked Boiled Shrimp be the star of the show! This is truly the only method you need for the best, easiest, and most flavorful Boiled Shrimp Recipe out there. Enjoy!

Recipe FAQs
Why did my boiled shrimp turn out rubbery or tough?
Rubbery texture is the classic sign of overcooking. Shrimp cook extremely quickly, usually within 2 to 3 minutes once the water returns to a boil, depending on their size. To prevent this, remove them immediately from the hot water and transfer them to a cold ice bath to halt any residual cooking process instantly.
Should I boil the shrimp with the shells on or off?
For the absolute best results in a seasoned boil, cook them shell-on. The shell acts as a protective layer, helping the meat retain moisture and preventing it from absorbing too much salt too quickly. They can be peeled easily once they have cooled down.
How do I know exactly when the shrimp are perfectly cooked?
Perfectly cooked shrimp will turn a vibrant pink red color and curl into a loose "C" shape. If they curl into a tight "O" shape, they are usually overcooked. The meat should be firm but still snappy, not mushy or overly hard.
When is the best time to add the seasoning and lemon to the water?
All seasonings, salt, lemon, and spices must be added and brought to a rolling, vigorous boil before you introduce the shrimp. This process creates the aromatic court bouillon, ensuring the water is fully infused so the flavor is immediately imparted to the shrimp upon contact.
Can I use previously frozen shrimp for this recipe?
Yes, you can use previously frozen shrimp, but they must be fully thawed before cooking. Thaw them overnight in the refrigerator, or under cold running water in a sealed bag. Cooking frozen shrimp directly results in uneven texture and significantly lowers the temperature of your boiling liquid.
How long can I safely store leftover boiled shrimp in the refrigerator?
Boiled shrimp should be cooled rapidly and stored in an airtight container within two hours of cooking. They will remain fresh, safe, and delicious for up to 3 to 4 days in the refrigerator. If they develop a slimy texture or ammonia smell, discard them immediately.
Should I use an ice bath if I plan to serve the shrimp hot?
Even if serving hot, you should always shock the shrimp briefly in an ice bath after draining. This immediately stops the cooking process and prevents the shrimp from becoming rubbery. You can then briefly warm them in the seasoned water just before serving, or simply drain them well and serve with melted butter.
Easy Boiled Shrimp Recipe
Ingredients:
Instructions:
Nutrition Facts:
| Calories | 220 kcal |
|---|---|
| Fat | 2 g |
| Fiber | 0 g |
