Easy Homemade Focaccia Bread: Pillowy and Crisp
- Time:15 minutes active + 2 hours 25 mins rising/baking = Total 2 hours 40 mins
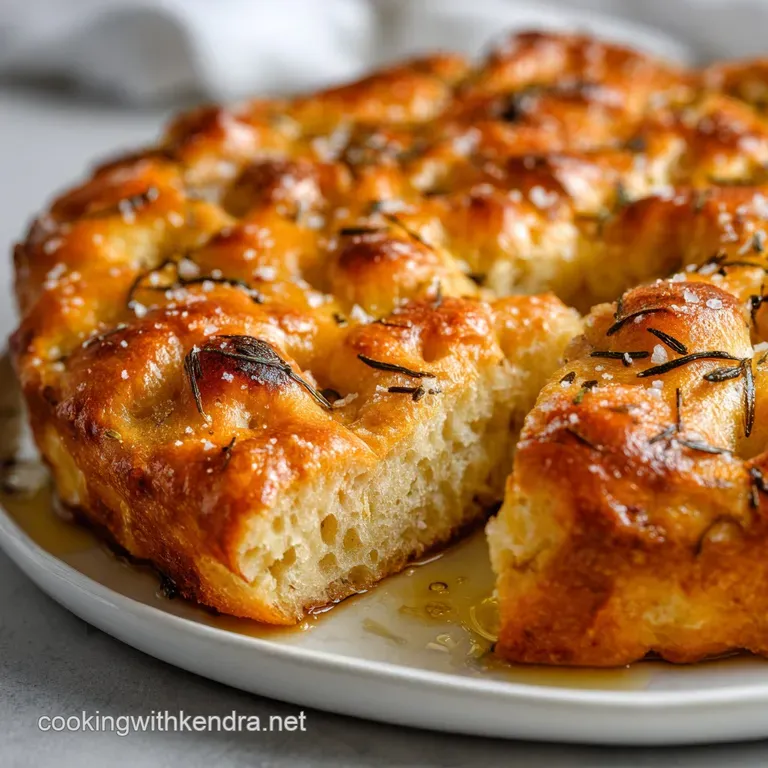
- Flavor/Texture Hook: Mahogany brown crust with a velvety, olive oil soaked crumb
- Perfect for: Weekend brunch, garlic bread lovers, or as a side for a hearty pasta dinner
- Get Your Easy Homemade Focaccia Bread Right
- Why This Bread Stays Airy
- Ingredient Deep Dive
- Pantry Staples and Swaps
- Gear for the Bake
- Step-by-Step Baking Guide
- Fixing Your Dough Mishaps
- Troubleshooting Common Issues
- Tweaking the Base Recipe
- Keeping Your Loaf Fresh
- Best Ways to Serve
- Recipe FAQs
- 📝 Recipe Card
Get Your Easy Homemade Focaccia Bread Right
The scent of roasting garlic and warm olive oil hitting the oven air is honestly my favorite kind of alarm clock. I remember a particularly gray Sunday a few years back when I wanted something that felt like a warm hug but didn't want to spend hours kneading dough.
I just wanted that specific, crackling sound of a crust breaking under a knife, followed by the sight of those huge, irregular bubbles inside.
That day, I realized that the secret isn't in the effort, but in the patience. This easy homemade focaccia bread isn't about technical skill, it's about letting the yeast and the oil do the heavy lifting while you go about your morning.
It's the kind of bread that makes your kitchen feel like a cozy Italian bakery, and it's surprisingly hard to mess up once you know a few tricks.
You can expect a loaf that is light, salty, and deeply savory. We're aiming for a contrast where the bottom is practically fried in olive oil, while the top stays soft and dimpled. It's an effortless win for anyone who thinks they "can't bake bread" because there's no shaping or punching down involved.
Why This Bread Stays Airy
High Hydration: The high ratio of water to flour creates a thin batter rather than a stiff dough, which allows steam to push up larger bubbles during the bake. This is a key concept often discussed by King Arthur Baking when explaining how "wet" doughs produce a more open crumb.
Oil Barrier: A generous layer of olive oil in the pan prevents the dough from sticking and essentially fries the bottom crust. This creates that signature shatter effect when you bite into it.
Slow Fermentation: Letting the dough rest for nearly two hours allows the gluten to relax and the yeast to produce plenty of carbon dioxide. This is what gives the bread its pillowy, cloud like interior.
Honey Fuel: The tiny bit of honey provides immediate sugar for the yeast to eat. This speeds up the initial rise and helps the crust brown more deeply.
| Method | Time | Texture | Best For |
|---|---|---|---|
| Rimmed Sheet | 2 hours 40 mins | Uniformly crispy | Party platters |
| Cast Iron | 2 hours 40 mins | Thicker, fried crust | Small family meal |
| Cake Pan | 2 hours 40 mins | Higher rise, softer edges | Sandwich loaves |
Ingredient Deep Dive
| Ingredient | Science Role | Pro Secret |
|---|---|---|
| All Purpose Flour | Provides structure | Sift it if you see clumps to avoid flour pockets |
| Instant Yeast | Creates the lift | Check expiration; dead yeast means a flat brick |
| Olive Oil | Tenderizes and browns | Use extra virgin for the topping to keep the flavor bold |
| Sea Salt | Controls yeast and flavors | Use flaky salt on top for a professional crunch |
Pantry Staples and Swaps
For this recipe, you don't need anything fancy, but the quality of your oil really makes a difference. Since there are so few ingredients, the olive oil is the star here. I usually use a mid grade oil for the dough and a high end, peppery extra virgin for the topping.
For the Dough
- 3 cups (375g) all purpose flour Why this? Standard protein level for a soft yet sturdy crumb (Substitute: Bread flour for a chewier texture)
- 1 ½ cups (350ml) lukewarm water Why this? Activates yeast without killing it (Substitute: Warm milk for a softer, richer crumb)
- 2 ¼ tsp (7g) instant yeast Why this? No need to bloom in water first (Substitute: Active dry yeast, but bloom it for 10 mins first)
- 1 tsp (5ml) honey Why this? Aids browning and yeast growth (Substitute: Maple syrup or a pinch of sugar)
- 1 ½ tsp (9g) fine sea salt Why this? Essential for taste and yeast control (Substitute: Kosher salt)
- 2 tbsp (30ml) extra virgin olive oil Why this? Adds elasticity to the dough (Substitute: Melted butter for a buttery flavor)
For the Garlic Rosemary Glaze
- ¼ cup (60ml) extra virgin olive oil Why this? The primary flavor carrier (Substitute: Avocado oil, but you lose the peppery notes)
- 1 tbsp chopped fresh rosemary Why this? Woody, aromatic contrast (Substitute: Dried rosemary, but use only 1 tsp)
- 3 cloves minced fresh garlic Why this? Pungent, savory depth (Substitute: 1 tsp garlic powder)
- 1 tsp flaky sea salt Why this? Adds textural pops of salt (Substitute: Coarse sea salt)
| Original Ingredient | Substitute | Why It Works |
|---|---|---|
| Honey (1 tsp) | Maple Syrup (1 tsp) | Similar sugars for yeast. Note: Adds a very subtle autumn sweetness |
| All Purpose Flour | Bread Flour | Higher protein. Note: Result is chewier and less "cakey" |
| Fresh Rosemary | Dried Rosemary | Similar profile. Note: Much more concentrated; use a smaller amount |
Gear for the Bake
You don't need a professional bakery setup for this, but a few specific tools make the process much smoother. I've found that using a flexible spatula is a lifesaver because the dough is incredibly sticky - you don't want to be fighting it with a wooden spoon.
A 9x13 inch rimmed baking sheet is the standard, but a cake pan works wonders if you want a thicker loaf. The rims are important because the olive oil needs to stay pooled around the edges to "fry" the bread. If you use a flat cookie sheet, the oil will just run off, and you'll lose that shatter crisp bottom.
Finally,, a damp kitchen towel is essential. Since we aren't kneading, the dough just needs a warm, humid environment to grow. Covering it with a damp cloth prevents a dry skin from forming on top, which would hinder the rise.
Step-by-step Baking Guide

Right then, let's get into the actual process. The key here is to be gentle. We want to keep as much of that air inside the dough as possible.
- Combine flour, instant yeast, and salt in a large bowl. Note: Mixing dry ingredients first ensures the salt doesn't touch the yeast directly in high concentrations.
- Stir in the lukewarm water, honey, and 2 tablespoons of olive oil. Use a spatula to mix until a shaggy, sticky dough forms and no dry flour remains.
- Cover the bowl with a damp cloth and let the dough rest in a warm spot for 1.5 to 2 hours until doubled in size.
- Pour half of the garlic rosemary glaze oil into a 9x13 inch rimmed baking sheet or cake pan.
- Gently transfer the risen dough into the pan and use fingertips to stretch the dough toward the corners. Note: If it resists, let it rest for 5 mins and try again.
- Drizzle the remaining garlic rosemary oil over the surface. Use fingers to press deep dimples into the dough, pushing down to the bottom of the pan.
- Sprinkle the top with flaky sea salt.
- Bake at 425°F (218°C) for 20–25 minutes until the edges turn deep mahogany brown and the center springs back when touched.
Chef's Tip: For a deeper flavor, try freezing your minced garlic for 10 minutes before adding it to the oil. It helps the garlic distribute more evenly without burning in the high heat. Also, try adding a pinch of espresso powder to your dough to intensify the golden color of the crust.
Fixing Your Dough Mishaps
Even with a simple recipe, things can go sideways. Usually, it comes down to temperature or yeast health. According to Serious Eats, salt can inhibit yeast if they are concentrated in one spot, which is why we mix the dry ingredients thoroughly first.
Troubleshooting Common Issues
| Issue | Solution |
|---|---|
| Why Your Dough Didn't Rise | If your dough is still flat after two hours, your yeast might be dead or your water was too hot. If the water exceeds 130°F, it kills the yeast cells. Next time, use a thermometer or ensure the water |
| Why Your Bread is Too Dense | Density usually happens when the dough is under proofed or the oven isn't preheated. If the dough hasn't doubled in size, those air pockets won't be there to expand in the heat. Be patient with the ri |
| Why Your Crust is Burnt but Middle is Raw | This happens if your oven runs hot or the pan is too shallow. Ensure your rack is in the center of the oven. If the edges are browning too fast, you can loosely tent the top with foil for the last 5 m |
Tweaking the Base Recipe
If you're looking to change things up, this dough is surprisingly versatile. Because it's a high hydration dough, it's a bit more forgiving than a structured loaf. If you love the idea of a softer, more roll like texture, you might enjoy my soft dinner rolls, but for this focaccia, we want that specific open crumb.
Adjusting the Size
To make a half batch, use 1.5 cups of flour and 3/4 cup of water. I recommend using a smaller 8x8 inch pan. Since the dough is thinner, reduce the baking time by about 20% and start checking for doneness at 15 minutes.
Scaling Up
For a double batch, don't just double the salt and yeast - increase them to about 1.5x. Too much yeast can lead to an "off" fermented taste. Work in batches if your bowl isn't large enough, as the dough needs space to expand without hitting the lid.
Flour Swaps
You can swap 1 cup of all purpose flour for whole wheat flour. Just keep in mind that whole wheat absorbs more water, so you might need to add an extra 2-3 tablespoons of water to keep the dough shaggy. This results in a denser, nuttier loaf.
Keeping Your Loaf Fresh
Fresh focaccia is best eaten warm, but you can definitely make it ahead. Because of the high oil content, it stays moist longer than a standard sourdough or white loaf.
Storage: Store leftovers in an airtight container at room temperature for 2 days. In the fridge, it will last up to 5 days, though the crust will lose its shatter crisp quality.
Freezing: Slice the bread first, then freeze the slices with parchment paper between them. They'll stay great for 3 months. This is a lifesaver for quick toasted sandwiches.
Reheating: To bring back that fresh baked feel, avoid the microwave. Instead, pop a slice in a toaster oven or a dry skillet over medium heat for 2-3 minutes. This re crisps the oil fried bottom. For a real treat, try pairing these reheated slices with buttery dinner rolls for a carb heavy feast.
Zero Waste: If you have a few stale pieces, don't toss them. Cube them up and toss them with a bit of garlic butter and parmesan to make homemade croutons for a Caesar salad.
Best Ways to Serve
This easy homemade focaccia bread is the ultimate supporting actor in any meal. While it's great on its own, it really shines when paired with something acidic to cut through the richness of the olive oil.
The classic move is a shallow bowl of extra virgin olive oil and high-quality balsamic vinegar. The salt on the bread pulls the sweetness of the balsamic out perfectly. If you're serving it as a main, it makes a velvety base for a gourmet sandwich.
Try layering fresh mozzarella, heirloom tomatoes, and a handful of arugula on a toasted slice.
For a more rustic approach, serve it alongside a bowl of marinara sauce or a creamy garlic dip. Because of the deep dimples, the bread acts like a sponge, soaking up all the sauce without becoming soggy. It's the perfect companion for a rainy evening and a big pot of pasta.
Recipe FAQs
What is the secret to good focaccia?
Keep the air inside the dough. Be gentle when transferring the risen dough to the pan to preserve the bubbles. This light texture makes it the ideal base for a Italian grinder sandwich.
Is there a quick way to make focaccia bread?
No, the proofing time is mandatory. The dough must rest for 1.5 to 2 hours to double in size; skipping this step results in a dense, heavy loaf.
Is focaccia bread good for diabetics?
No, it is generally not recommended. The high concentration of refined all-purpose flour and honey can cause rapid spikes in blood glucose levels.
Can I make focaccia with all-purpose flour instead of bread flour?
Yes, it works perfectly. This recipe specifically uses all-purpose flour to achieve a tender, soft crumb without needing specialized high protein flour.
How to store leftover focaccia?
Place slices in an airtight container at room temperature. It stays fresh for about two days, or you can freeze slices for up to three months.
Why is my focaccia dough not rising?
Your water was likely too hot. If the water temperature exceeds 130°F, it kills the yeast cells and prevents the dough from doubling in size.
How to create the signature dimples?
Press your fingertips deep into the dough. Push straight down to the bottom of the pan after drizzling the garlic rosemary oil to create pockets that hold the flavor.
Easy Homemade Focaccia Bread

