Healthy Banana Bread Recipe: Moist and Low Sugar
- Time: 10 min active + 55 min baking = Total 65 mins
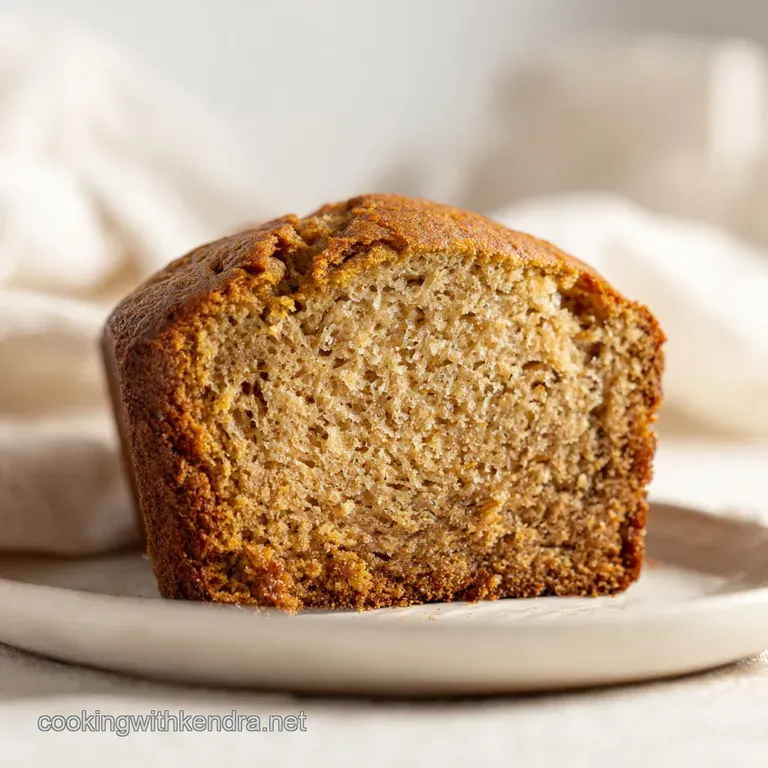
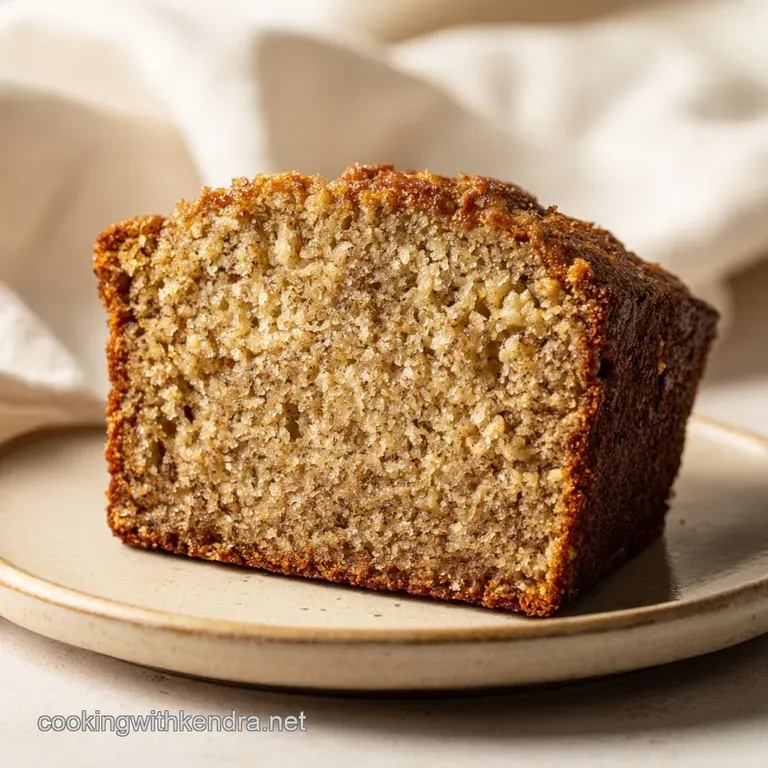
- Flavor/Texture Hook: Pillowy crumb with a fragrant cinnamon scent
- Perfect for: Busy weekday breakfasts or a low stress weekend treat
- My Favorite Healthy Banana Bread Recipe
- Why This Bread Actually Works
- The Essential Ingredient List
- Must Have Kitchen Tools
- Step-By-Step Baking Guide
- Solving Common Baking Issues
- Smart Swaps and Variations
- Adjusting Your Batch Size
- Baking Myths Debunked
- Storage and Waste Tips
- Serving and Styling Ideas
- Recipe FAQs
- 📝 Recipe Card
The smell of overripe bananas is a trigger for me. It takes me right back to my grandmother's kitchen, where a bunch of black spotted bananas on the counter wasn't a sign of waste, but a signal that it was time to turn on the oven.
In her house, and many others from that generation, the "waste not" mentality was a way of life. You didn't throw away fruit; you transformed it into something that could feed the whole family for three days.
That tradition of frugality is actually what makes this a healthy banana bread recipe. By leaning into the natural sugars of the fruit and using simple pantry staples, we create something that feels like a treat but fits into a balanced day.
We're trading the heavy refined fats for creamy yogurt and whole grains, keeping that nostalgic, comforting vibe without the heavy feeling in your stomach.
Right then, let's get into how to make this happen. You don't need a professional kitchen or fancy tools, just some very old bananas and a bit of patience while it bakes. Trust me, the wait is worth it for that first warm slice.
My Favorite Healthy Banana Bread Recipe
To get the best results, you need bananas that look like they've given up on life. I'm talking about peels that are mostly black or deep brown. This is where the magic happens because as bananas ripen, the starch converts to sugar, making the batter naturally sweet and fragrant.
If you're in a rush, you can speed this up in the oven, but the slow, natural ripeness gives you a velvety texture that you just can't fake. This recipe avoids the usual refined sugar traps, relying instead on the fruit and a bit of maple syrup to carry the flavor.
But what about the texture? Some people worry that "healthy" means "dense" or "rubbery". We've solved that by using a specific balance of leavening and moisture. You'll get a loaf that's tender, slightly springy, and holds together without crumbling into a million pieces.
Why This Bread Actually Works
I've spent a lot of time wondering why some loaves turn out like bricks while others are pillowy. It usually comes down to a few basic reactions in the bowl.
- The Yogurt Boost: The acidity in Greek yogurt reacts with the baking soda to create tiny air bubbles, which gives the bread its lift.
- Fruit Sugar: Overripe bananas provide a concentrated source of fructose, which helps the crust brown without needing loads of white sugar.
- Fiber Structure: Using whole wheat or oat flour adds a sturdier structure, which prevents the loaf from collapsing in the center.
- Moisture Lock: The fat in the yogurt and the pectin in the bananas create a barrier that keeps the crumb moist for days.
Before we dive into the ingredients, let's look at how this approach differs from the standard "shortcut" versions you see online.
| Feature | Fresh/Whole Method | Shortcut/Processed Method | Impact on Result |
|---|---|---|---|
| Flour | Whole Wheat/Oat | All Purpose White | More fiber, nuttier taste |
| Fat Source | Greek Yogurt | Melted Butter/Oil | Lighter feel, less grease |
| Sweetener | Maple Syrup/Fruit | White Sugar | Lower glycemic, deeper flavor |
| Texture | Dense & Velvety | Airy & Cakey | More filling and satisfying |
It's all about the balance of moisture and structure. If you use too much fruit, it gets gummy; too little, and it's dry. We've hit the sweet spot here.
The Essential Ingredient List
I've found that weighing your ingredients is the only way to be consistent. If you're using cups, just remember to spoon the flour in rather than packing it down, as according to King Arthur Baking, packing flour can add up to 25% more than you actually need.
- 3 large overripe bananas, mashed (approx. 340g) Why this? Provides the bulk of the sweetness and moisture
- 1/2 cup (120g) plain Greek yogurt Why this? Adds tang and helps the bread rise
- 1 large egg (50g) Why this? Binds everything together for a sturdy crumb
- 1/3 cup (80ml) pure maple syrup or honey Why this? Adds a rich, liquid sweetness
- 1 tsp (5ml) vanilla extract Why this? Enhances the natural banana aroma
- 1 1/2 cups (190g) whole wheat flour or oat flour Why this? Keeps it hearty and high fiber
- 1 tsp (5g) baking soda Why this? The primary lifting agent
- 1/2 tsp (3g) salt Why this? Balances the sweetness
- 1 tsp (2g) ground cinnamon Why this? Adds warmth and depth
- 1/2 cup (60g) chopped walnuts or pecans Why this? Adds a salty, crunchy contrast
- 1/4 cup (35g) dark chocolate chips (70% cacao or higher) Why this? Adds a touch of bitterness to cut the sugar
Depending on what you have in the pantry, you can swap a few things around without ruining the loaf.
| Original Ingredient | Substitute | Why It Works |
|---|---|---|
| Whole Wheat Flour | Oat Flour | gluten-free option. Note: Result is softer and slightly denser |
| Maple Syrup | Honey | Similar sweetness. Note: Honey has a stronger, distinct floral taste |
| Greek Yogurt | Sour Cream | Similar acidity and fat. Note: Makes the crumb slightly richer |
| Walnuts | Pumpkin Seeds | Great nut free crunch. Note: Adds an earthy, savory note |
Honestly, don't even bother with low-fat yogurt here. You need those few extra fats to keep the bread from feeling like a sponge.
Must Have Kitchen Tools
You don't need a fancy stand mixer for this. In fact, I prefer doing this by hand because it's easier to tell when the batter is actually ready. Overmixing is the enemy of a tender loaf.
- 9x5 inch loaf pan: The standard size for a classic slice.
- Parchment paper: This is non negotiable. It's the only way to ensure the bread doesn't stick to the bottom.
- Large mixing bowl: Give yourself plenty of room to fold in the flour.
- Potato masher or fork: For getting those bananas into a smooth paste.
- Silicone spatula: Essential for folding the dry ingredients without knocking out the air.
- Digital scale: For precision, though cups work in a pinch.
Step-by-step Baking Guide
Let's crack on. The goal here is to keep the process simple and avoid overworking the batter.
- Preheat your oven to 350°F (175°C) and line a 9x5 inch loaf pan with parchment paper, leaving an overhang on the sides for easy removal.
- In a large bowl, mash the bananas until smooth with no large chunks remaining. Note: Use a fork for a bit of texture or a masher for a silky base.
- Whisk in the Greek yogurt, egg, maple syrup, and vanilla until the mixture is completely homogeneous.
- Sift in the flour, baking soda, salt, and cinnamon.
- Gently fold the ingredients together using a spatula until no streaks of flour remain. Note: Stop as soon as the flour disappears to avoid a tough loaf.
- Fold in the chopped walnuts and dark chocolate chips.
- Pour the batter into the prepared pan and smooth the top with your spatula.
- Bake for 50–60 minutes until a toothpick inserted into the center comes out clean or with a few moist crumbs.
Chef's Tip: If the top is browning too quickly but the center is still wobbly, tent a piece of foil loosely over the top for the last 15 minutes.
Solving Common Baking Issues
Even with a solid healthy banana bread recipe, things can go sideways. Usually, it's because of the moisture levels in the bananas or how the flour was measured.
The Gummy Center
If you cut into your loaf and the middle feels damp or undercooked despite the timer going off, you likely had "extra large" bananas. This adds too much moisture for the flour to absorb.
The Sunken Middle
This happens when the bread rises quickly and then collapses. It's usually caused by opening the oven door too often or using too much baking soda, which creates air bubbles that pop.
The Burnt Top, Raw Inside
This is a temperature issue. Either your oven runs hot, or you used a dark metal pan that absorbs too much heat.
| Problem | Root Cause | Solution |
|---|---|---|
| Gummy Center | Too much banana moisture | Bake for an extra 5-10 mins at 325°F |
| Sunken Middle | Overmixing or oven door open | Fold gently; don't peek before 40 mins |
| Burnt Top | Oven too hot or dark pan | Tent with foil after 30 minutes |
Common Mistakes Checklist:
- ✓ Used truly overripe (black) bananas for maximum sugar.
- ✓ Sifted the baking soda to avoid bitter clumps.
- ✓ Folded the flour in gently didn't use a whisk for the final step.
- ✓ Let the bread cool in the pan for 10 minutes before transferring.
- ✓ Measured flour by weight or the "spoon and level" method.
Smart Swaps and Variations
One of the best parts about this recipe is how flexible it is. You can lean into different flavors depending on what you're craving that week.
For a high protein healthy banana bread, you can replace 1/4 cup of the flour with unflavored whey or pea protein powder. Just be careful protein powders can dry out a bake, so you might need an extra tablespoon of Greek yogurt to compensate.
If you want something a bit more zesty, add the zest of one lemon to the wet ingredients. It cuts through the sweetness and makes the whole thing feel brighter. You can also swap the walnuts for sunflower seeds or hemp hearts for a seed based crunch.
If you have a few extra bananas left over from your bunch, you can whip up some Korean banana milk as a side drink to serve with your warm slices.
Adjusting Your Batch Size
Sometimes you don't want a whole loaf. Here is how to scale this without messing up the chemistry.
Scaling Down (Half Batch): Use an 8x4 inch pan if you have one. For the egg, crack one into a small bowl, whisk it, and use exactly half (about 25g). Reduce the bake time by about 20%, but still use the toothpick test to be sure.
Scaling Up (Double Batch): Do not simply double the baking soda and salt; increase those to 1.5x instead to avoid a metallic taste. Work in two separate loaf pans rather than one giant one, otherwise, the outside will burn before the middle cooks.
Lower the oven temperature to 325°F (160°C) and extend the time by 10-15 minutes.
If you're wondering which flour to choose, here is a quick guide to help you decide based on the result you want.
| Flour Choice | Texture | Flavor Profile | Best For |
|---|---|---|---|
| Whole Wheat | Hearty/Dense | Nutty and Earthy | Meal Prep |
| Oat Flour | Soft/Tender | Mild and Sweet | Kids/Picky Eaters |
| Spelt Flour | Springy | Slightly Sweet | Traditional Feel |
Baking Myths Debunked
There's a lot of noise out there about how to bake bread. Let's clear some things up.
Myth: You must "cream" the butter and sugar for a good rise. In this recipe, we aren't using butter. The lift comes from the chemical reaction between the yogurt's acid and the baking soda. You don't need to beat air into the fats to get a fluffy result.
Myth: Brown bananas are "spoiled" and less nutritious. Actually, as bananas ripen, they become easier to digest. According to USDA FoodData, while some vitamins change, the potassium remains, and the natural sugars become more available.
Storage and Waste Tips
To keep your slices moist, don't leave the loaf uncovered on the counter. Once it's completely cool, wrap it tightly in beeswax wrap or store it in an airtight container.
- Fridge: Lasts up to 5 days.
- Freezer: Wrap individual slices in parchment and then a freezer bag. They'll stay fresh for up to 3 months. Just pop them in the toaster for a minute.
For zero waste, don't toss those banana peels if you're feeling adventurous. You can freeze them to make a banana peel tea or simply toss them in your compost bin to feed your garden. If you have a few leftover slices that have gone a bit stale, they are great for banana coconut french toast the next morning.
Serving and Styling Ideas
While a plain slice is great, a few additions can make this feel more like a treat. I love to toast a slice and top it with a smear of almond butter and a sprinkle of sea salt. The salt makes the cinnamon and banana flavors pop.
For a more "brunch" style presentation, serve the slices with a dollop of Greek yogurt on top and a drizzle of the same maple syrup used in the batter. If you're serving this for guests, slice the loaf into 1 inch thick pieces and arrange them on a wooden board with some fresh berries.
Right then, you've got everything you need. This healthy banana bread recipe is all about taking something humble and making it feel special. Get those bananas mashed and enjoy the smell of your kitchen!
Recipe FAQs
Can banana bread be healthy?
Yes, by swapping refined ingredients for nutrient dense ones. Using whole wheat flour and maple syrup instead of white flour and white sugar adds essential fiber and minerals.
Can I eat banana bread while trying to lose weight?
Yes, in moderation. At 207 calories per slice, this version is a balanced treat, especially when paired with a protein source to manage blood sugar.
What is a good substitute for sugar in banana bread?
Pure maple syrup or honey. These provide natural sweetness and moisture. If you enjoy these flavors in other breakfast bakes, see how we balance sweetness in our homemade hotcake mix.
What is the healthiest flour for banana bread?
Whole wheat or oat flour. These options increase the nutrient density and provide a heartier texture compared to refined white flour.
How to store banana bread to keep it moist?
Wrap it tightly in beeswax wrap or an airtight container. Store in the fridge for up to 5 days or freeze individual slices for up to 3 months.
Is it true that I must use all-purpose flour for the right texture?
No, this is a common misconception. Whole wheat or oat flour create a moist, dense crumb that is ideal for a healthy banana bread.
How to tell when the banana bread is fully baked?
Insert a toothpick into the center. The loaf is ready when the toothpick comes out clean or with a few moist crumbs after 50 60 minutes at 350°F.
Healthy Banana Bread Recipe

