Sugar Cookie Frosting: the Essential Hardening Glaze
- Achieving the Perfect Glaze: Why Skip the Buttercream?
- Essential Components: Ingredients for High-Shine Cookie Icing
- The Science of Shine: Why This Glaze Sets Hard and Smooth
- Crafting Your Professional Glaze: Step-by-Step Method
- Mastering the Flood: Advanced Decorating Techniques and Troubleshooting
- Longevity and Prep: Storing and Preparing Icing in Advance
- Beyond the Biscuit: Creative Uses for Leftover Glaze
- Recipe FAQs
- 📝 Recipe Card
Achieving the Perfect Glaze: Why Skip the Buttercream?
When you pull a tray of freshly baked, perfectly cut-out cookies from the oven, what’s the next step? It absolutely has to be a flawless finish, and for me, that means a perfect glaze. This simple, high shine Sugar Cookie Frosting is the ultimate secret weapon in my baking arsenal.
It sets rock hard, stacks beautifully, and creates that crisp, professional look that traditional American buttercream simply cannot achieve.
Honestly, I love a big pile of fluffy buttercream as much as the next person, but it’s just not right for decorating flat sugar biscuits. It stays soft, it smudges, and it usually overpowers the delicate cookie flavor. We are aiming for precision and portability here, not richness.
This easy Sugar Cookie Frosting recipe is fast, uses ingredients you likely already have, and allows you to master the "flood" technique, transforming your basic holiday baking into something truly spectacular. We're cracking on with the details, so grab your sifter, and let's get started.
Defining the Difference: Glaze vs. Royal Icing
People often confuse this simple glaze with royal icing, but trust me, they are worlds apart! Royal icing, which typically uses meringue powder or raw egg whites, creates a truly rock hard, opaque finish. It’s brilliant for highly detailed 3D work, like building gingerbread houses.
Our high shine glaze, however, is far less fussy. It requires no specialized ingredients and is forgiving if you mess up the consistency slightly. It still sets hard enough to stack and ship, and crucially, it delivers that gorgeous, glossy sheen that looks like melted glass.
Plus, for those with egg sensitivities, this glaze is a total lifesaver.
The Art of the Crisp Outline and Flat Finish
The biggest benefit of using this specific Sugar Cookie Frosting is achieving that signature flat surface. You know, the one where the entire cookie top looks like a uniform, polished canvas.
This requires managing two distinct consistencies: the thick outline and the thinner flood .
The outline needs to be stiff enough to act like a little fence, preventing the runnier flood icing from spilling over the edge. Once that outline is set, the thinner 'flood' glaze fills the space perfectly, flowing easily to create a smooth, unstreaked finish.
It’s all about patience and precision in your thinning agents, which we will cover in depth.
Why This Recipe Is Essential for Holiday Baking
If you are planning to make dozens of cookies, especially for gifting or transport, you need a durable Sugar Cookie Frosting . This glaze sets hard and doesn't get sticky when packaged, unlike softer cream cheese or traditional butter based frostings.
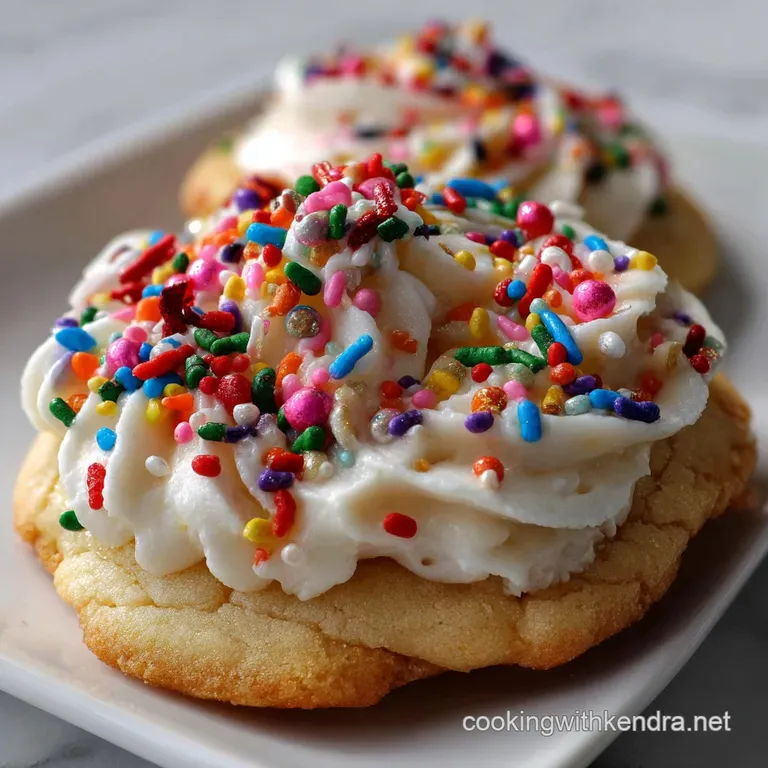
This is truly the best foundation for adding extra decorations, like sprinkles or edible markers, because the hard surface supports them perfectly. I’ve tried shipping cookies across the country, and this is the only cookie frosting recipe I trust to arrive looking pristine.
Essential Components: Ingredients for High Shine Cookie Icing
The ingredient list is minimal, but the quality and preparation of those ingredients are paramount for achieving a truly high shine finish. Don't cheap out on the extract, and always, always sift your sugar.
Selecting Your Confectioners’ Sugar (And Why Sifting Matters)
Confectioners’ sugar (or icing sugar) is the backbone of this recipe. It’s pulverized sugar mixed with a small amount of cornstarch, which is critical for quick setting. But here’s the rub: even the best store-bought powdered sugar contains tiny, compressed lumps.
If you skip sifting, those lumps will dissolve after the glaze is mixed, creating weak spots that crack as the frosting dries. Sifting it fine and fully is non-negotiable if you want that professional, smooth surface.
Corn Syrup: The Secret to Stability and Gloss
The one ingredient that elevates this from a simple icing to a stunning glaze is the light corn syrup. It is the stabilizer and the gloss agent. Not only does it help prevent the glaze from cracking when the cookie moves or flexes, but it also gives the finished surface that beautiful, mirror like shine.
Chef’s Note: You can make this sugar cookie frosting no corn syrup if necessary, but you will sacrifice some of the high shine finish and durability.
Substitute with an equal amount of liquid glucose or honey, though note that honey will introduce a distinct flavor.
Flavoring Notes: Best Extracts Beyond Vanilla
I stick to clear vanilla extract for my base, especially when using lighter colours like pink or yellow, as brown vanilla extract can dull the vibrancy. But a tiny dash of almond extract is the true magic trick here.
Almond enhances the buttery notes of a good sugar cookie beautifully and gives that nostalgic, bakery fresh aroma.
| Ingredient | Why We Use It | Substitution Idea |
|---|---|---|
| Powdered Sugar | Structure and quick set | If desperate, granulated sugar can be ground in a high speed blender, but texture may suffer. |
| Light Corn Syrup | Shine, elasticity, prevents cracking | Glucose syrup or a tiny amount of honey. |
| Whole Milk | Richness and viscosity control | Heavy cream (use less) or water (for maximum shine). |
| Clear Extracts | Flavor without discoloration | Peppermint, Coconut, or Butter extract. |
Troubleshooting Thinning Agents and Substitutions
We use milk or water to thin the glaze, and the choice matters. Water provides a slightly harder set and a more intense shine, perfect for a high end look. Milk (especially whole milk) adds a tiny bit of fat, resulting in a slightly creamier texture and a softer, more subtle sheen.
The crucial thing is adding liquid slowly. You can always add more liquid, but fixing an overly runny batch means adding more sifted powdered sugar, which is a pain!
The Science of Shine: Why This Glaze Sets Hard and Smooth
This sugar cookie frosting recipe that hardens relies on the high ratio of sugar solids to liquid. As the water or milk evaporates, the tiny sugar crystals aided by the stabilizer (corn syrup) lock together tightly, forming a durable, glassy shell.
If you try to use too much liquid, the sugar structure is too weak, and it will dry streaky, sticky, or soft. The corn syrup essentially creates a protective layer, minimizing micro cracks and ensuring the drying process is uniform across the whole surface.
This is how we get a beautiful, professional sugar cookie frosting that hardens completely.
Crafting Your Professional Glaze: step-by-step Method
Making the base glaze is incredibly quick, but you need to be mindful of your mixing speed. This is where lumps and air bubbles the arch enemies of a smooth glaze creep in.
Controlling the Consistency: Understanding 'Flooding' vs. 'Outlining'
Remember, we need two separate consistencies. The outline consistency is thick like toothpaste or very soft peanut butter. When you pull your whisk out, it should leave definite, slow trails. The flood consistency is thinner, acting more like thick cream or honey.
It must flow readily to fill the space you’ve piped.
Water or Milk? Adjusting Your Liquid Medium
I always start with the minimum amount of milk or water required in the recipe and mix until the thick outline consistency is achieved. Mix slowly. High speed introduces air, and those trapped bubbles will rise to the surface of your cookie, leaving tiny craters.
Once you have the perfect outline consistency, divide your batch, and only then start thinning down your 'flooding' portions with extra liquid, drop by drop.
The Mixing Process: Avoiding Air Bubbles and Lumps
My biggest mistake when I first started was over mixing the glaze with a high speed whisk. It looks faster, but you pay for it later when you’re poking thousands of tiny bubbles. Use the paddle attachment on low speed, or just mix gently by hand with a spatula.
You want a smooth, thick ribbon of glaze, not a pile of fluffy foam.
Achieving the '10 Second Rule' Consistency Test
This rule is everything for the flooding glaze. To test, dip a spoon into the glaze and drizzle a line back onto the surface.
- If the line takes 10 12 seconds to completely disappear back into the glaze, it’s perfect for Outlining .
- If the line takes 5 7 seconds to completely disappear and become perfectly smooth, it’s ready for Flooding .
If it vanishes faster than 5 seconds, add 1 teaspoon of sifted powdered sugar. If it takes longer than 7 seconds, add 1/4 teaspoon of liquid. Keep adjusting until you nail that window!
Mastering the Flood: Advanced Decorating Techniques and Troubleshooting
Once you’ve nailed the consistency, the application is straightforward, but it requires practice. Always allow your outline border (Step 9) to set for a good 10 minutes. If you flood too quickly, the pressure of the wet, thin glaze will breach your dam, resulting in a horrible spill. I know this because I once ruined an entire batch of Lemon Meltaway Cookies: The Ultimate Buttery, Zesty, Easy Recipe by being impatient.
For flooding, use a squeeze bottle or a piping bag with the tip snipped large. Pour the glaze gently into the center, letting it spread naturally. Use your cookie scribe (or a clean toothpick) only for gently nudging the glaze into the corners or dragging it smoothly over any gaps.
Move slowly, and pay attention to popping those bubbles as they surface. This helps create beautiful sugar cookie frosting for decorating .
Longevity and Prep: Storing and Preparing Icing in Advance
One of the great things about this recipe is how much you can prep ahead of time. This saves huge amounts of stress when you're gearing up for a big holiday bake.
Fixes for Glaze That Is Too Runny or Too Stiff
If your glaze is too thin, it will look watery, and the 5 second test will be immediate. Add sifted powdered sugar (1 teaspoon at a time) until the viscosity returns. If it’s too stiff, it will look dull and hard to stir.
Add your liquid medium (milk or water), just a few drops at a time, until it flows smoothly and gains that high shine.
Drying Time and Environment: Setting Your Decorated Sugar Cookie Frosting
This is the hardest part: waiting. The glaze needs airflow to dry properly. Never cover them! I leave my decorated cookies on a wire rack on the counter in a cool, dry room. They need a minimum of 2 hours, but I strongly recommend leaving your decorated Sugar Cookie Frosting to set overnight (8- 12 hours) before stacking or packaging them.
If you live somewhere humid, the drying time can be significantly longer.
Refrigerating Prepared Glaze (And How to Reactivate It)
You can absolutely prepare the stiff outlining glaze ahead of time. Store it in an airtight container in the fridge for up to a week. When you take it out, it will be incredibly hard.
Just let it come to room temperature, stir it vigorously, and if needed, add a single drop of water to bring back its original viscosity. I don't recommend storing the thin flooding consistency for more than a day, as it tends to separate a little.
Can You Freeze Cookies Already Decorated with This Glaze?
Yes! Because this glaze sets hard and contains corn syrup for elasticity, it handles freezing surprisingly well. Allow the cookies to set completely (overnight!), then stack them carefully between layers of parchment paper in an airtight container.
Thaw them slowly in the container (still sealed) at room temperature to prevent condensation from messing up the glaze's surface.
Beyond the Biscuit: Creative Uses for Leftover Glaze
So you've perfected your cut-out cookies (maybe using my favorite Sugar Cookie Recipe: Best Cut Out For Decorating ) and still have a half cup of glaze leftover. What do you do? Don't waste it!
Quick Glaze for Other Baked Goods (Pound Cake, Scones)
This glaze is amazing drizzled over quick breads or scones. Thin any leftover glaze aggressively with extra milk until it runs easily from a fork. Drizzle it over the top of a warm slice of Healthy Chocolate Banana Bread: Fudgy, Moist, Low Sugar Recipe for a fast, elegant finish. It sets fast, creating a nice crisp shell.
Making Edible Glue for Gingerbread Construction
If you leave the glaze at the super stiff, outline consistency, it actually works brilliantly as edible glue. It sets faster than royal icing because there are no egg whites, making it perfect for sticking together gingerbread house walls or affixing large, heavy decorations to a cookie surface.
Final Thoughts on Your Sugar Cookie Frosting
Whether you’re a beginner or a seasoned baker, this Sugar Cookie Frosting is designed to give you flawless results every time, provided you follow the 5 second rule and promise me you will sift that sugar. It's the simplest way to get professional looking, durable cookies. Sorted!

Recipe FAQs
Why is my frosting drying dull instead of achieving that high shine glaze?
The high shine typically comes from the ratio of powdered sugar to water or a small amount of corn syrup, minimizing fat content. Ensure you are using water or lemon juice rather than milk or butter, as dairy products can introduce fat that leads to a duller, matte finish upon setting.
How do I fix my glaze if it is too thick or too runny for flooding?
Adjusting consistency is critical for professional results. If the glaze is too thick, add liquid (water or lemon juice) 1/2 teaspoon at a time until it reaches a slow moving, syrup like state that fills in easily. If it is too runny, whisk in extra sifted powdered sugar until it holds a clean, soft line.
Can I use different flavor extracts, and will they thin the glaze?
Yes, you can substitute vanilla with clear extracts like almond, peppermint, or lemon for varied flavors. Use high proof, alcohol based extracts sparingly, as the additional liquid will thin the glaze; start with half the recommended amount and adjust consistency accordingly.
How long does this high shine glaze take to fully set and harden?
The setting time varies greatly depending on the thickness of your layer and the humidity of your kitchen. The glaze should be dry to the touch within 1 to 2 hours, but you must allow 12 to 24 hours at room temperature for the layer to fully cure and harden before stacking or packaging your cookies.
What is the best way to store leftover glaze and decorated cookies?
Store any unused glaze in an airtight container at room temperature for up to 3 days; give it a rigorous stir before reuse, as the sugar may settle. Once the cookies are decorated and the glaze is completely cured (after 24 hours), store them in an airtight container at room temperature for optimal flavor and structure.
Is it possible to make this glaze recipe vegan or dairy-free?
Absolutely; this recipe is highly adaptable for dietary needs. Instead of using traditional dairy milk (if your recipe calls for it), substitute with an equal amount of water or a neutral, unsweetened plant based milk, such as almond or oat milk, maintaining the required consistency.
Can I use different sweeteners or granulated sugar instead of confectioners' sugar?
No, the use of powdered (confectioners') sugar is essential for this type of glaze. Granulated sugar will not dissolve properly, resulting in a gritty, unstable frosting that will not set smoothly or achieve the necessary structure for the high shine finish.
High Shine Sugar Cookie Frosting
Ingredients:
Instructions:
Nutrition Facts:
| Calories | 824 kcal |
|---|---|
| Protein | 0.6 g |
| Fat | 0.8 g |
| Carbs | 207.9 g |
