Stir Fry Sauce: Savory and Glossy
- Time: 5 min active + 5 min cook = 10 minutes total
- Flavor/Texture Hook: Velvety, glossy, and savory
- Perfect for: High speed weeknight dinners or meal prep
The sharp, pungent sizzle of fresh ginger hitting a hot pan is probably my favorite sound in the kitchen. It's that immediate signal that something dynamic is happening. I remember the first time I tried to make a stir fry at home, and I just dumped in some soy sauce and hoped for the best.
The result was a watery, salty mess that soaked into the rice and made everything taste like a salt lick. It lacked that stunning visual shine you see in those high end Asian fusion spots.
That's why I spent time figuring out the ratio of sugar to acid to starch. You don't want a sauce that just coats the food, you want a glaze that clings. This specific Stir Fry Sauce is designed to be fast, bold, and visually striking.
It transforms a random pile of fridge clearout vegetables and a protein into something that looks like it costs 30 dollars at a bistro.
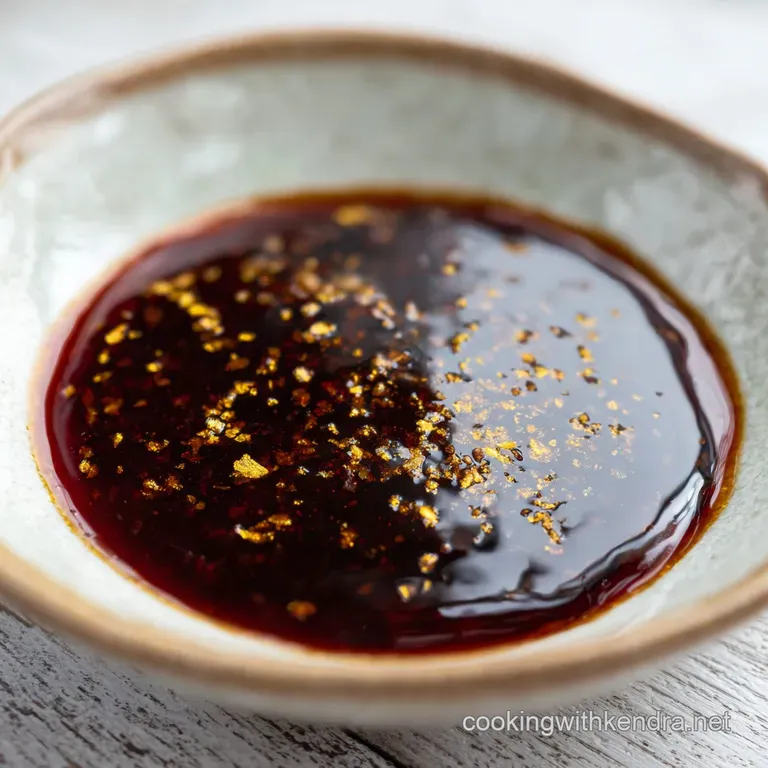
Whether you're tossing in shrimp, tofu, or flank steak, the goal is a velvety finish. We're aiming for a sauce that doesn't just sit there, but actually interacts with the heat to thicken into a translucent, rich coat.
Trust me, once you see the sauce turn that deep mahogany color, you'll never go back to the bottled stuff.
Stir Fry Sauce: The Glossy Glaze Guide
The key to this recipe isn't just the ingredients, it's how they react to the heat of the pan. Most home cooks make the mistake of adding the sauce too early or not letting it reach the right temperature to activate the thickener.
Starch Gelatinization: Cornstarch granules swell and burst when heated with liquid, creating a thick, translucent mesh. This is what gives the sauce its grip.
Sugar Caramelization: The brown sugar doesn't just add sweetness, it creates a syrup like consistency. This adds the rich, dark color and a heavy mouthfeel.
Aromatic Activation: Garlic and ginger release their flavor packed oils almost instantly. By mixing them into the sauce first, you ensure every bite has a consistent, zesty punch.
Acidity Balance: Rice vinegar breaks through the heavy salt of the soy sauce. It prevents the dish from feeling one dimensional and adds a bright, clean finish.
| Method | Texture | Time | Best For |
|---|---|---|---|
| Separate Simmer | Silky & Consistent | 5 mins | Beginners / Precise control |
| Wok Tossed | Dynamic & Charred | 2 mins | High heat / Smoked flavor |
| Cold Mix | Thin & Light | 0 mins | Cold noodles / Salads |
Component Analysis
Understanding the role of each ingredient helps you tweak the flavor without breaking the sauce.
| Ingredient | Science Role | Pro Secret |
|---|---|---|
| Soy Sauce | Umami Base | Use low sodium to avoid over salting as it reduces |
| Brown Sugar | Viscosity/Color | Adds a molasses note that white sugar lacks |
| Cornstarch | Thickening Agent | Always whisk into cold liquid to avoid lumps |
| Rice Vinegar | pH Balance | Adds the "tang" that mimics professional restaurant versions |
The Component List
Right then, let's look at what you need. Keep your ingredients measured out before you start the heat, because once that pan is hot, things move fast.
- 1/2 cup soy sauce Why this? Provides the essential salty, umami foundation. (Sub: Tamari for gluten-free)
- 1/4 cup low sodium chicken broth Why this? Thins the sauce so it doesn't burn instantly. (Sub: Vegetable broth)
- 1 tsp toasted sesame oil Why this? Adds a nutty, aromatic depth. (Sub: Peanut oil)
- 2 tbsp brown sugar Why this? For the mahogany color and thickness. (Sub: Honey or Maple syrup)
- 1 tbsp rice vinegar Why this? Cuts through the salt. (Sub: Apple cider vinegar)
- 1 tbsp fresh ginger, finely grated Why this? Provides a sharp, zesty contrast. (Sub: 1/2 tsp ground ginger)
- 3 cloves garlic, minced Why this? Essential savory punch. (Sub: Garlic powder, though fresh is better)
- 1 tbsp cornstarch Why this? The thickening powerhouse. (Sub: Arrowroot powder)
Chef Note: If you're using a high powered blender, you can toss everything in for 10 seconds for a completely smooth, homogenized texture.
Bringing It Together
Let's crack on with the process. Make sure your protein and veggies are already cooked and resting on a plate before you start the sauce.
- Combine soy sauce, chicken broth, brown sugar, rice vinegar, grated ginger, and minced garlic in a mixing bowl. Note: Doing this cold prevents the sugar from clumping.
- Add the cornstarch to the mixture.
- Whisk vigorously until the powder is completely dissolved and the liquid looks smooth.
- Pour the mixture into a small saucepan over medium heat.
- Stir constantly for 2-3 minutes until the sauce transforms into a shiny, translucent mahogany glaze.
- Increase the heat to high and add your cooked proteins and vegetables.
- Toss everything for 60 seconds until the sauce grips the ingredients and looks velvety.
- Remove from heat immediately to prevent the sauce from becoming too gummy.
Fixing Common Sauce Glitches

Even the best of us hit a snag. Usually, it's a temperature issue or a measurement slip.
Sauce is too watery?
This happens if the sauce didn't reach a simmer or if you added too many watery vegetables (like zucchini) at the last second. The starch needs heat to "activate."
Overly Salty Glaze?
If the soy sauce was too strong or the sauce reduced too much, it can become a salt bomb. A splash of extra rice vinegar or a pinch of sugar can neutralize this.
The sauce "broke"?
While rare for a cornstarch sauce, if you overheat it for too long, the starch bonds can break down, leaving you with a greasy liquid.
| Problem | Root Cause | Solution |
|---|---|---|
| Lumpy Texture | Cornstarch added to hot liquid | Whisk into cold liquid first |
| Too Thick/Gummy | Overcooked the starch | Stir in 1 tbsp of broth or water |
| Bland Flavor | Under seasoned aromatics | Add a squeeze of fresh lime at the end |
Common Mistakes Checklist
- ✓ Did you whisk the cornstarch while the liquid was cold?
- ✓ Did you wait for the sauce to become translucent before adding food?
- ✓ Did you use fresh ginger instead of the dried powder?
- ✓ Did you remove the pan from the heat as soon as the sauce gripped?
Adjusting the Batch Size
Scaling this homemade stir fry sauce is pretty straightforward, but you can't just multiply everything by four and expect it to work exactly the same.
Scaling Down (Half Batch): Use a smaller saucepan to prevent the liquid from evaporating too quickly. Reduce the simmering time by about 20% since there's less mass to heat up.
Scaling Up (Double or Triple): This is where it gets tricky. Only increase the salt and spices to 1.5x initially, then taste and adjust. For the liquids, reduce the total volume by about 10% so you don't end up with a soup.
If you're cooking the final toss in a home sized wok, work in batches to keep the heat high.
If you're looking for something with a bit more kick, you can stir in a spoonful of my homemade hot sauce recipe for a spicy, fused version of this glaze.
Sauce Misconceptions
Myth: You should add cornstarch at the very end of the stir fry process. Truth: Adding it directly to the hot pan often creates "starch pearls" little clumps of raw flour. Always mix it into the cold liquid or a slurry first for a velvety finish.
Myth: Soy sauce is the only way to get that dark color. Truth: While soy is the base, the brown sugar is what actually creates the deep, glossy mahogany look through caramelization. Without the sugar, the sauce looks flat and thin.
Keeping and Saving Sauce
Storage Guidelines: You can keep this stir fry sauce in an airtight glass jar in the fridge for up to 7 days. Because of the cornstarch, it will thicken significantly in the cold. Just give it a good shake or whisk in a teaspoon of water before reheating.
Freezing: I don't recommend freezing this. The cornstarch can separate during the freeze thaw cycle, leaving you with a gritty texture.
Zero Waste Tips: Don't throw away your ginger peels! If you're making a big batch of sauce, save the peels and simmer them in water for a zesty tea. Also, any leftover minced garlic can be frozen in a tiny ice cube tray for your next batch.
Presentation Tips
Since this dish is all about those stunning visuals, how you plate it matters. The goal is to show off the gloss of the sauce.
Simple Level: Serve in a wide, shallow bowl. Pile the stir fry in the center and drizzle any remaining sauce from the pan directly over the top.
Polished Level: Use a flat white platter. Arrange the proteins and vegetables in a neat heap. Garnish with a sprinkle of toasted sesame seeds and thinly sliced scallions on a bias for a dynamic look.
Restaurant Level: Use a dark slate plate. Create a high, tight mound of vegetables and protein in the center. Use a squeeze bottle to add a few precise dots of sauce around the perimeter and top with micro cilantro or a single sprig of Thai basil. This pairs beautifully with a side of Easy Homemade Focaccia Bread to soak up the extra glaze.
| Level | Key Tweak | Visual Goal |
|---|---|---|
| Simple | Bowl Toss | Comfort & Ease |
| Polished | Bias cut Scallions | Contrast & Color |
| Restaurant | Vertical Stacking | Architectural Height |
High in Sodium
1050 mg 1050 mg of sodium per serving (46% 46% of daily value)
The American Heart Association recommends a daily limit of 2,300mg of sodium for most adults to maintain heart health.
Tips to Reduce Sodium
-
Substitute Soy Sauce-30%
Replace the soy sauce with coconut aminos or a low-sodium soy sauce alternative to drastically lower salt intake.
-
Switch to Unsalted Broth-30%
Swap the low sodium chicken broth for completely unsalted broth or water to eliminate hidden sodium.
-
Dilute the Sauce-20%
Reduce the soy sauce quantity by half and supplement the volume with extra rice vinegar or water.
-
Enhance Natural Aromatics
Increase the amount of fresh ginger and garlic, or add red pepper flakes to boost flavor without adding salt.
Recipe FAQs
What is the sauce you put in stir fry?
A savory glaze of soy sauce, ginger, and garlic. This specific recipe combines these aromatics with brown sugar and rice vinegar to create a deep mahogany finish.
Can you eat stir fry with high cholesterol?
Yes, provided you control the oils. Stir frying is generally heart healthy because it uses minimal fat and focuses on fresh vegetables.
Is stir fry ok for diabetics?
Yes, but monitor the sugar content. Because this sauce contains brown sugar, you may need to adjust the portion size to manage glycemic impact.
What is the best sauce for a chicken stir fry?
A glossy, cornstarch thickened soy glaze. The combination of fresh ginger and garlic creates a velvety coat that grips chicken proteins perfectly.
What is stir fry sauce used for?
Coating proteins and vegetables in a cohesive glaze. It prevents the sauce from pooling at the bottom of the bowl and ensures every ingredient is evenly seasoned.
What thickens a stir fry sauce?
Cornstarch. Whisking cornstarch into the liquid before heating allows it to transform into a shiny, translucent mahogany glaze.
What can I add to my stir fry for flavor?
Freshly grated ginger and minced garlic. These provide the essential pungent base; if you enjoyed this flavor balance, see how we use similar acid techniques in our Italian pasta salad.
Homemade Stir Fry Sauce

