Old Fashioned Pumpkin Pie: the Proper Silky Classic with Flaky Pastry
- Getting Started: The Definitive Old Fashioned Pumpkin Pie Recipe
- The Science of Silky: Achieving the Perfect Custard Texture
- Master Ingredient List: Building the Foundation of Your Old Fashioned Pumpkin Pie
- How to Make Old Fashioned Pumpkin Pie: A Step-by-Step Guide
- Baker's Wisdom: Expert Tips for Troubleshooting Your Pie
- Practical Guide: Storing, Making Ahead, and Freezing Pumpkin Pie
- Presentation and Pairings: Finishing Your Proper Job Dessert
- Recipe FAQs
- 📝 Recipe Card
Getting Started: The Definitive Old Fashioned Pumpkin Pie Recipe
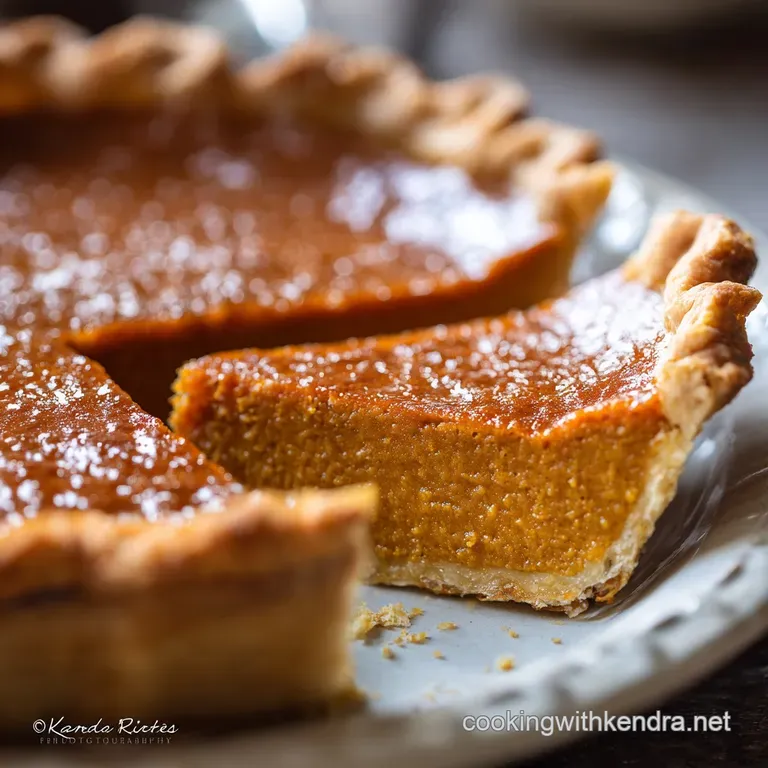
That incredible aroma is what hits you first cinnamon, ginger, and nutmeg hitting the hot oven air, basically encapsulating autumn in one beautiful scent. But smell isn't everything; the texture here is absolutely crucial, and we are aiming for a silky, almost fudgy custard that melts into a ridiculously flaky, buttery crust.
No grainy fillings or rubbery centers allowed!
Honestly, people unnecessarily panic about making [Old Fashioned Pumpkin Pie] from scratch, but it is shockingly easy once you master the timing. This recipe uses incredibly simple pantry staples and takes less than 20 minutes of actual active prep time, making it a genuinely stress free solution for any holiday baking marathon.
It’s affordable, comforting, and guaranteed to be the dessert everyone asks for seconds of.
Forget the bland, overly sweet, and rubbery store-bought versions you might have suffered through before. We are doing this the proper, old-fashioned way, focusing on deep, complex spice and nailing that killer custard texture. Let's crack on and bake the absolute [Best Pumpkin Pie Recipe] you’ve ever tasted.
The Science of Silky: Achieving the Perfect Custard Texture
What Makes a "Proper Job" Pumpkin Pie?
It’s all about the perfect protein balance and meticulous temperature control, believe me. Many recipes use far too many whole eggs or bake at too high a temperature, which risks curdling the dairy and results in that universally dreaded grainy texture.
We cleverly counteract this by using a blend of two whole eggs plus an extra yolk for maximum richness, combined with concentrated evaporated milk.
Difficulty and Timeline: Planning Your Pie Day
Don't try to rush the initial dough chilling that is the biggest mistake I repeatedly made when I started baking pies. While mixing the filling is incredibly fast, the final pie requires a full two to four hours of patient cooling just to set properly.
This means the [Homemade Pumpkin Pie Recipe] is the ultimate "bake it in the morning, eat it after dinner" project.
The Essential Difference: Treacle and Spice Balance
An authentic [Old Fashioned Pumpkin Pie] should always taste complex and autumnal, not just saccharine sweet. We ensure a deep spice layer, but the truly crucial step is incorporating just a hint of black treacle (or dark molasses) for a beautiful, slight bitterness and deep, dark colour.
It genuinely prevents the pie from tasting flat or overwhelmingly like candy.
Why Black Treacle Elevates the Flavor Profile
Treacle has this incredible, robust mineral depth and a hint of salinity that sugar alone can never replicate. It introduces a beautiful background note of complexity, almost like a dark, slow cooked caramel that lingers pleasantly on the palate.
This minuscule ingredient makes a monumental difference in achieving that signature "old fashioned" flavour profile.
The Importance of Blind Baking for a Flaky Bottom (No Soggy Bottoms!)
Soggy bottoms are the bane of every baker’s existence, and blind baking fixes them immediately. Baking the pastry shell until it is partially set before the highly wet filling goes in creates an essential barrier against the liquid.
If you want a perfectly structural, flaky bottom crust, this step is absolutely non-negotiable.
Tempering and Sifting: Ensuring a Smooth Finish
You must make sure you properly sift your spices and thoroughly whisk your sugars into the pumpkin purée before adding the wet ingredients. This simple action prevents tiny spice lumps from forming and ensures all the sugars dissolve completely for the smoothest, most luxurious filling possible.
Master Ingredient List: Building the Foundation of Your Old Fashioned Pumpkin Pie
Canned vs. Homemade Pumpkin Puree: Which is Best?
Canned purée is consistently the most reliable choice because the water content is strictly controlled just ensure you buy pure pumpkin, never the pre-spiced filling. If you are using fresh roasted squash, which I sometimes love doing for intense flavour, be sure to drain off any excess liquid after puréeing, as fresh squash holds significantly more water than canned. For another delicious use of that pureé, try my Pumpkin Chocolate Chip Cookies: The Softest, Spiced Fall Recipe .
The Buttery Crust: Choosing Your Fats Wisely
This classic [Pumpkin Pie From Scratch] demands All-Butter pastry because nothing else delivers that rich, deep flavour and unmatched flaky texture. If you live in a really hot climate and need the crust to be structurally sound, you can swap up to half the butter for vegetable shortening, but be aware you sacrifice a little flavour for that guaranteed stability.
Spice Profile Breakdown: Achieving That Signature Autumnal Warmth
We rely on the classic quartet: cinnamon, ginger, cloves, and freshly grated nutmeg it's the perfect balance of heat and warmth. If you happen to be missing one or two, you can substitute 2 teaspoons of a quality store-bought pumpkin pie spice blend in a pinch.
However, freshly grated nutmeg offers a volatile aroma that takes the pie from good to magnificent.
Dairy Choices: Evaporated Milk vs. Heavy Cream
I am fiercely loyal to [Evaporated Milk] for this [Classic Pumpkin Pie Recipe] because it is concentrated and imparts a dense, fudgy quality that heavy cream often dilutes. You can substitute full fat heavy cream if necessary, but just know the custard texture will be slightly less dense and more jiggly than the authentic old-fashioned version.
| Ingredient | Viable Substitute | Notes |
|---|---|---|
| Black Treacle | Dark Molasses or Date Syrup | Offers necessary complexity and color. |
| Evaporated Milk | Heavy Cream (Double Cream) | Results in a slightly lighter, less dense custard. |
| All-Purpose Flour | gluten-free Blend (w/ xanthan gum) | Use a 1:1 blend for the crust and filling. |
How to Make Old Fashioned Pumpkin Pie: A step-by-step Guide

Phase I: Preparing the All-Butter Flaky Pastry
- In your chosen large bowl, combine the flour, sugar, and salt, mixing them well before adding the butter. Cut the cold, cubed butter into the flour using a pastry cutter or by pulsing briefly in a food processor until it resembles coarse breadcrumbs dotted with some visible pea-sized butter pieces.
- Slowly drizzle in the ice water, one tablespoon at a time, until the dough just holds together when you pinch it; stop immediately to avoid overmixing and developing tough gluten. Form the dough into a disc, wrap it tightly, and chill for at least 45 minutes to let the fats firm up properly.
- Roll the dough out evenly, fit it carefully into your 9 inch pie dish, and crimp the edges into a neat pattern. Freeze the lined pie plate for 15 minutes to guarantee minimal shrinking during the bake.
- Preheat your oven to 400°F (200°C), then line the frozen crust with parchment paper and fill it with ceramic pie weights. Blind bake for 15 minutes, remove the paper and weights, prick the bottom lightly, and return to the oven for 5– 8 minutes more until the crust looks dry and set. Reduce the oven temperature immediately to 350°F (175°C).
Phase II: Whisking the Silky Custard Filling
- In a medium bowl, whisk together the canned pumpkin purée, both sugars, salt, and all your ground spices until incredibly smooth and uniform. You need to incorporate all those beautiful [Pumpkin Pie Filling Recipe] spices now, ensuring the sugars dissolve slightly.
- In a separate large bowl, whisk the whole eggs, the extra egg yolk, evaporated milk, vanilla, and the treacle until perfectly combined and streak free. Keeping the wet and dry separate initially prevents the acidic pumpkin from immediately scrambling the eggs.
- Gradually pour the wet milk mixture into the spiced pumpkin mixture while continuously whisking slowly. Whisk only until the entire custard is uniform in colour and completely smooth; don’t over whisk and introduce too much air.
Phase III: The Critical Baking and Cooling Process
- Carefully place your blind baked pie shell onto a simple baking sheet this prevents leaks and makes moving the hot pie much safer. Pour the silky filling into the prepared crust until it is nearly full.
- Bake immediately in the preheated 350°F (175°C) oven for 55– 65 minutes. Keep an eye on those crust edges around the 40 minute mark; if they look too dark, cover them loosely with a foil ring.
- The pie is done when the edges are set and slightly puffed, but the very centre, about a 2 inch circle, still exhibits a slight, gentle wobble when you lightly nudge the pan. Pull it out straight away!
- Transfer the finished pie to a wire rack and let it cool completely, absolutely, totally completely, before even contemplating cutting it. I promise you, patient cooling is the secret ingredient for structure.
Baker's Wisdom: Expert Tips for Troubleshooting Your Pie
The two biggest amateur fails are getting a grainy texture and suffering from cracks across the beautiful surface. Luckily, they are easily fixed for your next perfect [Pumpkin Pie Recipe Easy].
- Fixing Grainy Texture: You likely overbaked it; next time, trust the gentle wobble test and pull the pie out a moment sooner than you think necessary. Also, ensure you use the evaporated milk, as its lower water content provides that wonderfully creamy, fudgy density.
- Fixing Cracks: Surface cracks happen when the outer edge sets and shrinks dramatically while the center is still cooking and expanding. To prevent this, ensure your filling isn’t overly airy from whisking, and use the water bath trick described below to ensure incredibly gentle, even heat from all directions.
Practical Guide: Storing, Making Ahead, and Freezing Pumpkin Pie
You can definitely make the pastry dough up to 2 days ahead of time and keep it tightly wrapped in the fridge. The filling itself can be mixed up to 24 hours in advance, but please, do not combine the liquid filling with the crust until the minute before baking.
Shelf Life: Baked [Classic Pumpkin Pie Recipe] is a custard and must be refrigerated after it has completely cooled down. It will keep beautifully and safely for 3 to 4 days.
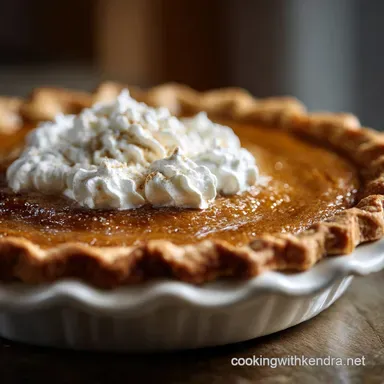
Reheating: Pumpkin pie is traditionally served chilled, which emphasizes its crisp crust and creamy filling. If you prefer it warm, heat individual slices briefly in a 300°F (150°C) oven for about 10 minutes until warmed through, but make sure they don't get hot enough to soften the filling.
Presentation and Pairings: Finishing Your Proper Job Dessert
Preventing Cracks in the Custard (The Water Bath Method)
For the most professional, reliably crack free finish, try placing your pie (on its baking sheet) inside a much larger roasting pan. Fill the roasting pan with hot water halfway up the sides of the pie dish.
The resulting steam provides incredibly gentle, moist, and even heat, guaranteeing a silky texture that doesn't seize up and pull apart.
Handling Excess Filling and Preventing Spills
If you end up with a bit too much filling for your exact pie dish, please do not attempt to overfill the crust. Pour the remainder into a small, buttered ramekin and bake it right alongside the pie; it makes a lovely, perfect chef's treat.
Placing the empty pie shell on the oven rack before carefully pouring the filling is also a genius way to prevent stressful sloshing during transport.
When to Cover the Crust Edges (Avoiding Burning)
Around 30 to 40 minutes into the bake, quickly check your beautiful crimped edges. If they are already dark golden brown, immediately cover them loosely with a ring made from aluminum foil. This simple shield prevents burning while allowing the custard center to finish cooking perfectly.
The Essential Cooling Period: Do Not Cut Early!
Chef's Note: Cutting the pie before it has fully cooled and completely set is a guaranteed recipe for a runny, weeping, structural collapse. Give it a minimum of two hours, but honestly, four hours or chilling overnight yields the best, cleanest slices.
Shelf Life and Refrigeration Best Practices
Once the pie has cooled completely on the counter (this takes several hours), wrap it loosely in foil or plastic wrap and store it promptly in the fridge. Keep it on the middle or top shelf, away from strong odors like onions or leftover curry, as the custard can shockingly absorb smells easily.
Freezing the Pie: Baked vs. Unbaked Options
Freezing a baked pie is actually quite simple! Cool it completely, wrap it tightly in several layers of plastic wrap and then foil, and freeze for up to 2 months. Thaw the whole pie overnight in the refrigerator before serving. I generally avoid freezing the unbaked pie, as the custard sometimes separates upon thawing, yielding a disappointingly watery texture. If you need a dessert that freezes better unbaked, my recipe for Peach Blueberry Crumble Golden Oat Streusel Easy Summer Dessert works brilliantly.

Recipe FAQs
Why did my pie crust come out soggy or wet at the bottom?
This "soggy bottom" issue usually arises because the filling is too hot or the crust wasn't sufficiently blind baked. Ensure you blind bake the dough until it is completely dry to the touch before adding the wet custard filling, and allow the crust to cool fully before pouring in the mixture.
How do I know when the pumpkin pie is fully set?
The pie is done when the edges are firm and slightly pulled away from the crust, but the very center (about the size of a quarter) still wobbles slightly when gently nudged. Avoid overbaking, as the residual heat will allow it to finish setting fully during the crucial cooling period on a wire rack.
Can I use fresh, homemade pumpkin puree instead of canned?
Yes, but fresh puree often contains significantly more water than commercial canned varieties, which are denser. If using fresh, make sure you drain it thoroughly in fine cheesecloth for several hours, or even overnight, to prevent a thin or watery custard filling.
My crust edges are burning before the filling sets. What can I do?
This is a common troubleshooting issue with long baking times required for custard pies. About halfway through the baking time (30-40 minutes), gently cover the exposed crust edges with strips of aluminum foil or use a dedicated pie crust shield to prevent further darkening while the center sets.
What is the purpose of the black treacle in this "Old-Fashioned" recipe?
Black treacle (or dark molasses) adds a crucial depth and complexity that distinguishes this traditional recipe from simpler versions. It balances the sweetness of the sugar and imparts a subtle, slightly smoky warmth, significantly enhancing the overall autumnal flavor profile.
How should I store the leftover pumpkin pie, and can I freeze it?
Since this pie is a custard based dessert, it must be stored tightly covered in the refrigerator, where it will maintain its best texture for 3 to 4 days. While you can freeze the baked pie, freezing and thawing may change the silky texture of the custard, so it is generally best consumed fresh.
Can I make this pie vegan or dairy-free?
For the filling, you can substitute the heavy cream and evaporated milk with full fat coconut milk or a high-quality cashew or oat cream alternative. However, since this recipe uses an all-butter crust for flakiness, you would need to replace the pastry entirely with a shortening or vegan butter crust recipe.
Old Fashioned Pumpkin Pie Classic
Ingredients:
Instructions:
Nutrition Facts:
| Calories | 688 kcal |
|---|---|
| Protein | 13.1 g |
| Fat | 32.3 g |
| Carbs | 85.8 g |
