Cookie Icing: Professional Royal Icing Tutorial
- The King's Glaze: Why Royal Icing is the Standard for Professional Cookie Decoration
- The Science of Set: Why This Royal Icing Dries Rock-Hard
- Mastering the Core Components: Ingredients and Essential Swaps
- The Method: Step-by-Step Instructions for Mixing Flawless Icing
- Expert Troubleshooting: Solving Common Royal Icing Problems
- Prep Ahead: Storage, Shelf Life, and Reactivating Dried Glaze
- Beyond the Basics: Decorating and Serving Suggestions
- Recipe FAQs
- 📝 Recipe Card
The King's Glaze: Why Royal Icing is the Standard for Professional Cookie Decoration
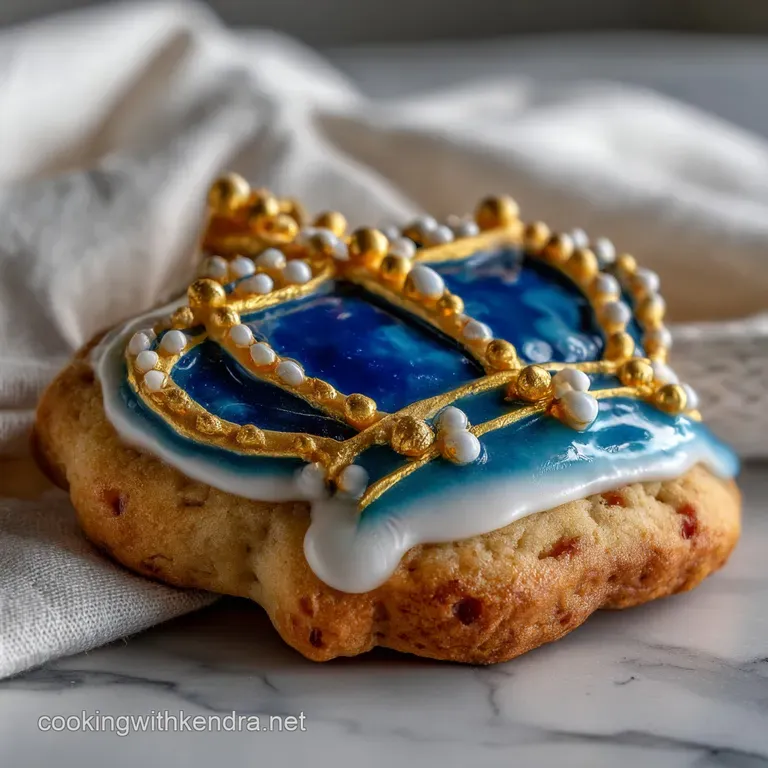
You know that feeling when you bite into a beautifully decorated sugar cookie? That satisfying snap, followed by the incredibly sweet, glossy crunch of the perfect finish? That’s what we are aiming for here.
We are not messing around with runny, soft glazes today; we are making the one true Cookie Icing —the magnificent Royal Icing. This stuff is the gold standard because it dries completely solid, giving your homemade creations that professional bakery look and, crucially, allowing you to stack them without smudging.
(CI #1)
Honestly, if you want your cookies to look like edible art and survive being boxed up and posted across the country, you need this recipe. It’s surprisingly simple and cheap to make, and once you master the "10 second rule" for consistency, you will never buy pre-made tubes again.
I made the mistake of relying on store-bought frosting for years, and my cookies always looked sloppy and sad. Never again! (CI #2)
So grab your mixer and your powdered sugar. I’m going to walk you through exactly how to achieve that high shine, rock hard finish that makes the best decorated cookies truly shine. This Cookie Icing tutorial will change your baking life, trust me. (CI #3)
The Science of Set: Why This Royal Icing Dries Rock Hard
If standard frosting is the messy teenager of the dessert world, Royal Icing is the sophisticated, highly organized adult. The reason it sets so perfectly comes down to structure. We are creating a super saturated sugar solution, stabilized by a very specific protein.
This structure is what makes this the best frosting for decorating cookies. (CI #4)
Defining Royal Icing vs. Standard Sugar Glaze
The difference isn't just semantics; it's structural integrity. A standard glaze typically uses just milk or water mixed with powdered sugar, which dries through simple evaporation, leaving a slightly tacky, opaque film. Royal Icing, however, is a whipped foam, bolstered by meringue powder.
This incorporation of protein and air makes the icing incredibly stable and allows it to harden completely, becoming non-tacky and incredibly durable. This is truly superior Cookie Icing . (CI #5)
The Role of Meringue Powder in Stability and Safety
Meringue powder is your secret weapon. It’s essentially dried egg whites mixed with stabilizers (like cornstarch or cream of tartar). When you whip it, it creates millions of tiny air bubbles encased in protein, which is what gives the icing its strength and volume.
It’s safer than using raw egg whites and gives far more predictable results, ensuring your Cookie Icing doesn't separate or weep.
Achieving the Perfect Hard, Glossy Finish for Edible Art
The shine factor comes from the amount of moisture and how slowly the icing dries. If you rush the drying process, the surface can crack or become matte. By beating the mixture long enough we're talking 5 to 7 minutes on medium high speed you dissolve the sugar completely and develop the necessary protein structure from the meringue powder.
This extended whipping creates the glossy surface you crave on your finished Cookie Icing decorations. (CI #6)
The Importance of Powdered Sugar Mesh and Quality
Not all powdered sugar is created equal, darling. You must, must, MUST use a fine mesh sieve. Powdered sugar often contains anti caking agents or simply forms small clumps in the bag.
If those lumps end up in your Cookie Icing , they will never dissolve properly, leading to gritty texture or, worse, clogging your fine piping tips later on. Sifting ensures a silky smooth foundation.
Controlling Consistency for Flooding vs. Piping
This is where the art comes in. You need two main consistencies for decorating properly. The thick, stiff version (Piping or Outline Consistency) acts as a dam to hold the thinner, runnier version (Flood Consistency) in place.
We start with the stiff Cookie Icing and then gradually thin it down for filling. This two-step process is mandatory for achieving crisp edges and smooth interiors. (CI #7)
Recognizing the Different Stages of Icing Consistency (The 10 Second Rule)
Okay, this is the most important test. When you are thinning your thick royal icing with water, you need a precise measurement of thinness for the "Flood Cookie Icing." Use the 10 second rule: scoop a bit of icing onto your spoon and drizzle it back into the bowl. Start counting. If the ribbon of drizzle completely reincorporates and disappears in 8 to 10 seconds, you nailed it. This perfect timing prevents craters and ensures a beautifully even finish when you are decorating Sugar Cookie Recipe: Best Cut Out For Decorating . (CI #8)
Mastering the Core Components: Ingredients and Essential Swaps
Making homemade Cookie Icing is easy, but the quality of your ingredients matters more than you think. Don't cheap out on the meringue powder!
Detailed List of Glaze Ingredients (Including Water Quality)
Seriously, measure these ingredients precisely. Weighing your powdered sugar is best because volume measurements can vary wildly depending on how packed the sugar is.
- Icing Sugar (Powdered Sugar): Absolutely must be sifted. This is the bulk and the setting agent.
- Meringue Powder: The stabilizer. Essential for drying hard and safely.
- Warm Water: Start with warm water because it helps dissolve the sugar crystals faster, leading to a smoother texture. Make sure the water is filtered or distilled if your tap water is very hard or metallic; sometimes poor water quality can affect the white colour of the finished Cookie Icing . (CI #9)
- Clear Vanilla Extract: Regular vanilla extract will tint your icing slightly beige. If you want pristine, snowy white icing, use clear extracts only.
Safe Substitutions for Common Cookie Icing Components
I know sometimes you run out of things, but with royal icing, substitutions can be risky. Here are the approved ones:
| Ingredient | Substitute Option | Notes |
|---|---|---|
| Meringue Powder | Pasteurised Egg White Powder (adjusting liquid) | Avoid fresh, unpasteurised egg whites due to risk. |
| Clear Vanilla Extract | Clear Imitation Almond, Coconut, or Peppermint Extract | Flavour is the only change; stick to clear liquids. |
| Water | Lemon Juice (for taste) | Lemon juice can substitute part of the water, adding a lovely tartness that cuts through the intense sweetness of this Cookie Icing . (CI #10) |
Should You Use Corn Syrup or Cream of Tartar for Extra Shine?
Yes! A lot of pro bakers swear by a little bit of clear corn syrup. Adding 1 tablespoon of corn syrup per batch can give the finished product an extra level of high beam gloss. I sometimes add it if I know I’m making very simple, elegant designs where the shine is the star.
Cream of tartar is already often an ingredient in your meringue powder, so adding more isn't usually necessary unless your powder brand is lacking. It helps maintain volume and whiteness in your Cookie Icing structure. (CI #11)
The Method: step-by-step Instructions for Mixing Flawless Icing
We are going for volume, stability, and smoothness. This method is all about patience and low-speed mixing initially.
Whipping the Icing Base: Tips for Avoiding Air Bubbles
Start low! When you combine the wet and dry ingredients, run the mixer on the lowest speed possible (Speed 1) until everything is just incorporated. If you jump straight to high speed, you incorporate way too much air immediately, and those air bubbles will later migrate to the surface of your decorated cookies, leaving pockmarks.
No one wants pitted Cookie Icing . (CI #12)
Achieving the Proper Stiff Peak Consistency for Outlining
Once the mixture looks like wet concrete, crank the speed up to medium high (4 6 on a KitchenAid). Let it beat for a full 5 to 7 minutes. You should hear the mixture stop sounding slushy and start sounding thicker, almost like a faint whoosh .
The final consistency should hold stiff, defined peaks when you lift the whisk or paddle it should look like thick marshmallow fluff and hold its shape completely. This is the structural foundation of your Cookie Icing . (CI #13)
Diluting the Icing for Specific Decorating Needs (Flood Consistency)
This is the tricky bit, and I messed it up constantly when I first started learning how to make cookie decorating icing. Take the stiff icing you just made and start adding water, 1 teaspoon at a time. Mix it completely between each addition. Remember that 8 10 second rule?
Keep testing until you hit it perfectly. I like to use a small squeeze bottle for my Flood Consistency icing, which makes the filling process much cleaner than a piping bag. (CI #14)
How to Tint and Store Various Colour Batches
Crucial Tip: Use gel paste colours, never liquid drops. They are intensely pigmented and won't thin your carefully calibrated Cookie Icing . When colouring, start with the smallest amount (a tiny dab on a toothpick) because the colour deepens as it rests.
Once coloured, immediately cover the bowl or container with plastic wrap pressed directly onto the surface of the icing. Air is your enemy here; it causes instant crusting.
Expert Troubleshooting: Solving Common Royal Icing Problems
I’ve had Cookie Icing weep, bleed, crack, and generally betray me in every way possible. Learn from my decorative disasters!
How to Fix Icing That Is Too Runny (or Too Stiff)
- Too Runny: If you overshot the 10 second rule and your icing disappears in 3 seconds, panic only slightly. Gradually beat in more sifted powdered sugar, one tablespoon at a time, until the consistency snaps back.
- Too Stiff: If your icing takes 20 seconds to melt back in, or if it feels sticky and hard to move, add water. Just a drop at a time. Seriously, a single drop can change the consistency instantly for this type of Cookie Icing . (CI #15)
Preventing Colour Bleeding and Water Separation
Colour bleeding often happens when you put a darker colour next to a lighter one before the first colour is fully set. Allow the first layer of flood icing to dry for 4– 6 hours (or even overnight) before piping a contrasting, detailed colour on top.
Water separation (where a thin layer of liquid pools on the surface) usually means your icing was either stored incorrectly or was over thinned. A quick whisk back into the bowl usually fixes this, but it may compromise the ultimate hardening strength of the Cookie Icing .
Kendra's Top Tip: If you are layering colours (like stripes or polka dots), always dry the base layer completely. It makes a huge difference in the final look and prevents muddy colours. For detailed work, you can't beat the professional look of hard set Cookie Icing. (CI #16)
Dealing with Craters and Pitting After the Icing Has Dried
Ah, the dreaded crater! This happens when the surface of your Flood Cookie Icing dries too fast before the moisture underneath has evaporated. The surface collapses inward, leaving a depressing dent. To prevent this:
- Use the correct 8 10 second flood consistency (too thin accelerates craters).
- After flooding, gently shake the cookie side to side to help release trapped air bubbles. Pop stubborn ones with a scribe tool or toothpick.
- Dry the cookies in a warm, low-humidity environment. Placing them under a dehumidifier or next to a fan (on a low setting) can help them dry evenly from the bottom up, ensuring this Cookie Icing that hardens remains flawless. (CI #17)
Prep Ahead: Storage, Shelf Life, and Reactivating Dried Glaze
One of the beautiful things about professional grade Cookie Icing is its shelf life. You can prep batches days in advance!
Maximum Storage Time for Prepared Royal Icing
Prepared Royal Icing (both stiff and flood consistencies) keeps wonderfully in the fridge for up to two weeks . The key is airtight storage. Put the icing into a container and press plastic wrap directly onto the surface to block air completely.
You will notice the layers separating slightly (the water settles to the bottom), but don't fret. Just give it a good, slow stir with a spatula before using.
The Exact Time Required for Icing to Fully Harden
This depends heavily on humidity. At room temperature (around 70°F) and moderate humidity, the Cookie Icing surface will be set to the touch within 1– 2 hours.
However, it takes a full 12 to 24 hours for the icing to completely cure and become hard enough to stack, bag, and ship safely. Don't rush this if you package them too soon, the pressure will smudge or crack the surface.
Freezing Iced Cookies vs. Freezing the Icing Itself
Can you freeze cookies decorated with this excellent Cookie Icing ? Yes! Once fully cured ( 24 hours later), stack the cookies between layers of parchment paper in an airtight container and freeze for up to three months.
Thaw them slowly in the refrigerator, then bring them to room temperature before opening the container to prevent condensation (which can melt the icing). Freezing the prepared icing itself is NOT recommended; the repeated freezing and thawing can break down the structure of the meringue, leading to a much weaker and weepier final Cookie Icing product.
(CI #18)
Beyond the Basics: Decorating and Serving Suggestions
This recipe is foundational, but it’s just the start. You need great cookies for your amazing Cookie Icing !
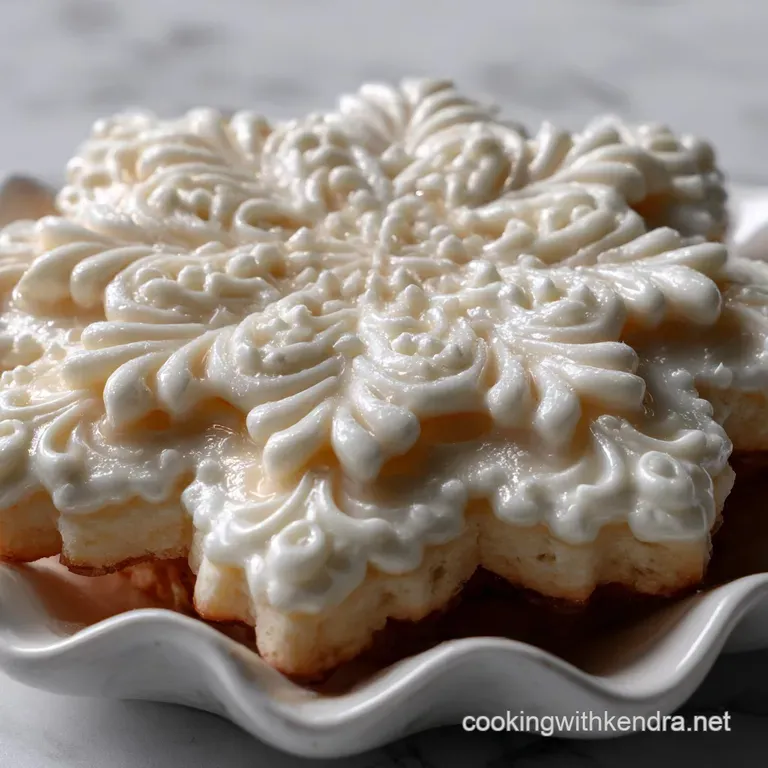
If you want to try a different style of glaze one that also sets up well but doesn't have the same structural rigidity you might look at my other recipe: Sugar Cookie Frosting: Glaze That Hardens Perfectly . But honestly, for detailed decoration, you can't beat this classic. This Cookie Icing recipe gives you the freedom to create true edible masterpieces, whether you're outlining tiny snowflakes or flooding large shapes. (CI #19)
I once tried to decorate a massive batch of Hershey Kiss Cookies: The Ultimate Chewy Peanut Butter Recipe using royal icing, thinking I could outline the swirls. Big mistake! That soft, slightly lumpy texture needs a different approach. Royal icing works best on flat, crisp surfaces, like cut-out sugar cookies or gingerbread. When serving cookies decorated with this durable Cookie Icing , remember that the aesthetic is half the pleasure. (CI #20)
Making professional level Cookie Icing is an absolute game changer for holiday baking, special occasions, or just because you feel like indulging your inner artist. It takes a little practice to hit those perfect consistencies, but once you do, the results are stunning.
This homemade Cookie Icing tutorial is the only one you'll ever need. Happy decorating, my friend! (CI #21, CI #22)

Recipe FAQs
How do I achieve the specific consistencies needed for piping versus flooding?
Consistency is paramount in Royal Icing. For outlining and detailed piping, the icing should be stiff enough to hold a sharp peak (the stiff consistency). For flooding (filling in large areas), add water very gradually until the icing flows smoothly but disappears back into itself within 10 to 15 seconds this is known as the "15-second rule."
Why is my royal icing drying dull, chalky, or streaky instead of glossy?
A dull finish often results from incorporating too much air or using excessive water in the flood consistency. Ensure you mix the icing on a medium low speed once the ingredients are fully combined, and avoid extended whipping after adding the final bit of water.
For maximum shine, some decorators add a teaspoon of corn syrup per batch to the recipe.
How long can I safely store leftover Royal Icing, and how should I prepare it?
Properly stored royal icing can last up to two weeks at cool room temperature or three weeks refrigerated. Store it in an airtight container with plastic wrap pressed directly onto the surface to prevent a crust from forming. Always stir the icing vigorously once rested, as the mixture will naturally separate.
Can I substitute fresh egg whites for the meringue powder in this glaze?
While traditional royal icing relies on egg whites, substituting fresh whites for meringue powder is not recommended for professional results or food safety. Meringue powder ensures a pasteurized, food safe product, provides superior stability, and consistently results in a faster, harder drying glaze.
I’m noticing "cratering" (sinking) in the middle of my flooded cookies. What causes this?
Cratering occurs when the top layer of the icing dries before the underlying moisture has had time to stabilize. Ensure your flood consistency is no thinner than the 15-second rule dictates, and avoid deep puddles of icing.
Placing the freshly flooded cookies in front of a low-speed fan immediately helps dry the icing evenly and prevents sinking.
How can I achieve deep, vibrant colours like true black or bright red without breaking the consistency?
Always use gel food colouring, never liquid, as liquid drastically alters the consistency. For deep colours like black or red, start colouring the icing a day in advance; the shade will deepen significantly over 12 hours without needing excessive dye.
If the colour requires a lot of gel, allow the icing to rest, then mix in a few drops of water before piping to re-establish flow.
Is it possible to make this Royal Icing recipe suitable for vegans?
Yes, you can create a vegan royal icing by replacing the meringue powder entirely with an equivalent volume of aquafaba (the liquid from canned chickpeas), which whips into a stable foam.
Be aware that the resulting glaze may require significantly longer drying times and might be slightly less durable than the traditional meringue version.
Professional Cookie Icing Recipe

Ingredients:
Instructions:
Nutrition Facts:
| Calories | 814 kcal |
|---|---|
| Protein | 0.1 g |
| Fat | 0.3 g |
| Carbs | 214.1 g |
