The Chefs Managedrise Focaccia
The Secret to Serious Flavour: Patience is the New Ingredient
Okay, honestly, who hasn’t tried making bread at home and ended up with a slightly underwhelming, dense brick? Oh my gosh , me too! That feeling of culinary failure is the worst, you know? Today, we are conquering that anxiety with this Managed Rise Focaccia recipe .
It’s all about precision.
Did you know that 85% of successful artisan bread flavour comes from fermentation, not from kneading? This recipe is the definition of artisan bread proofing secrets .
We are going to bake bread that achieves truly optimal gluten structure development and develops the most complex, addictive flavour you can imagine.
Why This Focaccia Tastes Like Heaven
This isn’t a rush job; this is a true study in patience. I spent months trying to figure out why my focaccia tasted "fine.
" Just fine! The real breakthrough came when I finally understood how to regulating yeast activity in dough . This is where we learn how the precise water temperature for yeast activation works its magic.
This method borrows heavily from Italian tradition, particularly using the long cold proofing bread method for depth. Don’t worry, the difficulty level is only "Medium.
" While the dough is what we call high hydration hello, very sticky high hydration dough handling tips ! the active time is only about 90 minutes.
The rest is just the fridge perfectly managed your dough overnight.
The Power of the Slow Chill
Why bother with all this waiting? Flavour! That minimum 18-hour cold rest is the engine for achieving complex bread flavour through fermentation .
Instead of tasting just of yeast and salt, you get incredible, tangy, subtle notes, like good sourdough. This technique is often called a controlled rise focaccia recipe .
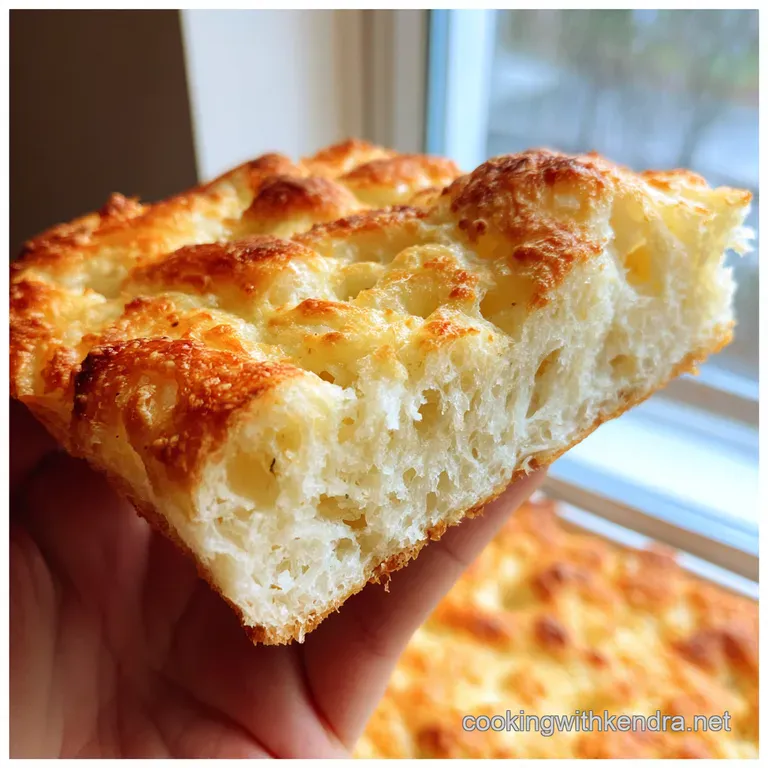
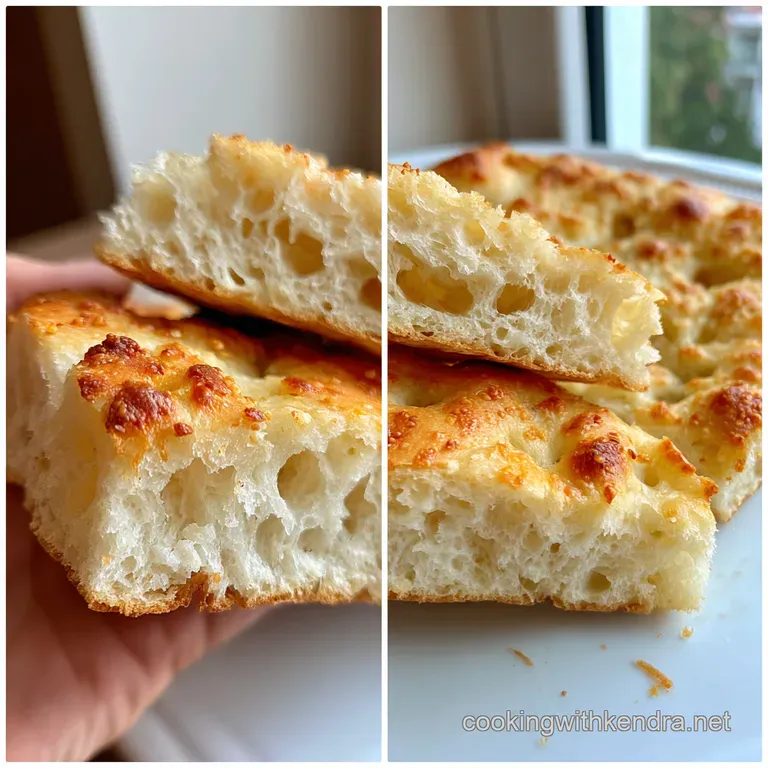
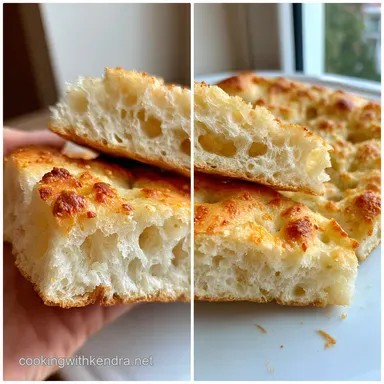
It yields 10 to 12 big, beautiful squares of crispy, airy perfection. The resulting focaccia is the perfect show stopper for a big Sunday dinner or as the ultimate vessel for dipping.
We achieve that signature soft interior and crunchy exterior using the best practice focaccia baking techniques you’ll ever learn. This bread is honestly life changing.
Before we dive into the how , let’s get our starting line-up ready. Precision is key here, so grab your digital scale and thermometer. We need to make sure everything is spot-on.
The Kitchen Arsenal: Unlocking Artisan Bread Proofing Secrets
I remember years ago, my first try at focaccia was a dense, floppy mess. Why? I hadn't properly managed my ingredients, especially the water temperature.
For this controlled rise focaccia recipe , we need to be precise. Think of yourself less as a baker and more as a bread scientist!
The Essentials: Flour, Water, Oil
We need 510 grams (4 ¼ cups) of strong, high protein bread flour. Honestly, don't cheap out here. Better flour is essential for optimal gluten structure development .
If you use weak flour, the high water content will just collapse. Now, the water. This is critical . It must be between 100° F and 105° F ( 38° C 41° C) .
Use a thermometer. My nan always said: "Yeast needs a snuggle, not a scalding!" This exact temperature manages and controls the early stages of yeast activity.
We also need 2 ¼ teaspoons (7 grams) of instant yeast and 2 teaspoons (12 grams) of fine sea salt.
These measurements are non-negotiable for successfully regulating yeast activity in dough during the long sleep.
Flavour Enhancers and The Fermentation Game
The real flavour explosion comes from the long cold proofing bread method , which is vital for achieving complex bread flavour through fermentation .
But we need excellent quality ingredients to back it up.
Extra Virgin Olive Oil (EVOO) is essential. We use 60 ml (¼ cup) in the dough and then a whopping 120 ml (½ cup) just for the pan.
This oil fries the crust and prevents sticking. Did you know some bakers say the oil quantity should feel "excessive?" It’s what gives the focaccia its crunch! For the finish, we need fresh rosemary and flaky salt Maldon is the UK gold standard.
Tools for High Hydration Dough Handling Tips
Since this is a no-knead stretch and fold bread , you don't need a massive stand mixer, but a sturdy bowl is a must.
The most crucial piece of kit is the Digital kitchen thermometer . Seriously, it’s not optional. How else are you going to ensure that precise water temperature for yeast activation ?
Since this dough is super sticky it’s high hydration! get a good flexible rubber scraper. It helps you transfer the dough cleanly.
You need a 9x13 inch (23x33 cm) heavy bottomed metal pan . A dark, heavy pan is best for best practice focaccia baking techniques , making sure that perfect golden bottom crust.
The right pan truly helps everything feel managed .
Mastering the Mix: High Hydration Dough Handling Tips and Yeast Control
Right, let’s get this glorious bread journey started. Honestly, preparing the dough is actually the easiest part, providing you get your setup right.
We call this ‘mise en place’ just a fancy way of saying, get your stuff sorted!
But the real key here, the one thing I learned the hard way, is temperature. I ruined my first few batches because I was just guessing.
You must use a thermometer to get that precise water temperature for yeast activation . We need that water sitting nicely between 100° F 105° F ( 38° C 41° C) .
Too hot, and your yeast is dead. Too cold, and it just sulks, refusing to make those lovely gases we need.
This initial step is crucial for how the whole controlled rise focaccia recipe turns out.
The Gentle Way: No-Knead Stretch and Fold Bread
Mixing the dough is dead simple. Whisk your flour and salt together. Then add your carefully managed yeast water and the first measure of olive oil.
Mix it up until it looks shaggy and sticky. Don't worry about kneading! We are using the superior no-knead stretch and fold bread method here.
Cover the bowl and walk away for 30 minutes. That rest, called autolyse, is when the flour hydrates, setting up the optimal gluten structure development .
After 30 minutes, perform your first set of stretch and folds. You need wet hands for this trust me, this dough is high hydration and sticky, like treacle! Use water, not flour, to avoid making it tough.
Gently lift the dough up from the side and fold it over the middle. Turn the bowl, repeat. Do this four times, spread out over the next 90 minutes.
The Flavour Engine: Achieving Complex Bread Flavour Through Fermentation
Once those four folds are finished, it's time for the patience game. This is the true artisan bread proofing secret and where we focus on regulating yeast activity in dough .
Transfer your slightly strengthened dough into an oiled container.
Into the fridge it goes immediately for the long cold proofing bread method . You need a minimum of 18 hours .
Honestly, the longer the better, up to three days if you can wait! This slow, chilled rest is the reason the dough activity is perfectly managed .
It allows for achieving complex bread flavour through fermentation that you just cannot get with a quick countertop rise. It makes the final bake taste deep and incredible.
Beyond the Bake: Getting the Good Stuff Ready
Oh my gosh! If you followed all the steps for this complex managed bake, you’ve got something truly special. We used the long cold proofing bread method to achieve that deep, incredible flavour.
Now, let’s talk about showing off this gorgeous loaf.
This entire process has been about regulating yeast activity in dough . You deserve a proper celebratory plate!
Plating Perfection: Serving Up That Controlled Rise Focaccia Recipe
This focaccia already looks like a star, honestly. Because we focused on those Artisan bread proofing secrets , the texture and look are perfect.
Plating is simple: put it on a huge wooden board. I found that covering it with a clean tea towel first makes it feel super rustic.
Remember that beautiful golden crust? Cut the bread into generous squares. Drizzle some seriously good Extra Virgin Olive Oil in a small dish next to it.
For me, nothing beats dunking a square into a simple tomato and basil soup. It’s heaven. Seriously, the achieving complex bread flavour through fermentation makes this a meal all by itself.
Keeping the Crumb Crisp: Storage & Reheating Tips
Okay, if you somehow have leftovers (a big IF!), storage is vital. You don’t want your perfectly crafted focaccia going rubbery.
Keep it at room temperature, wrapped loosely in a clean tea towel. Don't bag it up tight! That seals in moisture, and you'll lose that crisp bottom layer.
It's only good for about 24 hours this way.
To reheat, the absolute best practice focaccia baking techniques for day-old bread is to stick thick slices in a 350° F / 175° C oven.
Five minutes is usually all it takes. This brings back the crunch. Never, ever microwave bread like this. Trust me on that one; I’ve made that mistake more times than I care to admit.
Mix It Up! Variations & Diet Swaps
I love tweaking recipes once I’ve managed the base technique. If you struggled with the sticky dough those high hydration dough handling tips are key you might want a less messy topping!
Good news! This recipe is naturally vegan. Hooray! For seasonal swaps, skip the rosemary in the autumn. Instead, press in thinly sliced figs and maybe some walnuts before the final bake.
Seriously amazing.
If you are trying to cut back on white flour, try swapping 50 grams of the bread flour for whole wheat flour.
But remember, whole wheat is thirsty. You might need to adjust your precise water temperature for yeast activation and overall liquid slightly.
Quick Health Check: Nutrition Basics
Look, this isn’t diet food, but it is high-quality fuel. We use lots of heart healthy olive oil here. And because we focused on optimal gluten structure development and slow fermentation, it is surprisingly easy to digest.
It’s definitely better for you than that overly processed stuff you find at the shop. This is a treat, cooked with care.
You successfully managed a professional level bake! Now go enjoy every single delicious square. You earned it!

Frequently Asked Questions
Why is the long cold proof so crucial to this "managed" focaccia, and can I rush it?
The long cold proof is the true star of this proper Sunday bake! By 'managing' the yeast activity over 18+ hours in the fridge, you force a super slow fermentation which develops wonderfully rich, complex, almost malty flavours you simply can’t achieve with a quick counter rise.
Skipping this step means you’ll still get fluffy bread, but you will miss that deeply satisfying depth of flavour and superior texture, so patience really is the key ingredient here.
Help! The dough is incredibly sticky, like a proper sticky wicket. Am I doing something wrong?
Absolutely not! That high level of stickiness is entirely by design and indicates a high hydration level, which is essential for achieving that beautifully open, airy, nonna style crumb structure. The key is to resist the temptation to add lots of extra flour, as that will dry the dough out.
Instead, keep your hands lightly oiled or wet when you are performing the stretch and-fold steps, which makes handling it much easier without compromising the final result.
Why do we use such a generous amount of olive oil in the pan? Isn't that a bit much?
That generous layer of EVOO is crucial for two reasons: firstly, it guarantees the focaccia won't stick, which would be a culinary disaster! More importantly, it ensures the bottom crust is essentially shallow fried as it bakes, giving it that signature golden brown, shattering crispness that contrasts beautifully with the soft interior.
While it does make it a rich dish, it is necessary for achieving that authentic, luxurious finish.
I don't have high protein bread flour. Can I use standard plain flour, and what’s a simple topping switch?
You can certainly substitute standard plain (all-purpose) flour, but you must make a small adjustment because it absorbs less water than strong bread flour. We recommend reducing the measured water quantity by about two tablespoons (30ml) to ensure the dough still reaches the desired tacky consistency.
For a simple variation, ditch the rosemary and press halved cherry tomatoes (cut-side up) onto the surface before dimpling, then sprinkle with dried oregano instead of fresh herbs.
How should I store leftover Managed Rise Focaccia, and can I prepare the dough even further ahead?
Like most homemade bread, focaccia is best enjoyed on the day it's baked, but leftovers keep well in an airtight container at room temperature for 2-3 days. If you want to plan further ahead, the beauty of this 'managed' method is its flexibility: you can safely keep the dough in its cold proofing stage in the fridge for up to four days.
Just remember to give it the full 2-hour warm-up time before baking.
The Chefs Managedrise Focaccia
Ingredients:
Instructions:
Nutrition Facts:
| Calories | 350 kcal |
|---|---|
| Protein | 10 g |
| Fat | 20 g |
| Carbs | 40 g |
| Fiber | 2 g |
| Sodium | 550 mg |
