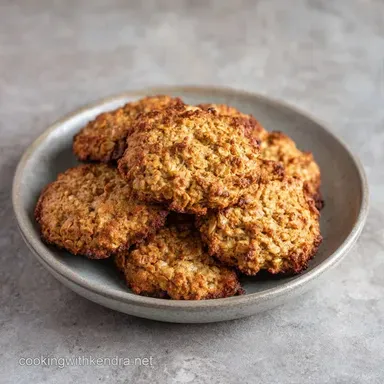
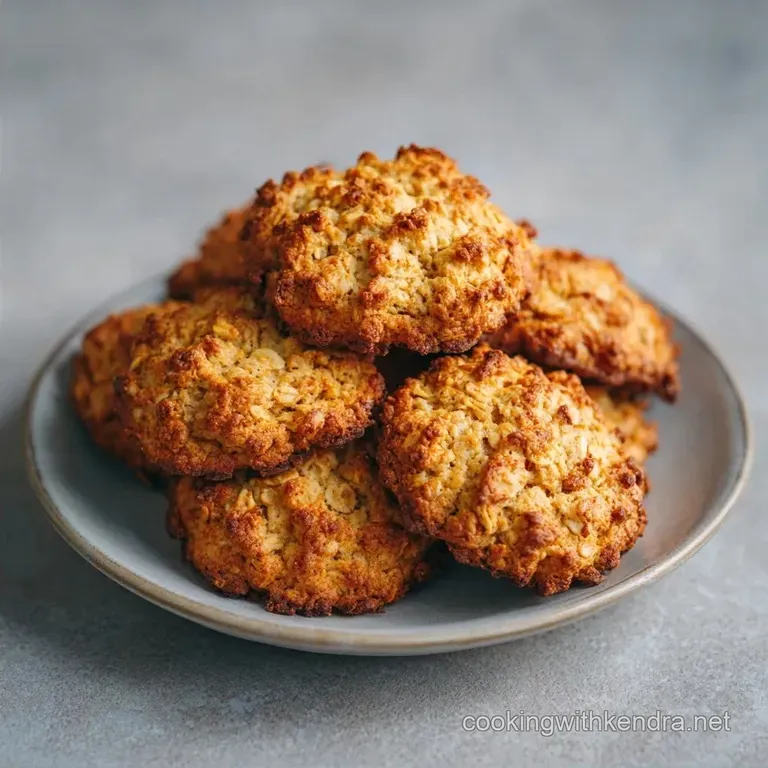
Homemade Toddler Snack with Banana and Oats
- Time: 10 min active + 12 min bake + 10 min cooling
- Flavor/Texture Hook: Velvety banana center with a slight cinnamon warmth
- Perfect for: Fast morning prep or healthy toddler lunchboxes
- Homemade Toddler Snack with Banana and Oats
- The Story Behind the Snack
- Why Most Recipes Fail
- Recipe Specs
- Gathering Your Essentials
- Essential Equipment
- The Cooking Process
- Fixing Common Mistakes
- Troubleshooting Common Issues
- Creative Flavor Twists
- Storage and Freezing
- Perfect Serving Pairings
- Recipe FAQs
- 📝 Recipe Card
Homemade Toddler Snack with Banana and Oats
The smell of warm cinnamon and caramelized banana hitting the air is usually my favorite part of the morning. But let's be real, if you've tried making "healthy" toddler bars before, you've probably dealt with the "gummy disaster." I remember making a batch a few years ago that looked great coming out of the oven, but as soon as my kid took a bite, it had the texture of a wet sponge.
He spit it out immediately, and I ended up eating the whole tray just so I wouldn't feel like a failure.
The problem is almost always the moisture ratio. Most recipes use too much banana or skip the binder, leaving you with something that's either a mushy mess or a dry cracker. Discover the perfect Homemade Toddler Snack with Banana and Oats for your little one.
This version fixes that by using a specific ratio of egg and melted butter to give the bars structure without making them rubbery.
You can expect a snack that's soft enough for little teeth but sturdy enough to be held in a small hand without crumbling into a million pieces. It's a straightforward process that doesn't require a fancy food processor or a degree in pastry arts. Just a bowl, a fork, and a few minutes of your time.
The Story Behind the Snack
I started making these when my youngest went through a "banana or nothing" phase. I was tired of peeling bananas every two hours, and I wanted something that I could prep on a Sunday and not think about until Wednesday.
The struggle was finding a balance between "healthy" and "actually edible." I tried the no bake versions first, but they often felt too heavy and sticky for a toddler to manage independently.
Then I tried the baked version, but it felt too much like a dense cake. I realized that the key was the type of oats. I switched from quick oats to rolled oats, which gave the bars a bit more "chew" and prevented that cakey, spongy feel.
Once I added a touch of melted butter, the texture shifted from "health food" to something that felt more like a treat.
Now, these are a staple in our house. They aren't just for the kids, either. I've caught my husband sneaking a couple of these during his mid afternoon work slump. It's the kind of recipe that just works because it doesn't try to be too complex. It's just fruit, grains, and a little bit of fat to keep things moist.
Why Most Recipes Fail
Most people treat these bars like a cake, but they're actually closer to a dense custard bound by grains. When a recipe fails, it's usually because the water content in the bananas varies too much. One "large" banana can be 100g or 150g, and that difference is enough to turn a bar into a pudding.
Banana Consistency: Using underripe bananas means less natural sugar and more starch, which can make the bars taste bland and feel gritty. Egg Structure: Skipping the egg removes the protein network that holds the oats together, leading to bars that crumble the moment they're touched.
Oat Absorption: Not letting the batter sit for a minute or two means the oats don't hydrate, leaving you with hard bits of grain in a soft mash. Overbaking: Taking them too long in the oven evaporates the moisture from the banana, turning a velvety snack into a rubbery brick.
| Method | Time | Texture | Best For |
|---|---|---|---|
| Fresh Mash | 10 min | Velvety | Best flavor and natural sweetness |
| Frozen Puree | 5 min | Softer | Extremely fast prep |
| No Egg | 10 min | Crumblier | Allergy friendly options |
Recipe Specs
Before we get into the ingredients, let's look at the actual components that make this work. I don't like "guessing" in the kitchen, so I've broken down why these specific items are in the bowl.
| Ingredient | Science Role | Pro Secret |
|---|---|---|
| Overripe Banana | Binder & Sweetener | Use bananas with black spots for maximum sweetness |
| Rolled Oats | Structure & Bulk | Don't blend them; keep the whole grain for chew |
| Large Egg | Protein Network | Room temperature eggs incorporate faster |
| Melted Butter | Tenderness | Adds a rich mouthfeel and prevents sticking |
Gathering Your Essentials
Right then, let's look at what you need. I've kept this list short because the beauty of this snack is that you probably already have everything in your pantry.
- 2 large overripe bananas (approx. 200g), mashed smooth Why this? Provides the natural sugars and moisture
- 1 cup (90g) rolled oats Why this? Better texture than quick oats
- 1 large egg (approx. 50g) Why this? Essential for the "lift" and bind
- 1/2 tsp (2g) ground cinnamon Why this? Warmth that complements the banana
- 1 tsp (5ml) pure vanilla extract Why this? Rounds out the sweetness
- 1 tbsp (15g) melted unsalted butter Why this? Keeps the bars from being rubbery
If you're looking for a swap, you can use coconut oil instead of butter for a dairy-free version. According to USDA FoodData, bananas are a great source of potassium, making these more than just a filler snack.
Essential Equipment

You don't need a kitchen full of gadgets for this. In fact, the fewer tools you use, the less you have to clean up.
- Mixing Bowl: A medium sized bowl is plenty.
- Fork: For mashing the bananas into a smooth paste.
- Whisk or Spoon: To combine the wet ingredients.
- Baking Sheet: A standard rimmed sheet works best.
- Parchment Paper: This is non negotiable; the banana sugars will stick to the pan otherwise.
The Cooking Process
Let's crack on. Follow these steps closely to ensure you get that soft, chewy consistency.
Phase 1: Prepping the Mash
Preheat your oven to 350°F (175°C). In your mixing bowl, mash the bananas using a fork until they reach a smooth, velvety paste. If there are huge lumps, the bars will have "wet spots" that don't cook through.
Phase 2: Mixing the Base
Whisk in the egg, vanilla extract, and cinnamon. Stir until the mixture is well incorporated and looks a bit glossy. Note: Ensure the egg is fully beaten so you don't have streaks of white in the final snack.
Phase 3: Folding in the Oats
Gently fold in the oats using a spoon. Stir just until the oats are moistened and the batter looks thick and sticky. Don't overmix here, or you'll knock out the air provided by the egg.
Phase 4: Baking to Perfection
Line your baking sheet with parchment paper. Spread the mixture into a rectangle roughly 1/2 inch thick, or scoop into 6 equal bars. Bake for 12 minutes until the edges are light golden and the center feels springy to the touch.
Phase 5: The Setting Period
Let the bars cool for 10 minutes before slicing. Trust me on this. If you cut them immediately, they'll feel a bit too soft. Letting them rest allows the starches to set, giving you a clean cut.
Fixing Common Mistakes
Even with a simple recipe, things can go sideways. Usually, it comes down to the oven temperature or the banana ripeness.
Troubleshooting Common Issues
| Issue | Solution |
|---|---|
| Why Your Bars Are Too Mushy | This usually happens if the bananas were overly watery or if the oven wasn't fully preheated. If the center feels like pudding after 12 minutes, give them another 2-3 minutes. |
| Why Your Bars Are Too Dry | Overbaking is the enemy here. If the edges are dark brown and the center is hard, you've gone too far. Check them at the 11 minute mark next time. |
| Why Your Bars Crumble | This is almost always due to not using enough binder. Make sure your egg is large and that you've mashed the bananas thoroughly to release their natural pectins. |
Success Checklist:
- ✓ Bananas are mashed completely smooth
- ✓ Oven is fully preheated to 350°F
- ✓ Parchment paper is used to prevent sticking
- ✓ Bars are cooled for 10 mins before slicing
Creative Flavor Twists
Once you've nailed the base, you can start playing with the flavors. My kids love it when I add a few surprises to the mix.
For a Nutty Twist
Stir in a tablespoon of almond butter or a sprinkle of crushed walnuts. If you're worried about allergies, a bit of sunflower seed butter works great. For another nutty treat, you might like my Pistachio Butter recipe as a side dip.
For a Fruity Burst
Fold in a handful of blueberries or small pieces of dried apricot. Just make sure the fruit pieces are small so the bars don't fall apart when you slice them.
For a dairy-free & Vegan Swap
Replace the egg with a "flax egg" (1 tbsp ground flaxseed mixed with 3 tbsp water, sat for 5 mins) and use melted coconut oil instead of butter. The texture will be slightly denser but still delicious.
For an Extra Nutrient Boost
Add a teaspoon of chia seeds or a tablespoon of hemp hearts. These blend right into the oats and add a bit of omega-3s without changing the taste.
Storage and Freezing
These bars are great for meal prep, but they need to be stored correctly so they don't get soggy in the fridge.
Fridge Storage: Keep them in an airtight container for up to 5 days. I recommend putting a piece of parchment paper between layers so they don't stick together.
Freezer Storage: These freeze beautifully. Wrap each bar individually in plastic wrap and toss them in a freezer bag for up to 3 months.
Reheating: To get that "fresh from the oven" feel, pop a frozen bar in the microwave for 15-20 seconds. Or, if you have more time, put them in a toaster oven for 3 minutes at 300°F.
Zero Waste Tip: Don't throw away those banana peels! If you have a compost bin, they're gold. If not, you can actually freeze them and use them to make a banana peel tea (which is surprisingly good for plants).
Perfect Serving Pairings
These bars are a complete snack on their own, but you can turn them into a full breakfast with a few additions.
I love serving these with a side of homemade apple sauce for dipping. The tartness of the apples cuts through the sweetness of the banana. For a drink, a glass of Korean Banana Milk makes it a real theme day breakfast that the kids absolutely love.
If you're serving these to older kids, a dollop of Greek yogurt on top adds some extra protein and a nice tang. Just keep it simple for the toddlers - a bar and a few slices of orange is usually a winning combination.
Recipe FAQs
Can these bars be used as a filling after school snack for kids?
Yes, they are highly satisfying. The combination of rolled oats and egg provides lasting energy. If you enjoyed this 10-minute prep, apply the same efficiency to our nacho cheese sauce.
Are these bars a good option for preschool snacks?
Yes, they are ideal for school settings. These bars are easy for small hands to handle and provide a healthy alternative to processed treats.
How to store these bars for school lunches?
Place them in an airtight container for up to 5 days. I recommend putting parchment paper between layers so they don't stick together in the fridge.
Do adults typically enjoy these toddler friendly bars?
Yes, they work well as a light snack. The cinnamon and vanilla create a flavor profile that appeals to adults as well as children.
Is it true that these bars will always be mushy in the center?
No, this is a common misconception. Ensure your oven is fully preheated to 350°F and bake for exactly 12 minutes to achieve a springy center.
How to prevent these bars from crumbling?
Ensure you use a large egg as a binder. This ingredient is essential to keep the rolled oats and mashed bananas from falling apart after baking.
Can I freeze these for quicker meal prep?
Yes, they freeze beautifully for up to 3 months. Wrap each bar individually in plastic wrap and store them in a freezer bag.
Banana Oat Toddler Snacks