Blanching Green Beans: Crisp and Vibrant
- Time: Active 5 mins, Passive 3 mins, Total 8 mins
- Flavor/Texture Hook: Snappy, vibrant, and garden fresh
- Perfect for: Busy weeknight sides or holiday meal prep
- Achieving the Best Results Blanching Green Beans
- Why This Quick Technique Works Perfectly
- Crucial Prep Specs and Timing Rules
- Ingredient Deep Dive for Better Results
- Essential Equipment for Stress Free Cooking
- Step-by-Step Instructions for Perfect Beans
- Fixing Common Texture and Color Issues
- Custom Variations for Your Busy Weeknight
- Storage and Smart Zero Waste Tips
- Plating Tips for a Beautiful Presentation
- Blanching Green Beans FAQs
- 📝 Recipe Card
Achieving the Best Results Blanching Green Beans
I still remember the first time I tried to make a big holiday dinner for my family. I had a pound of fresh beans from the market, and I thought I could just boil them until they looked "done." By the time we sat down to eat, they were a sad, muddy shade of olive drab and had the texture of wet cardboard.
It was a complete disaster, and honestly, it's a mistake I only made once.
That was the day I learned that blanching green beans isn't just a fancy chef term - it is a survival skill for home cooks who want their food to actually taste good. When you use this method, you are basically hitting the pause button on the cooking process at exactly the right moment.
It takes just a few minutes, but the difference in the final dish is honestly night and day.
Since then, I have used this technique for everything from simple garlic sautéed sides to prep for our favorite Perfectly Steamed Green recipe. It is quick, it is predictable, and it saves you from that dreaded vegetable mush. Once you see that bright green color pop in the boiling water, you will never go back to just boiling them the old-fashioned way.
Why This Quick Technique Works Perfectly
Enzyme Deactivation: The sudden heat from the boiling water stops the enzymes that cause vegetables to lose their flavor and turn brown over time.
Gas Expansion: Heat causes the air trapped between the plant cells to expand and escape, which makes the chlorophyll (the green pigment) look much more vivid and intense.
Fiber Softening: A short burst of boiling water breaks down the tough hemicellulose in the bean walls just enough to make them tender without letting them collapse.
Thermal Shocking: Plunging the beans into 4 cups ice immediately halts carryover cooking, ensuring the center of the bean stays crisp rather than turning soft from internal heat.
| Method | Total Time | Texture | Best For |
|---|---|---|---|
| Blanching | 8 minutes | Crisp tender snap | Salads, meal prep, and sautés |
| Traditional Boiling | 12 minutes | Soft and heavy | Southern style slow cooking |
| Microwaving | 5 minutes | Slightly uneven | Last minute side dishes |
If you are in a rush, you might be tempted to skip the ice bath, but trust me on this - the beans will keep cooking on the counter. Taking that extra minute to shock them in cold water is what separates a professional looking side dish from a soggy mess. It is the most important step in the whole process.
Crucial Prep Specs and Timing Rules
Timing is everything when you are working with fresh produce. If you go too short, they stay squeaky and raw. If you go too long, you lose that beautiful color. I always set a timer the second the beans hit the water because even thirty seconds can change the outcome.
We want that "shatter" when you bite into them, not a limp string.
| Timing Checkpoint | Status | Visual Cue |
|---|---|---|
| 1 minute | Underdone | Bright green but still very stiff |
| 2 minutes | Perfect Snap | Vivid green and slightly flexible |
| 3 minutes | Tender Crisp | Full color with a gentle bite |
| 4+ minutes | Overcooked | Color starts to fade toward olive |
For Rapid, Even Seasoning
Adding 2 tablespoons kosher salt to 4 quarts water is not just about flavor. The salt actually helps to stabilize the pectin in the cell walls of the beans, which keeps them from getting too soft too quickly. It also seasons the bean from the inside out.
Don't worry about the high amount of salt - most of it stays in the water, not on your beans.
Ingredient Deep Dive for Better Results
Using the right ingredients makes a massive difference in how your vegetables turn out. I always look for 1 lb fresh green beans that feel firm and make a distinct "snap" when you break them in half. If they feel rubbery in the store, they are already too old, and no amount of clever cooking will fix that.
| Ingredient | Science Role | Pro Secret |
|---|---|---|
| Fresh Green Beans | Cellulose structure | Choose beans of similar thickness for even cooking |
| Kosher Salt | Seasoning & Stability | Use more than you think; it creates a "sea water" brine |
| Ice Cubes | Rapid cooling | Make sure you have enough ice to keep the water freezing cold |
- 1 lb fresh green beans: Look for bright color and no brown spots. (Substitute: Haricots verts, but reduce cook time to 90 seconds). Why this? Freshness determines the final crunch and sweetness of the dish.
- 4 quarts water: You need plenty of volume so the temperature doesn't drop when you add the beans. (Substitute: Vegetable stock for extra flavor). Why this? High volume ensures the water returns to a boil almost instantly.
- 2 tablespoons kosher salt: Vital for seasoning. (Substitute: 1 tablespoon table salt). Why this? Enhances the natural sweetness of the green beans.
- 4 cups ice: Necessary for the "shock" phase. (Substitute: Very cold running water, though less effective). Why this? Stops the cooking process instantly to preserve color.
Essential Equipment for Stress Free Cooking
You don't need a lot of gear for this, but having a large spider strainer or a slotted spoon is a lifesaver. It allows you to move the beans from the boiling water to the ice bath in one quick motion.
If you try to drain them through a colander in the sink and then put them back in a bowl, you lose precious seconds and the beans keep cooking.
Chef's Tip: Use a large mixing bowl for your ice bath. You want enough room for the beans to swim around so every single one is surrounded by icy water immediately.
A large pot, such as a 6 quart Dutch oven, is also helpful because the thermal mass of the water stays higher. If you use a tiny pot, the water stops boiling the second the cold beans hit it, which ruins your timing and leads to that gray color we are trying to avoid.
step-by-step Instructions for Perfect Beans
- Prepare the beans. Wash 1 lb fresh green beans and trim off the tough stem ends. Note: Leave the curly tails on if you like a rustic look.
- Boil the water. Fill a large pot with 4 quarts water and bring to a rolling boil over high heat.
- Create the ice bath. While the water heats, combine 4 cups ice with cold water in a large mixing bowl.
- Salt the water. Add 2 tablespoons kosher salt to the boiling water once it reaches a vigorous bubble.
- Submerge the beans. Carefully drop the beans into the boiling water all at once.
- Set the timer. Start your timer immediately for 3 minutes until the beans turn neon green and are tender crisp.
- Shock the beans. Use a slotted spoon to move the beans into the ice bath until they feel cold to the touch.
- Drain thoroughly. Remove the beans from the ice water and pat them dry with a clean kitchen towel. Note: Excess water will make them soggy if you sauté them later.
Fixing Common Texture and Color Issues
If your beans come out looking dull or feeling mushy, it is usually a timing or temperature issue. I have had days where I got distracted by a phone call and left them in the pot for five minutes - they still tasted okay, but they definitely lost that "wow" factor. It happens to the best of us!
To Fix Squeaky or Raw Textures
If you bite into a bean and it feels "squeaky" against your teeth, it's underdone. This often happens if the water wasn't at a full boil before you added them. You can toss them into a hot pan with a little butter for a minute to finish them off, or just pop them back into the boiling water for another 30 seconds.
| Problem | Root Cause | Solution |
|---|---|---|
| Dull, gray color | Overcooked or slow cooling | Reduce boil time; use more ice in the bath |
| Squeaky texture | Under blanched | Increase cook time by 30-45 seconds |
| Bland taste | Not enough salt | Increase salt in water or season immediately after drying |
While we are talking about bean prep, if you are looking for a different texture for a taco night or a hearty lunch, you might like this Totally Tasty Refried recipe. It is a totally different way to enjoy beans that my kids absolutely love.
Common Mistakes Checklist
- ✓ Never crowd the pot - work in batches if you are doubling the recipe.
- ✓ Don't skip the salt - it is essential for both flavor and color retention.
- ✓ Ensure the water is at a "rolling" boil, not just a simmer, before adding the beans.
- ✓ Use a timer - do not try to eyeball the doneness by just looking at them.
- ✓ Dry the beans completely after the ice bath if you plan to sauté or freeze them.
Custom Variations for Your Busy Weeknight
If you want a specific outcome, follow these quick shortcuts to get exactly what you need for your dinner plans:
- If you want a base for a cold salad, blanch for the full 3 minutes, shock, and then toss in a lemon vinaigrette while they are still slightly cool.
- If you want to sauté them later with garlic, blanch for only 2 minutes so they stay very firm; they will finish cooking in the frying pan.
- If you want a quick snack, sprinkle the blanched beans with flaky sea salt and a squeeze of lime right after drying them off.
For a Casserole Ready Prep
When prepping for a big holiday casserole, I usually blanch the beans for about 2 and a half minutes. Since they will spend another 30 minutes in the oven under a layer of cream sauce and fried onions, you want them to start out quite firm.
This prevents the casserole from becoming a watery, mushy mess when it is served.
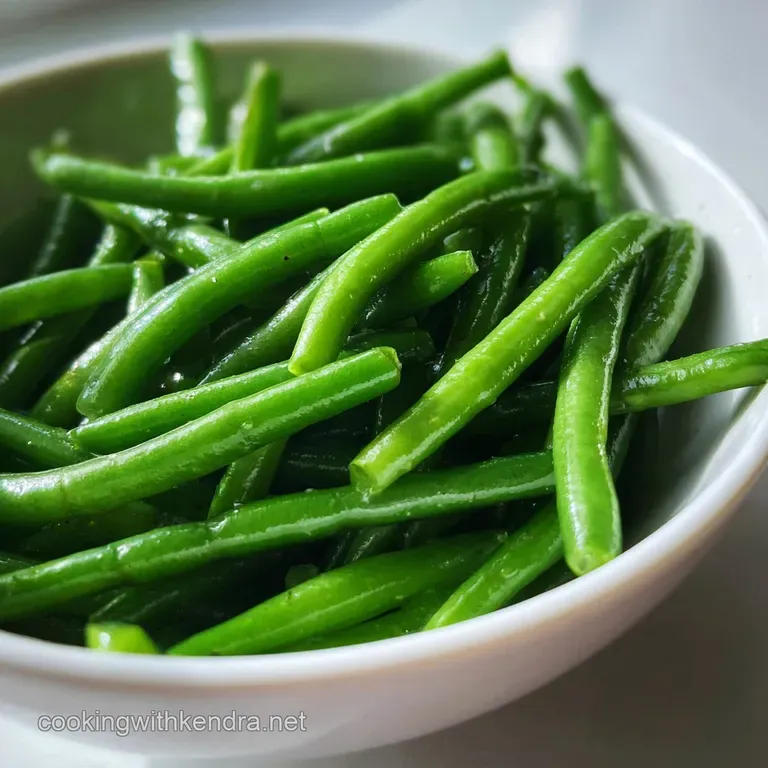
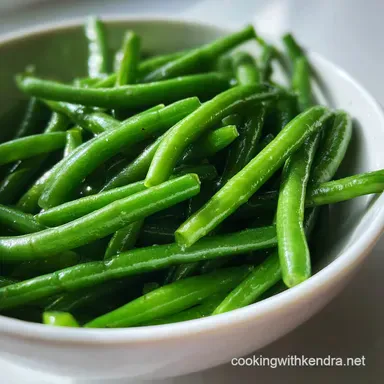
Storage and Smart Zero Waste Tips
Once your beans are blanched, shocked, and dried, they are incredibly shelf stable in the fridge. I like to keep a bag of them ready for quick snacks or to toss into stir fries at the last minute.
They will stay perfectly snappy for about 3 to 4 days if kept in an airtight container with a paper towel to absorb any extra moisture.
For long term storage, blanching green beans for freezing is the gold standard. After the ice bath and thorough drying, spread them out on a baking sheet in a single layer and freeze for an hour before moving them to a freezer bag.
This "flash freeze" method keeps them from clumping together, so you can grab just a handful whenever you need them. They will stay fresh in the freezer for up to 8 months.
Don't toss out those trimmed ends or any beans that look a little wilted! I keep a "veggie scrap bag" in my freezer. Those stems are full of flavor and go straight into the pot the next time I am making a batch of homemade vegetable or chicken stock.
It is a great way to reduce waste and add a little extra depth to your soups.
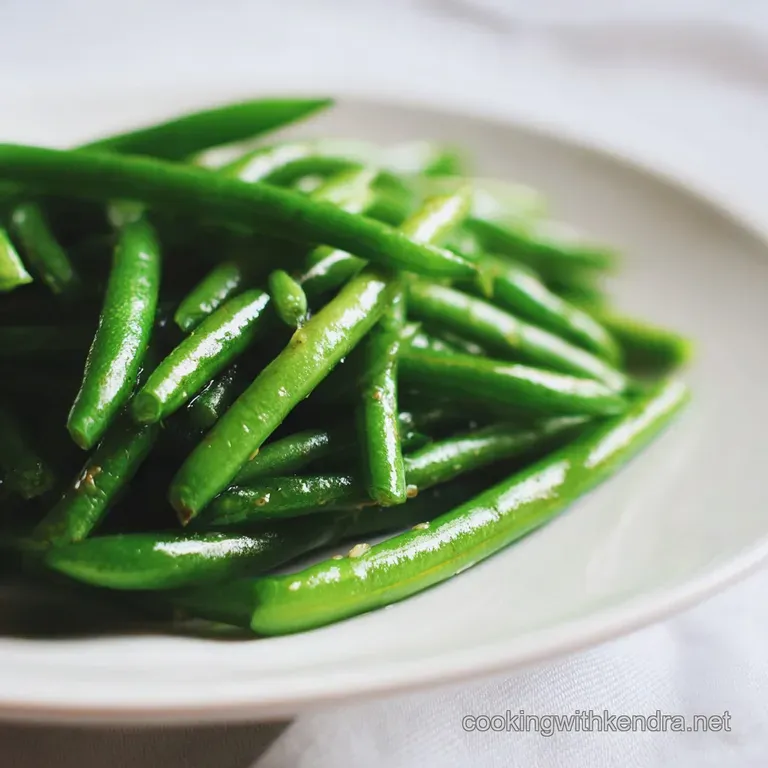
Plating Tips for a Beautiful Presentation
When you are ready to serve, remember that we eat with our eyes first. Because these beans are so vibrantly green, they look stunning on a white or light colored platter. I like to pile them up in a "birds nest" fashion rather than laying them out flat.
It gives the dish height and makes it look like it came straight out of a professional kitchen.
For a Professional Finish
For a final touch, I usually add something that provides a contrast in texture or color. A sprinkle of toasted almond slivers adds a great crunch, or a few gratings of fresh lemon zest can make that green color seem even brighter.
If you are serving them warm, a tiny knob of high-quality butter melting over the top creates a glossy sheen that is hard to resist. Just remember to add these toppings right before the plate hits the table so the beans stay as crisp as possible.

Blanching Green Beans FAQs
What is the point of blanching green beans?
To preserve color and texture. Blanching locks in a vibrant green color and a crisp tender snap, preventing them from becoming mushy or dull during cooking or storage. It essentially halts enzymatic activity.
What happens if you don't blanch green beans?
They can lose their vibrant color and become mushy. Unblanched green beans may turn a dull olive green and develop a softer, less appealing texture when cooked or stored. This is because enzymes continue to work, degrading chlorophyll and cell structure.
Do you dry green beans after blanching?
Yes, absolutely. Thoroughly drying blanched green beans is crucial, especially if you plan to sauté or freeze them. Excess moisture can lead to sogginess or ice crystals, impacting the final texture.
What are some common mistakes when blanching green beans?
Overcooking and skipping the ice bath. Leaving beans in boiling water too long leads to a loss of color and mushiness, while failing to shock them in ice water means they continue to cook, negating the blanching benefits. Crowding the pot is another common error.
Can I use blanched green beans in a casserole?
Yes, and it's highly recommended. Blanching green beans before adding them to a casserole, like in our Green Bean Casserole: The Best Posh Upgrade with Homemade Creamy Sauce, ensures they remain tender crisp and vibrant, preventing a soggy final dish.
Is blanching necessary if I'm freezing green beans?
Yes, it is essential for quality. Blanching deactivates enzymes that cause spoilage and color loss in frozen vegetables. If you enjoyed controlling the texture here, see how the same principle of preserving freshness applies to our Classic Irish Colcannon: Comforting Mashed Potatoes & Greens.
How long should I blanch green beans?
Typically 2 to 3 minutes. The goal is bright neon green and tender crisp. Start timing as soon as the beans hit the boiling water, and immediately transfer them to an ice bath to stop the cooking process.
Blanching Green Beans
Ingredients:
Instructions:
Nutrition Facts:
| Calories | 35 calories |
|---|---|
| Protein | 2.1 g |
| Fat | 0.3 g |
| Carbs | 7.8 g |
| Fiber | 3.1 g |
| Sugar | 3.6 g |
| Sodium | 285 mg |
