Cake Table Delight: 10 Tips for a Stunning Dessert Spread
- Have You Ever Wondered What Makes a Cake Truly Special?
- Celebrating Cake Through the Ages
- Why This Version Stands Out
- Recipe at a Glance
- Quality Ingredients Breakdown
- Kitchen Equipment Essentials
- Professional Cooking Guide
- Success Guaranteed Tips
- Perfect Presentation
- Storage and Make-Ahead
- Creative Variations
- Complete Nutrition Guide
- Expert FAQ Solutions
- 📝 Recipe Card
Have You Ever Wondered What Makes a Cake Truly Special?
Think about it for a second: when was the last time you took a bite of cake and felt an overwhelming wave of joy? if you’re anything like me, cake is not just a dessert; it’s a slice of happiness, often shared with friends and family on special occasions.
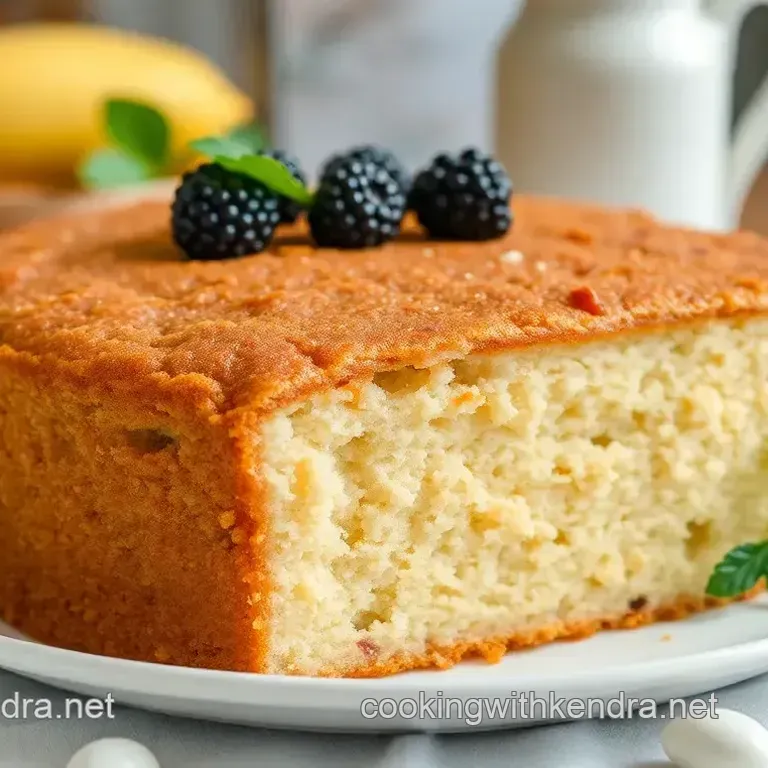
That’s exactly why i’m excited to share my cake table delight recipe with you! this beauty is all about a moist vanilla layer cake with fluffy buttercream frosting that will make your taste buds dance.
Worried about the time commitment? you’ll need just about 30 minutes of prep and another 25 minutes of baking. plus, the difficulty level is medium, which means it’s perfect for anyone looking to impress without losing their cool.
Celebrating Cake Through the Ages
Our love for cake is steeped in history. imagine attending a medieval feast where layers of sweet bread were stacked high and adorned with fruits it’s a tradition as as old as time! cakes originally emerged from as far back as the romans, where they were more akin to sweetened bread.
Fast forward to the modern age, and cake has transformed into a key player in celebrations. layer cakes became popular in the 19th century, thanks to progress in baking technology thank you, industrial revolution!
This recipe brings that heritage right onto your plate. cake table delight is versatile enough to be your go-to for everything from birthdays to cozy sunday brunches, making it a true celebration cake.
By whipping it up yourself, you’re not just following a recipe; you’re continuing a delightful tradition.
Why This Version Stands Out
So, what’s in this cake that keeps everyone coming back for more? first off, it’s all in the flavor combinations.
The rich vanilla flavor combined with the luscious buttercream frosting creates a mouthwatering experience that feels both nostalgic and comforting.
And don’t worry; it’s foolproof! after a few attempts (and several “uh-ohs” with previous recipes), i’ve nailed down this expert tested method that works every time.
But wait, there’s more! let’s not forget the health and nutrition highlights. with ingredients you can pronounce and full of wholesome goodness, this cake doesn’t just make your taste buds dance; it makes you feel good, too!
There are ways to accommodate dietary restrictions, creating gluten-free or dairy-free options so everyone can join in the fun without a second thought.
Recipe at a Glance
- Total Preparation Time: 30 minutes
- Cooking Time: 25 minutes
- Skill Level: Medium
- Serving Size: 8 servings
Now, grab your favorite apron because the next section is where the real magic happens! we’re diving into the ingredients that will create this show stopping dessert for your cake table .
Trust me, you’ll want to have these on hand to bring your cake table delight to life!
In the realm of layer cakes, whether you’re adding a burst of fresh fruit decoration or experimenting with buttercream frosting variations, there’s nothing quite like crafting a homemade cake that serves as both a treat and a centerpiece.
I can already picture it your family and friends gathered around, eyes lighting up as that gorgeous cake makes its grand entrance.
Let’s get to the ingredients and start baking!
Quality Ingredients Breakdown
Getting the best out of your baking experience begins with choosing the right ingredients. for this cake table delight , let’s have a little chat about what you’ll need to whip up this scrumptious vanilla layer cake.
Premium Core Ingredients
When I’m baking, I swear by the quality of my ingredients! Here’s a breakdown of what you'll need for the vanilla layer cake:
- All-Purpose Flour (2½ cups) : Look for a brand that feels fine and powdery. The good stuff will give your cake that airy texture. Store it in an airtight container to avoid moisture.
- Baking Powder (2½ tsp) : Always check the expiration date! If it’s been sitting in your cupboard since the last royal wedding, toss it and get a fresh one. Baking powder should smell a little sour sniff it for freshness!
- Salt (½ tsp) : Utilitarian, but a must have! Just regular table salt is fine for most baking keep it in a cool, dry spot.
- Unsalted Butter (1 cup) : Butter is queen when it comes to rich flavors. Grab high fat butter for that creamy goodness. You can soften it at room temperature or give it a quick zap in the microwave (just 10 seconds or so, or it’ll melt!). Store it in the fridge to keep it fresh.
- Granulated Sugar (2 cups) : The sweet stuff! Look for fine granulated sugar to dissolve easily into your batter.
- Eggs (4 large) : You’ll want these at room temp for a fluffier cake. Honestly, cracking fresh eggs is one of life’s little joys, isn’t it?
- Pure Vanilla Extract (1 tbsp) : Spend a bit more for pure vanilla none of that artificial stuff, please! It elevates the flavor tenfold. Store it away from heat.
- Whole Milk (1 cup) : Full fat for the win! It’ll make your cake extra moist. Keep it in the fridge, of course.
Signature Seasoning Blend
Now onto the buttercream frosting that really makes things sing!
- Butter (1 cup) : Same as before, keep it unsalted. The creaminess is key here.
- Powdered Sugar (4 cups) : This sweet cloud should be soft and fluffy. Don’t skip sifting it to avoid lumps in your frosting!
- Whole Milk (¼ cup) : Remember, it’s all about balance! This helps the frosting get that perfect spreading consistency.
- Pure Vanilla Extract (1 tbsp) : Going back to the good stuff!
- Food Coloring (optional) : If you want to add a whimsical touch, a few drops of gel food coloring will work wonders.
Smart Substitutions
Okay, life happens. We don’t always have every ingredient on hand, right?
- For gluten-free Options : Use gluten-free all-purpose flour. It might change the texture a tad, but it usually works out.
- dairy-free Alternatives : Swap the whole milk for almond or oat milk still gets the job done and usually adds a nice flavor.
- Egg-Free Cakes : You can use applesauce or a flaxseed mixture (1 tbsp flaxseed meal + 2.5 tbsp water = 1 egg) if you’re avoiding eggs.
- Flavor Variations : Toss in some almond extract instead of vanilla if you fancy a bit of a twist!
Kitchen Equipment Essentials
Next up, let’s talk about the tools of the trade. You don’t need anything super fancy, but a few essentials can make your baking life a lot easier.
- Mixing Bowls : At least two large mixing bowls will help you keep things organized.
- Electric Mixer : If you can, spring for a stand mixer. It’s a game changer! But a handheld one works just fine too.
- Measuring Cups and Spoons : Precision is key in baking if you estimate, you might end up with a cake that tastes like… well, a big ol’ mystery.
- Spatula : A good spatula is crucial for scraping down those sides and getting every last bit of batter into your pans.
- Cooling Racks : This helps cool your cakes evenly and prevents soggy bottoms no one likes that!
Pro Ingredient Tips
Alright, before we dive into the fun part making the cake let’s field some quick tips from my baking faux pas over the years.
- Always double check your ingredient freshness. I can’t tell you the number of times I’ve forgotten about expired butter and had to make a hasty cake run!
- When shopping, seek out local markets for fresher eggs and butter. It makes a noticeable difference.
- Store extras in the right conditions: flour in a cool, dry place; sugar in a sealed container; eggs in the fridge.
- Don’t be shy about splurging on a better brand of vanilla or butter once you taste the difference, you’ll get it!
That’s it for the ingredient rundown! now that you’ve got your pantry stocked and your tools ready, let’s move on to what really brings this masterpiece together the step-by-step instructions.
You’re going to love seeing your cake table delight come to life, perfect for any celebration or simply a cozy evening at home.
Professional Cooking Guide
Essential Preparation Steps
Okay, let’s get ready to bake! now, the first rule of any kitchen is mise en place , which is just a fancy way of saying "have everything in its place.
" gather up your ingredients for the vanilla layer cake and buttercream frosting. i don't know about you, but i’ve learned the hard way that having everything out and measured saves so much frustration later like when you realize you’re out of eggs halfway through mixing.
Then, give your flour, baking powder, and salt a good mix in a bowl and set it aside. this little bowl is now your treasure when you're ready to combine everything! it’s like putting on your favourite apron and getting into the baking groove.
Time management is key here, too. while your cakes are baking, you can whip up the frosting. multi tasking is your best friend.
Just be careful not to let something burn while you’re trying to decorate it’s not a good look on a cake table.
Keep a kitchen timer handy so you’re not juggling too many things at once.
Professional Cooking Method
Preheat the oven: here’s a magic number: 350°f (175°c). this is where the magic happens! grease those 9 inch round cake pans or get them dressed in parchment paper trust me, it makes life easier.
Prepare the dry ingredients: grab a medium bowl and whisk together 2½ cups of flour, 2½ teaspoons of baking powder, and a generous pinch of salt.
Set that aside; it’s going to help your cake rise like toast in a toaster.
Cream the butter and sugar: in a large mixing bowl, toss in 1 cup of softened butter and 2 cups of granulated sugar.
Use your electric mixer until it’s light and fluffy. don’t rush it! this could be about 4-5 minutes. you want that airy texture!
Add eggs and vanilla: crack in those magical eggs one at a time. mix until they’re blended nicely, then add in a tablespoon of pure vanilla extract.
Oh man, does that smell good!
Combine dry and wet ingredients: now this is the fun part! gradually add the flour mixture and alternate with 1 cup of whole milk until just combined.
It’s okay if there are small lumps; they’ll bake away. just don't turn it into wallpaper paste nobody likes a tough cake!
Divide Batter Between Pans: Pour that gorgeous batter into your prepared pans, smoothing the tops with a spatula. Dreams are being made here!
Bake the cakes: pop those pans in the oven and bake for about 25-30 minutes. use the toothpick trick: if it comes out clean, you’re golden! let the cakes cool for about 10 minutes in the pans, then carefully flip them out onto a wire rack.
Try not to eat the leftovers stuck to the pans i know it’s tempting!
Make the buttercream frosting: in a clean mixing bowl, beat 1 cup of softened butter until creamy. gradually add 4 cups of powdered sugar, then mix in ¼ cup of whole milk and your lovely tablespoon of vanilla.
Beat until fluffy; if you’ve got some food coloring, this is where you can make it pop!
Assemble the cake: totally big moment! once your cakes are cool, place one on your serving platter. slather it with frosting, then add the top layer and frost the whole thing.
Look at you go!
Decorate: now to the fun part get creative with fresh fruit, colorful sprinkles, or those edible flowers. i always feel a bit like an artist at this stage, and no fancy cake table would be complete without it.
Expert Techniques
Here’s my insider tip: always taste your frosting as you go! quality checks are crucial. if it’s a smidge too sweet, a pinch of salt can balance it out beautifully.
And if your cakes ever domed up too much in the oven, just trim the tops off. it’s all about making it look pretty and delicious.
Success Strategies
Don’t forget about troubleshooting! if your cake sinks in the middle, it might need more time in the oven. but if it’s burnt, well.
.. i mean, we’ve all been there! as long as it tastes good, you can pass it off as a rustic style cake.
A perfect cake comes from giving it the love it deserves. monitor your baking time closely and always double check that oven temp.
If you can smell it baking, you're on the right track!
Alright, that’s a wrap on the foundation of your delicious vanilla layer cake. over the next few pages, i’ll dive deeper into some delightful variations and baking tips that can take your cake table display from nice to absolutely stunning.
Ready for more cake magic? let’s go!
Success Guaranteed Tips
Professional Insights
Let’s get right into it. a remarkable cake often starts with a handful of insider tips. one of the best pieces of advice i’ve picked up over the years is to weigh your ingredients instead of measuring them by volume.
This little tweak significantly enhances the recipe's accuracy, especially for flour. plus, that means you’ll avoid the dreaded dry cake!
Expert Techniques
Are you preheating your oven before mixing? if not, you’re missing out. a hot oven helps achieve that beautiful rise.
And here’s a little trick i learned the hard way: when you add eggs, do so one at a time ! this allows for better incorporation, making your layers fluffy and delicious.
There's nothing worse than a dense cake at a birthday party, right?
Kitchen Wisdom
Don’t rush it! allow your cakes to cool completely before frosting. this tip saved me more than once from a melty buttercream catastrophe.
And if your frosting isn’t coming out as well as you’d like, try adding a splash of milk to soften it up a tad.
Success Guarantees
Following the recipe precisely is essential, but find your own rhythm along the way. baking is as much about the journey as it is about the destination.
Trust me, a few mix-ups are just part of the experience. each cake teaches you something new!
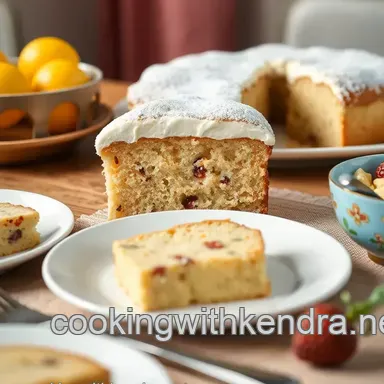
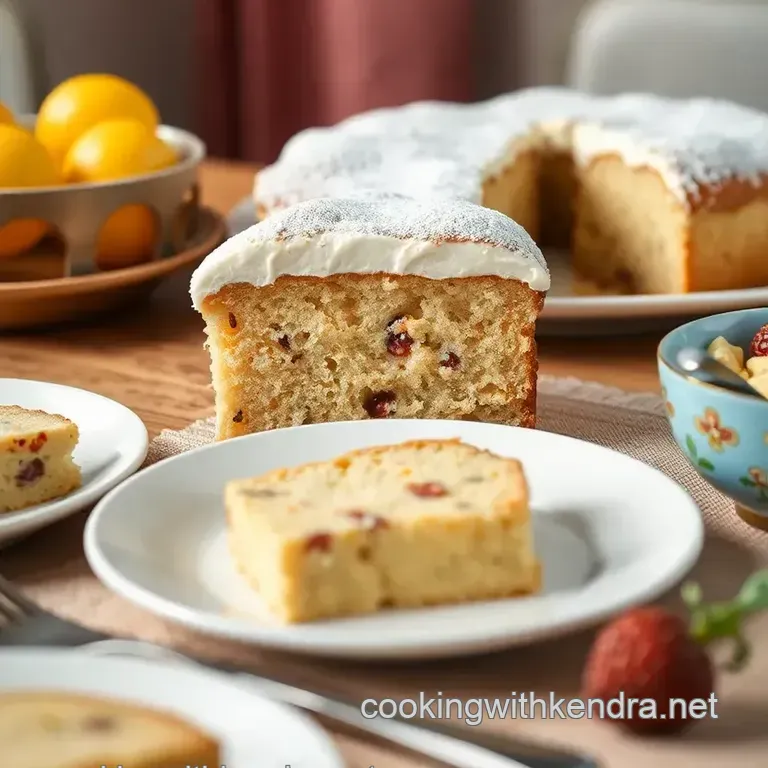
Perfect Presentation
Plating Techniques
When displaying your “cake table delight,” the aesthetic is key. use a cake stand for elevation it just looks fancy! a simple white plate does wonders for your cake if you don’t have one.
A scattered sprinkle or two around the edge adds a festive touch without much fuss.
Garnish Ideas
Fresh fruit is your best friend here! i love topping my cakes with berries they're visually stunning and deliciously tangy against the rich sweetness of a vanilla layer cake.
Less is more, so try a light sprinkle of edible flowers for that instagram ready shot.
Serving Suggestions
Think beyond just slicing! Try serving individual cake “scoops” in cups for a casual gathering. Pair with a dollop of whipped cream frosting or some ice cream on the side, and voila everyone’s happy!
Visual Appeal Tips
It’s all in the details, my friends. use a sharp knife to get clean slices. and don’t forget the sprinkles! they can turn an ordinary cake into a showstopper.
Opt for chocolate shavings or even colorful sprinkles to match the occasion's theme. now that's a cake table that draws attention!
Storage and make-ahead
Storage Guidelines
If you have leftovers though i doubt that’ll happen! store your cake covered at room temperature for about three days. if you want to keep it longer, refrigerate it wrapped tightly in plastic wrap.
It’s not the same as fresh, but it’ll still do!
Preservation Methods
You can also freeze your cake for up to three months. Just make sure to wrap it well. I once forgot to wrap a cake, and let’s just say it became a science experiment!
Reheating Instructions
To revive a previously frozen cake, let it thaw in the fridge overnight. you could warm individual slices in the microwave for about 10-15 seconds, which gives a lovely softening effect.
No one likes a dry slice with their coffee!
Freshness Tips
For ultimate freshness, try not to frost the entire cake until you’re ready to serve. keep the frosting separate if possible, especially if you’ve made a buttercream frosting .
It’ll stay light and fluffy that way.
Creative Variations
Flavor Adaptations
Have you thought about switching up the vanilla? adding a teaspoon of almond extract brings a lovely nuttiness to your cake for a delightful surprise.
Get eccentric and think of traditional cake recipes from around the world.
Dietary Modifications
I totally understand the need for options. for those avoiding gluten, switch to a gluten-free cake option . it still works beautifully.
And for a dairy-free crowd, almond or coconut milk is a game changer in baking!
Seasonal Twists
In autumn, swap in some pumpkin puree for an oh-so-delicious twist! toss in a few spices like cinnamon or nutmeg, and you’ve got a seasonal treat.
In the summer? stick on fresh sliced strawberries, and you’ll feel like you’re at a garden party!
Regional Variations
Why not take inspiration from other regions? try adding a bit of fruit compote between the layers for a modern take on layered desserts or think about crushed pistachios for a middle eastern flair.
Complete Nutrition Guide
Detailed Breakdown
Now, onto the nitty gritty-loving your cake doesn't just mean indulging blindly. Each serving of this beauty contains about 450 calories, and while it's a treat, it’s essential to know exactly what you're enjoying!
Health Benefits
While cakes are not exactly health foods, indulge with pieces like fresh fruit toppings that can give you vitamins and antioxidants. And everything in moderation, right?
Dietary Information
A quick peek into the recipe reveals that the cake is mostly carbs with a good amount of sugar. It’s not going to match your daily nutrition, but it’ll brighten your day!
Portion Guidance
Slice it right a standard serving is about 1/8 of the cake. if it’s a celebration, go ahead and allow for a bigger piece.
Let’s be real everything’s better when shared, and cake is no exception!
Expert FAQ Solutions
Common Concerns
Sometimes, people worry about their cakes rising properly. My honest advice? Make sure your baking powder is fresh!
Expert Answers
If you find your cake sticking to the pan, try using parchment paper. It’ll be a life saver. Trust me; I learned the hard way!
Troubleshooting Guide
If your cake seems too dense, you probably overmixed. Remember, being patient with fluffy is key!
Success Tips
If everything else fails, remember that decoration can hide a multitude of sins. A generous spread of buttercream frosting never hurt anyone!
In conclusion, the journey of baking your cake table delight can be both challenging and rewarding. with a few tips, some creative flair, and a sprinkle of love, your cake will be ready for any gathering or just a little me time .
Enjoy the process, taste test along the way, and most importantly, celebrate every delicious moment!