Bone Broth: Gut-Healing Instant Pot

- Time:15 minutes active + 180 minutes cooking = Total 195 minutes
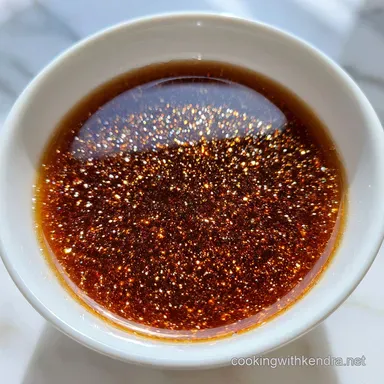
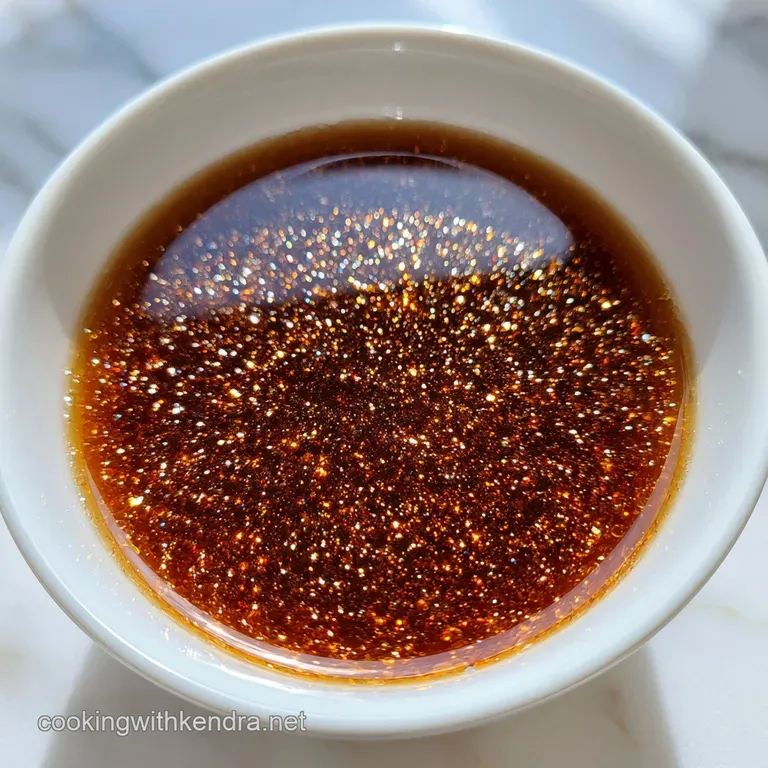
- Flavor/Texture Hook: Rich, mahogany liquid that gels into a savory jelly when chilled
- Perfect for: Weekly meal prep, cozy winter sips, or a base for hearty soups
The smell of beef bones roasting at 400°F is something you never forget. It starts as a faint, meaty aroma and quickly turns into this heavy, toasted scent that fills every corner of the house. I remember the first time I tried to skip the roasting step because I was in a rush.
I just threw everything in the pot, and the result was a pale, thin liquid that tasted more like boiled water than a rich stock. It was a total letdown.
Since then, I've learned that the roast is where the magic happens. When those bones sizzle and turn a deep mahogany, you're creating a foundation of flavor that no amount of salt can mimic. It's the difference between a bland liquid and a velvety, concentrated essence.
If you've been looking for a way to make a proper Bone Broth without spending three days hovering over a stovetop, you're in the right place. We're using a pressure cooker to cheat the clock while keeping the depth.
Trust me, once you see that liquid turn into a thick gel in the fridge, you'll never go back to store-bought cartons.
Making Real Bone Broth
Right then, let's talk about what's actually happening in your pot. Making this isn't just about boiling things; it's about extraction. We want the minerals and the gelatin to leave the bone and enter the water.
The pressure cooker is a total lifesaver here. Instead of simmering for 24 hours, we use high pressure to force the water into the dense structure of the knuckle bones. It's a much faster way to get that gut healing bone broth feel without the electricity bill from a slow cooker.
But don't let the speed fool you. We still have to respect the process. If you just vent the steam instantly, you'll end up with a cloudy mess. We need the natural descent to keep the proteins stable. It's a little bit of patience for a lot more quality.
Why This Actually Works
Acid Extraction: The apple cider vinegar helps break down the connective tissue and pull minerals out of the bones.
Heat Concentration: Roasting the bones creates browned bits that add a toasted, savory depth to the final liquid.
Pressure Breakdown: High pressure breaks down collagen into gelatin much faster than a simmer.
Natural Release: Letting the pressure drop slowly prevents the liquid from boiling violently, which keeps the broth clear.
| Method | Time | Texture | Best For |
|---|---|---|---|
| Stovetop | 12-24 hrs | Light/Clear | Traditionalist slow cooks |
| Instant Pot | 3 hrs | Velvety/Rich | Busy families, maximum collagen |
| Oven | 8-12 hrs | Dense/Heavy | Large batch meal prep |
Component Analysis
| Ingredient | Science Role | Pro Secret |
|---|---|---|
| Marrow Bones | Fat and Depth | Mix knuckle and marrow for the best gel |
| ACV | Mineral Release | Use raw, unfiltered vinegar for better results |
| Carrots/Celery | Sweetness/Aroma | Roast them with the bones for extra flavor |
| Filtered Water | Pure Base | Avoid chlorine to keep the taste clean |
Essential Ingredient List
For this recipe, we're sticking to the classics. Don't bother with low-fat versions or pre cut "soup mixes" from the store; they usually have too much filler.
- 4 lbs beef marrow and knuckle bones Why this? Knuckles provide the gelatin for that thick texture
- 2 tbsp avocado oil Why this? High smoke point for roasting
- 1 large yellow onion, roughly chopped
- 3 medium carrots, cut into chunks
- 3 stalks celery, cut into chunks
- 4 cloves garlic, smashed
- 1 tbsp whole black peppercorns
- 2 bay leaves
- 2 tbsp apple cider vinegar Why this? Essential for pulling collagen from bone
- 12 cups filtered water
- 1 tsp sea salt
Ingredient Swaps
| Original Ingredient | Substitute | Why It Works |
|---|---|---|
| Avocado Oil | Ghee (2 tbsp) | Similar smoke point. Note: Adds a buttery, nutty note |
| Apple Cider Vinegar | Lemon Juice (2 tbsp) | Both provide acidity. Note: Slightly brighter, more citrusy flavor |
| Beef Bones | Turkey Bones (4 lbs) | Same collagen structure. Note: Lighter color and milder taste |
One thing I've noticed is that using filtered water really does make a difference. Tap water can sometimes have a metallic tang that clashes with the richness of the pot bone broth. It's a small detail, but it's one of those things that separates a "good" broth from a "wow" broth.
The Gear You Need
You don't need a professional kitchen for this, but a few specific tools make it easier. A rimmed baking sheet is mandatory for the roast - if you use a flat pan, the oil and fat will spill over the edges and smoke up your kitchen.
I recommend a 6 quart or 8 quart pressure cooker, such as an Instant Pot. If you have a smaller one, you'll need to work in batches because filling it to the brim can be dangerous.
Finally,, a fine mesh strainer is your best friend. If you want it absolutely crystal clear, you can line the strainer with a piece of cheesecloth, but for most home cooks, the mesh is plenty.
Step by step Guide
- Preheat your oven to 400°F (200°C). Toss the beef bones in avocado oil on a rimmed baking sheet.
- Roast for 30 minutes until the bones are deep mahogany in color. Note: Don't let them burn, just get a dark brown crust.
- Transfer the roasted bones and every bit of the pan drippings into the Instant Pot.
- Add the chopped onion, carrots, celery, smashed garlic, peppercorns, bay leaves, and apple cider vinegar.
- Pour in the filtered water until the bones are covered, but stay below the Max Fill line.
- Lock the lid and set the pot to Manual/Pressure Cook on High for 120 minutes.
- Let the pressure release naturally for 20-30 minutes. Note: Forcing the steam out can cloud the liquid.
- Strain the liquid through a fine mesh strainer into glass mason jars, discarding the solids.
Chef's Tip: If you want a more intense flavor, freeze your bones for 2 hours before roasting. This dries out the surface, allowing them to brown faster and more evenly.
Fixing Common Mistakes
Why Your Broth Is Cloudy
If you see a milky or greyish haze, it's usually because the liquid boiled too hard during the pressure release. When you use the quick release valve, the sudden drop in pressure causes the liquid to surge, mixing fats and proteins back into the broth. Stick to the natural release for a clearer result.
Why It Didn't Gel
A lack of "jiggle" usually means you didn't have enough collagen rich bones. Marrow bones provide flavor and fat, but knuckle and joint bones provide the gelatin. If your Bone Broth is thin, try adding more joints (like feet or knees) next time.
The Taste Is Too Strong
Sometimes the beef can feel overpowering. This usually happens if the bones were roasted too long or if you used too many marrow bones. You can balance this by adding a squeeze of fresh lemon juice right before serving.
| Problem | Root Cause | Solution |
|---|---|---|
| Greasy layer on top | High fat marrow bones | Chill overnight and skim off the white fat |
| Bland flavor | Not enough roast/salt | Add a pinch more sea salt or roast bones longer |
| Bitter aftertaste | Burnt vegetables | Ensure veggies are added after roasting the bones |
Common Mistakes Checklist
- ✓ Did you roast the bones until they were dark brown, not just grey?
- ✓ Did you include the apple cider vinegar to extract the minerals?
- ✓ Did you wait for the natural pressure release?
- ✓ Did you use knuckle bones for that velvety thickness?
- ✓ Did you avoid filling the pot past the Max Fill line?
Easy Flavor Tweaks
Once you've got the base down, you can really play around with the profile. For a more "foresty" vibe, I love adding a few sprigs of fresh thyme and rosemary during the pressure phase.
If you're looking for something more like a homemade ramen broth, try adding a piece of kombu (dried kelp) and some ginger slices. It shifts the flavor from "beefy" to "umami rich" almost instantly.
For those who want an easy instant pot chicken bone broth, just swap the beef for chicken carcasses. Reduce the pressure time to about 60-90 minutes, as chicken bones break down much faster than beef.
Quick Decision Guide
- If you want a "Wellness Shot": Simmer the finished broth down by half to concentrate the collagen.
- If you want a "Gourmet Base": Add a splash of soy sauce or fish sauce for extra depth.
- If you want a "Clear Stock": Strain through a coffee filter or double layered cheesecloth.
Scaling Your Batch
When I'm making this for the whole family, I usually double the recipe. But be careful - don't just double the salt and peppercorns. I find that scaling spices to 1.5x is usually plenty. If you go full 2x, the black pepper can become too aggressive.
If you're making a smaller batch (half recipe), use a smaller pot if possible. If you use a huge pot for a small amount of liquid, it takes longer to reach pressure and you might lose more liquid to evaporation.
For those making an instant pot beef bone broth in massive quantities, work in batches. Overfilling the pot isn't just a safety issue; it also prevents the heat from circulating evenly, which can leave some bones under extracted.
Storage and Scraps
Keep your Bone Broth in glass jars in the fridge for up to 5 days. You'll notice it turns into a thick, jelly like consistency - this is exactly what you want! It means you've extracted plenty of gelatin. When you heat it up, it'll melt right back into a velvety liquid.
For long term storage, the freezer is your best bet. I use silicone muffin liners to freeze the broth into 1 cup portions. This makes it so easy to pop out a "cube" of broth whenever I'm making a pan sauce or a quick glaze. It stays fresh in the freezer for up to 6 months.
To avoid waste, don't just toss your veggie scraps. I keep a "scrap bag" in the freezer for onion ends, carrot peels, and celery tops. You can toss these into the pot with your bones to add even more nutrient density. According to Serious Eats, the quality of your aromatics significantly impacts the complexity of the final stock.
Ways to Use It
The best part about having this in the fridge is how it transforms other meals. I love using it as the base for a traditional pinto bean soup, which gives the beans a rich, meaty undertone.
You can also use it as a poaching liquid for chicken breasts or a way to cook your rice. Instead of using water for quinoa or farro, use this broth. The grains absorb the savory flavor, and the result is so much more satisfying.
And honestly, sometimes the best way to enjoy it is just in a mug. Add a pinch of salt, a crack of black pepper, and maybe a slice of fresh ginger. It's the ultimate comfort food for a rainy Tuesday or when you're feeling a bit under the weather.
Just heat it slowly on the stove - don't boil it again, or you'll lose some of that delicate texture we worked so hard to get.
High in Sodium
920 mg 920 mg of sodium per serving (40% 40% of daily value)
The American Heart Association recommends a daily sodium limit of no more than 2,300 mg (and ideally 1,500 mg for most adults) to reduce the risk of cardiovascular disease.
Tips to Reduce Sodium in Your Bone Broth
-
Avoid Added Salt-25%
Ensure that no additional table salt or salty seasonings are added during the simmering process or as a final seasoning step.
-
Blanch the Bones-15%
Boil the beef bones for 10 minutes and discard the water before starting the actual broth to remove excess natural sodium and impurities.
-
Increase Water Ratio-10%
Add an additional 2-4 cups of filtered water to the pot to further dilute the concentration of natural sodium per serving.
-
Enhance Acid Profile-10%
Slightly increase the apple cider vinegar; acidity tricks the taste buds into perceiving more saltiness, reducing the need for added sodium.
-
Use Fresh Aromatics
Stir in fresh parsley, thyme, or rosemary at the end of cooking to add complexity and depth without adding any sodium.
Recipe FAQs
How long do you cook bone broth in the Instant Pot?
Pressure cook on High for 120 minutes. Allow the pressure to release naturally for 20 30 minutes to ensure broth clarity and collagen stability.
Does bone broth help osteopenia?
No, it is not a clinical treatment. While it provides collagen and minerals, it lacks the concentrated calcium levels required to treat bone density loss.
Is bone broth good for high cortisol?
Yes, it can be supportive. The amino acids and nutrients help stabilize blood sugar and soothe the gut, which may reduce the body's systemic stress response.
What bone broth is best for IBS?
Choose a simple version with minimal additives. If you are sensitive to FODMAPs, omit the onion and garlic from the recipe to avoid digestive triggers.
Why is my bone broth not gelatinous?
Increase the ratio of knuckle bones. These bones are rich in collagen, which is essential for achieving that thick, jelly like consistency when chilled.
Is it true that skipping the roasting step doesn't affect the flavor?
No, this is a common misconception. Roasting the bones at 400°F creates a mahogany crust that provides a deep, savory complexity that boiling alone cannot produce.
How do I store the finished broth?
Chill in glass jars for 5 days or freeze for 6 months. Use silicone muffin liners for convenient 1-cup portions. If you enjoyed mastering broth preservation here, see how we apply a similar base logic in our hearty chicken and veg soup.
Instant Pot Bone Broth