My Favorite Apple Pie: Shattering Crust
- Time:30 minutes active + 1 hour chilling = Total 2 hours 30 mins
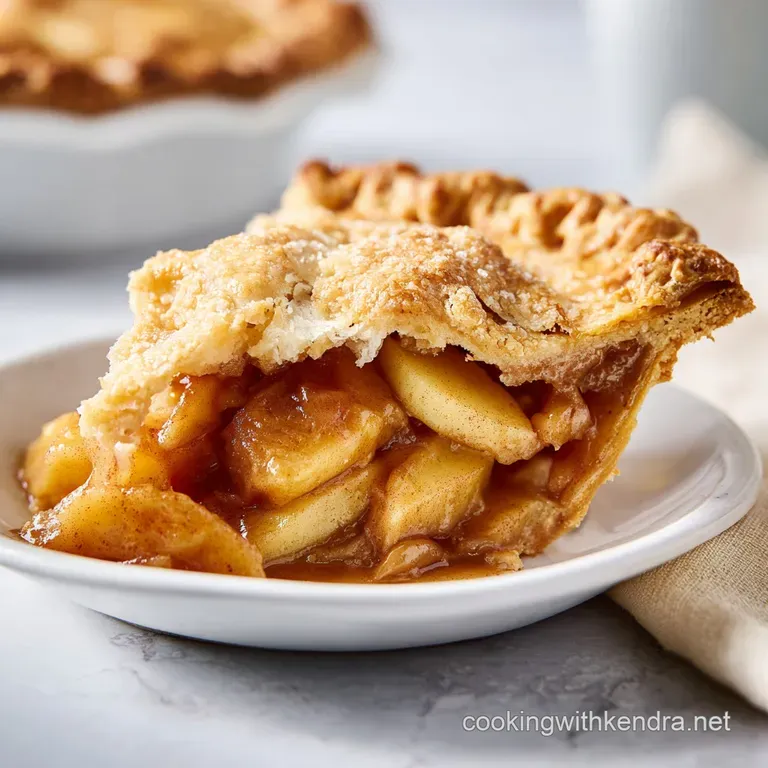
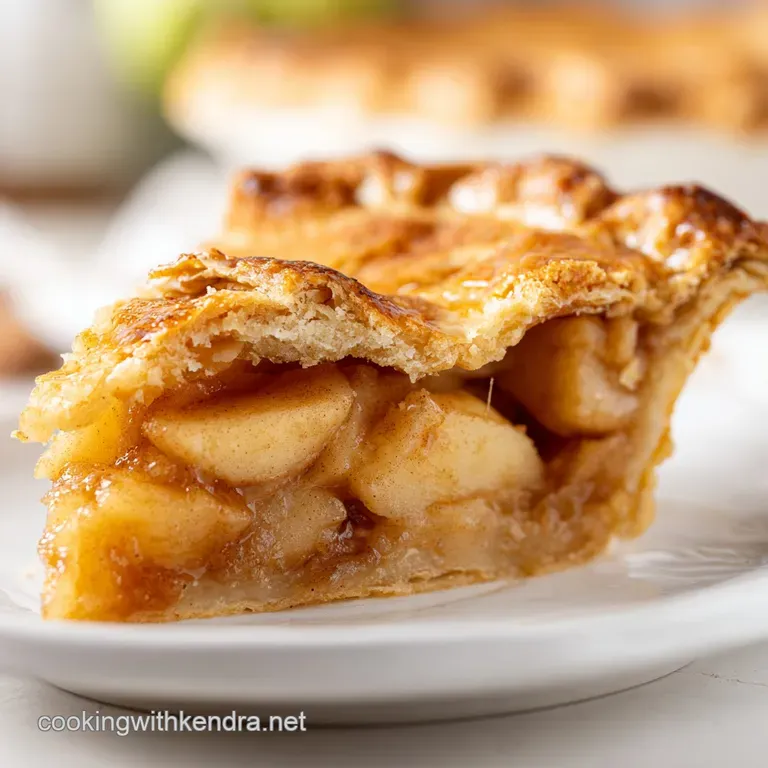
- Flavor/Texture Hook: Deep golden lattice crust with a velvety, spiced apple glaze
- Perfect for: Sunday family dinners or holiday centerpieces
- My favorite apple pie
- Solving the Soggy Bottom Problem
- Recipe Specs and Timing
- The Essential Building Blocks
- Gear for Better Baking
- Bringing It All Together
- Common Baking Mistakes Fixed
- Troubleshooting Common Issues
- Swaps and Creative Variations
- Adjusting the Recipe Size
- Kitchen Myths Debunked
- Storage and Waste Tips
- Serving and Enjoying It
- Recipe FAQs
- 📝 Recipe Card
My favorite apple pie
That sharp crack when the knife first hits the crust is the only sound that matters. I remember the first time I tried to make a traditional pie for my family, and it was a disaster. The top looked gorgeous, but the bottom was a soggy, pale mess that practically slid off the plate.
It was the classic "soggy bottom" syndrome that haunts so many home cooks.
I spent a long time wondering why the filling always leaked and turned the pastry into mush. The problem wasn't the dough, it was the apples. Raw apples release a massive amount of water as they bake, and that liquid has nowhere to go but down.
That's how I developed the method for my favorite apple pie, which treats the filling like a concentrate rather than a raw heap of fruit.
Now, we're going to fix that. I'll show you how to sauté the apples first to lock in the flavor and control the moisture. You can expect a pie that stays structural, smells like a Southern autumn, and has a crust that actually shatters.
Trust me, once you stop putting raw apples in your crust, you'll never go back.
Solving the Soggy Bottom Problem
The secret to a stable pie is managing the water. Most people just toss sliced apples with sugar and cornstarch, but that creates a soup in the oven. By cooking the filling on the stove first, we're essentially reducing the liquid into a syrup that clings to the fruit.
The Butter Pocket: Leaving pea sized lumps of butter in the dough creates tiny steam vents. When the heat hits, that water evaporates, pushing the flour layers apart and creating those flaky sheets.
Starch Gelatinization: Adding cornstarch to a hot skillet allows it to thicken immediately. This creates a glossy, velvety glaze that binds the apples together instead of pooling at the bottom.
Thermal Shock: Using ice water and chilled butter prevents the fat from melting before it hits the oven. If the butter melts early, you get a cookie like crust instead of a flaky one.
Pre filling Cool Down: Letting the filling rest for 15 minutes prevents the heat from melting the butter in your bottom crust before the bake even starts.
| Feature | Fresh to Oven Method | My Pre Cooked Method | Impact on Result |
|---|---|---|---|
| Bottom Crust | Often damp/soggy | Shatter crisp | Better structural integrity |
| Filling Texture | Can be watery | Thick and jammy | More concentrated flavor |
| Bake Time | Long (to cook fruit) | Medium (to brown crust) | Reduced risk of burnt edges |
Recipe Specs and Timing
Before we dive in, let's get the timeline straight. This isn't a "throw it together in ten minutes" kind of dessert, but it's not overly complex either. The bulk of the time is spent letting the dough chill and the pie bake.
The active work happens in two bursts: the dough prep and the filling sauté. Between those, you have a window to clean up your kitchen or prep some other treats. Since this is my favorite apple pie, I recommend giving it the full resting time. Rushing the dough will lead to a crust that shrinks in the oven.
The temperature shift during baking is also key. We start hot to set the crust and then drop the heat to ensure the center cooks through without the lattice burning. Keep a close eye on the edges around the 20 minute mark.
The Essential Building Blocks
When it comes to the fruit, don't just grab whatever is on sale. I use a mix of Granny Smith for that sharp tang and Honeycrisp for a bit of sweetness and structure. This balance prevents the pie from tasting like a one note sugar bomb.
For the crust, all purpose flour is the standard for a reason. It provides the right amount of gluten to hold the lattice together while remaining tender. Don't be tempted to use low-fat butter here, as the fat is what creates the actual flakes.
For the Flaky Butter Crust
- 2 ½ cups (315g) all purpose flour Why this? Balanced protein for a sturdy but tender crust
- 1 tablespoon (12g) granulated sugar Why this? Adds a hint of sweetness and aids browning
- 1 teaspoon (6g) salt Why this? Cuts through the richness of the butter
- 1 cup (225g) unsalted butter, chilled and cubed Why this? Cold fat is non negotiable for flakiness
- 8 tablespoons (120ml) ice water Why this? Binds dough without adding too much heat
For the Homemade Apple Pie Filling
- 3 lbs (1.36kg) mixed apples (Granny Smith and Honeycrisp), peeled and sliced Why this? Mixes tartness with a firm texture
- ¾ cup (150g) granulated sugar Why this? Caramelizes with the apple juices
- 2 tablespoons (16g) cornstarch Why this? Thickens the juices into a glaze
- 1 tablespoon (8g) ground cinnamon Why this? The classic warmth of a home bake
- ¼ teaspoon (1.5g) ground nutmeg Why this? Adds a subtle, earthy depth
- 2 tablespoons (30g) unsalted butter Why this? Sautés apples for a richer taste
- 1 tablespoon (15ml) lemon juice Why this? Brightens the flavor and prevents browning
For the Finish
- 1 large egg (50g) Why this? Creates a protein film for browning
- 1 tablespoon water Why this? Thins the egg wash for even coverage
- 1 tablespoon (12g) coarse sanding sugar Why this? Adds a professional crunch to the top
| Original Ingredient | Substitute | Why It Works |
|---|---|---|
| Honeycrisp Apples | Braeburn or Fuji | Similar firmness. Note: May be slightly sweeter |
| Unsalted Butter | Vegan Butter Block | Similar fat content. Note: Check for melting point |
| All Purpose Flour | gluten-free 1:1 Blend | Mimics structure. Note: Crust will be more fragile |
Gear for Better Baking
You don't need a professional kitchen for my favorite apple pie, but a few tools make the process a lot smoother. If you don't have a pastry cutter, a sturdy fork or two knives can work, though your arms will feel it more.
A heavy bottomed skillet is crucial for the filling. If you use a thin pan, the sugars can burn quickly, leaving you with a bitter taste. I prefer a cast iron or stainless steel pan that distributes heat evenly across the apples.
Finally, a 9 inch pie dish is the standard. If yours is deeper, you might need an extra apple or two to ensure the filling doesn't leave a huge gap at the top. A rolling pin and a piece of parchment paper will also save you from using too much extra flour on your counter.
Bringing It All Together
Right then, let's get to the actual making. This is where the magic happens. Remember to keep your butter cold and your patience high.
- Whisk flour, sugar, and salt in a bowl. Note: Ensure they are well combined so salt doesn't clump
- Cut in the chilled butter using a pastry cutter until the mixture resembles coarse crumbs with some pea sized lumps remaining. Note: Don't over mix or you'll lose the flakes
- Gradually add ice water, one tablespoon at a time, stirring until the dough just holds together.
- Divide dough into two discs, wrap in plastic, and refrigerate for 1 hour. Note: This relaxes the gluten to prevent shrinking
- Melt 2 tablespoons of butter in a skillet over medium heat.
- Add sliced apples, lemon juice, and cinnamon. Sauté for 5–8 minutes until apples soften slightly but retain their shape.
- Stir in sugar, cornstarch, and nutmeg. Cook for another 2 minutes until the sauce thickens into a glossy glaze.
- Remove from heat and let cool for 15 minutes. Note: Essential to avoid melting the bottom crust
- Preheat oven to 400°F (205°C).
- Roll out the first disc to a 12 inch circle and press into the pie dish.
- Pour in the cooled homemade apple pie filling, mounding it slightly in the center.
- Roll out the second disc and cut into strips to create a lattice weave over the top.
- Brush the crust with egg wash (beaten egg and water) and sprinkle with sanding sugar.
- Bake for 20 minutes, then reduce heat to 375°F (190°C) and bake for another 30–40 minutes until the crust is deep golden brown and the filling is bubbling.
Chef's Tip: If you're struggling with the lattice weave, just do a "rustic" crumble top. Mix a bit of flour, butter, and brown sugar, then sprinkle it over the top. It's just as good and way faster.
Common Baking Mistakes Fixed
Even with my favorite apple pie, things can go sideways if you aren't paying attention to the cues. Most issues stem from temperature or over working the dough.
Troubleshooting Common Issues
| Issue | Solution |
|---|---|
| Why Your Crust Is Tough | Toughness comes from over handling the dough. When you knead the dough too much, you develop too much gluten, which turns your flaky pastry into a piece of bread. Mix until it just comes together, a |
| Why the Edges Burn | The edges of the crust are thinner and more exposed than the rest of the pie. If you notice them turning dark brown while the center is still pale, simply cover the edges with a ring of aluminum foil |
| Why the Filling Is Runny | This usually happens if the apples were too juicy or the cornstarch wasn't cooked long enough in the skillet. The starch needs to reach a certain temperature to "activate" and thicken the liquids. |
Common Mistakes Checklist
- ✓ Avoid using warm water in the crust
- ✓ Don't roll the dough too thin (aim for 1/8 inch)
- ✓ Ensure filling is cooled before adding to crust
- ✓ Don't skip the lemon juice (it balances the sugar)
- ✓ Use a thermometer to check for bubbling filling
Swaps and Creative Variations
If you want to put your own spin on my favorite apple pie, there are plenty of ways to do it. I often experiment with the spices to change the mood of the dessert.
For a more complex flavor, try adding a pinch of ground cloves or allspice to the filling. If you're feeling bold, a tablespoon of bourbon stirred into the apple glaze adds a wonderful smoky depth that pairs beautifully with the tartness of the Granny Smith apples.
If you're looking for a completely different way to use your apples, you could try making a homemade apple sauce recipe with the leftover scraps. It's a great way to ensure nothing goes to waste.
Decision Shortcut
- If you want more crunch, add a cinnamon streusel topping.
- If you want more tartness, increase the Granny Smith ratio to 80%.
- If you're short on time, use a store-bought chilled crust, but still pre cook the filling.
Adjusting the Recipe Size
Scaling a pie can be tricky because the volume of the dish doesn't always match the math. If you're making a smaller version, remember that the baking time will decrease.
For a half batch, use a 6 inch springform pan. Reduce the bake time by about 20% and start checking for doneness at the 20 minute mark of the second phase. When dealing with eggs in small batches, beat one egg in a bowl and use only half of it for the wash.
If you're doubling the recipe to make two pies, don't double the spices exactly. I find that 1.5x the cinnamon and nutmeg is usually enough to carry the flavor without it becoming overwhelming. Work in batches when sautéing the apples so you don't crowd the pan, which would lead to steaming instead of browning.
Kitchen Myths Debunked
There are a lot of "rules" about pie that are actually just outdated habits. Let's clear a few of them up so you can bake with confidence.
The idea that you must blind bake the bottom crust to prevent sogginess is a myth for this specific recipe. While blind baking works for custard pies, my favorite apple pie uses the pre cooked filling method, which removes the need for that extra step.
Another common misconception is that you need a professional rolling pin to get a smooth crust. Honestly, a smooth wine bottle works just as well if you're in a pinch. The key is the thickness and the chill, not the tool you use.
Storage and Waste Tips
Once you've made my favorite apple pie, you'll want to keep it fresh. A slice of pie is great the next day, but how you store it matters. Keep it at room temperature for up to 2 days under a dome. For longer storage, the fridge is your friend, but it can make the crust lose its snap.
To reheat, avoid the microwave, as it makes the pastry rubbery. Instead, pop a slice in a 300°F (150°C) oven for about 10 minutes. This brings back that shatter crisp texture and warms the filling through.
For freezing, you can freeze the pie unbaked. Store it in a freezer friendly airtight container for up to 3 months. When you're ready, bake it from frozen, adding about 15-20 minutes to the total cook time.
Regarding zero waste, don't throw away those apple peels and cores. You can simmer them with a bit of water and cinnamon to make a simple apple syrup, or toss them into a compost bin to feed your garden.
Serving and Enjoying It
The final touch to my favorite apple pie is all in the presentation. I love serving this warm with a scoop of high-quality vanilla bean ice cream. The cold cream melting into the hot, spiced apples is a contrast that never gets old.
If you're planning a full meal, this pie is a heavy hitter. I usually pair it with something light and fresh for the main course, like a classic tuna nicoise salad to balance out the richness of the dessert.
The best part is the anticipation. Let the pie sit for at least 30 minutes after it comes out of the oven. This allows the filling to set fully, so when you cut into it, the slices stay neat and the glaze doesn't run all over the plate.
Grab a fork, gather your favorite people, and enjoy the results of your hard work.
Recipe FAQs
Which pie is best for diabetics?
This recipe is not suitable for diabetics. The high amount of granulated sugar in both the filling and the crust makes it incompatible with a low-sugar diet.
What's the secret to a good apple pie?
Keep your butter chilled and avoid over mixing. Using a pastry cutter to leave pea-sized lumps ensures a flaky crust. If you enjoyed mastering texture control here, the same principle of temperature management applies to our homemade whipped cream.
What is the best apple pie filling?
A combination of Granny Smith and Honeycrisp apples. This blend balances tartness and sweetness, while sautéing them with cinnamon and nutmeg creates a thick, glossy glaze.
How to prevent the crust from getting tough?
Mix the dough until it just holds together. Over handling the flour develops too much gluten, which transforms a flaky pastry into a bread like texture.
What to do if the edges burn before the center is done?
Cover the edges with a ring of aluminum foil. This shields the thinner, more exposed parts of the crust while the center finishes bubbling.
Is it true that I should bake the pie at 425°F for the entire time?
No, this is a common misconception. Bake at 400°F (205°C) for 20 minutes, then reduce the heat to 375°F (190°C) for 30 40 minutes to get a deep golden brown finish without burning.
How to reheat a slice without making it rubbery?
Heat a slice in a 300°F (150°C) oven for about 10 minutes. Avoid the microwave, as it destroys the shatter crisp texture of the pastry.
My Favorite Apple Pie

