Sugar Cookie Icing: Royal Icing Recipe for Perfect Decorating
- Achieving the Professional Gloss: The Ultimate Sugar Cookie Icing Guide
- The Science of Shine: Why This Royal Icing Dries Flawlessly
- Essential Ingredients for Flawless Flood and Detail Work
- Ingredient Notes and Expert Substitutions
- Master the Method: Step-by-Step Royal Icing Creation
- Achieving Perfect Consistency: The Two Essential Stages
- Troubleshooting and Expert Secrets for Perfect Piping
- Prepping Ahead: Storage and Shelf Life of Royal Icing
- Presenting Your Masterpieces: Display and Transport
- Recipe FAQs
- 📝 Recipe Card
Achieving the Professional Gloss: The Ultimate Sugar Cookie Icing Guide
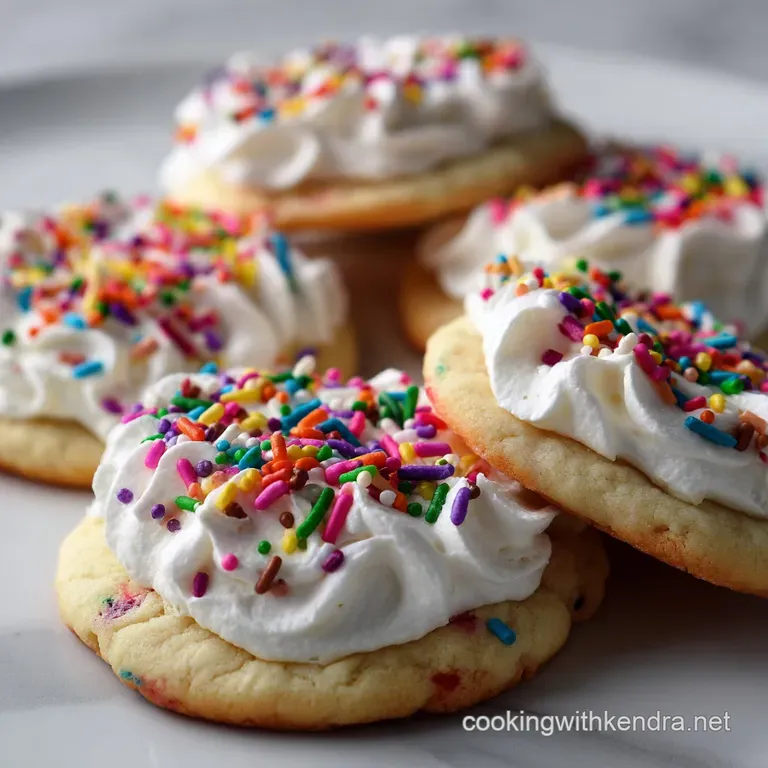
Oh my gosh, I am so excited you are finally diving into royal icing! Forget those thick, grainy buttercreams; we are aiming for the glossy, flawless finish you see on Pinterest and at high end bakeries.
When you whip this sugar cookie icing properly, it turns into pure, liquid silk, ready to transform your humble cut-outs into genuine showstoppers. The best part? The whole kitchen starts smelling like a perfect, sweet candy shop the second you start whipping that powdered sugar.
For years, I avoided royal icing because I thought it was super complicated, reserved only for professionals. Turns out, the ingredients are dirt cheap and it comes together in about 15 minutes flat way faster than chilling and stabilizing a Swiss meringue buttercream.
This sugar cookie icing dries completely hard, meaning you can stack those decorated cookies for transport without a single smudge, which is a total lifesaver during the holidays.
Ready to ditch the sticky messes and the cracked finishes? We are going deep into the why and how of the perfect royal icing using meringue powder. This specific method creates a stable, safe, and reliable base for all your intricate decorating needs.
Let's crack on and master this incredible sugar cookie icing recipe easy !
The Science of Shine: Why This Royal Icing Dries Flawlessly
This isn't just about dumping sugar and water together. We’re creating a stable, structurally sound structure that relies on air, protein, and sugar crystals. The reason this particular sugar cookie icing works better than simple glazes is all down to the proteins stabilizing the liquid, ensuring a crisp, smooth layer that doesn't melt or crack.
Why Meringue Powder is the Professional's Choice
Meringue powder is basically pasteurized, dried egg whites with stabilizers and flavourings added. It’s absolutely essential for achieving a reliable, fast drying, and shelf stable icing. I tried the raw egg white method once and the result was inconsistent and frankly, a bit stressful regarding safety.
Meringue powder guarantees stability and ensures your royal icing for cookies hardens into that desirable shell.
Understanding Flood vs. Detail Consistencies
The biggest hurdle for newbies is understanding that royal icing isn’t one consistency; it's two. The thick, stiff "piping" icing is your framework the dam that keeps the thin "flood" icing contained.
The thin "flood cookie icing" is what spreads out beautifully to give you that smooth, polished background. You simply cannot skip adjusting the consistency.
What Makes This Royal Icing Recipe Stable
We are whipping air into the mixture for a surprisingly long time. That process dissolves the sugar and activates the stabilizers in the meringue powder, creating billions of tiny bubbles trapped in the sugary protein structure.
This is what gives the icing its incredible volume, makes it opaque, and, most importantly, allows it to dry without collapsing.
The Role of Powdered Sugar Density
Not all powdered sugar is created equal, which is why sifting is non-negotiable. If you skip sifting, you introduce lumps, which leads to clogged piping tips, cratering, and an uneven finish.
The finer the powdered sugar, the faster and smoother the dissolve, resulting in a perfectly smooth finish for your sugar cookie icing .
How Meringue Powder Ensures Stability and Safety
Beyond safety, the meringue powder is key because it provides structure without adding much volume of liquid. Think of it like super concentrated protein glue. It allows the sugar cookie icing with meringue powder to hold intricate shapes and dry into a protective, stackable shield.
Setting Time Explained: Drying vs. Curing
When you flood a cookie, the top layer dries within an hour or two; that's the "dry to the touch" stage. But the icing inside is still wet, which is why heavy humidity causes craters. "Curing" means the icing is completely dry throughout.
For full curing, you really need 6 to 8 hours, or ideally, overnight.
Essential Ingredients for Flawless Flood and Detail Work
This simple list is deceptive because the quality and preparation of these ingredients make a huge difference.
- Confectioners' (Icing) Sugar: Must be sifted. This is the bulk of the recipe.
- Meringue Powder: The stabilizer. Do not skip this!
- Fine Sea Salt: Just a pinch to cut the intense sweetness of the icing.
- Room Temperature Water: Crucial for easy mixing and dissolving the sugar.
- Pure Vanilla Extract: Flavouring!
- Gel Food Colouring: Use gel only; liquid will mess up your consistency instantly.
Ingredient Notes and Expert Substitutions
| Ingredient | Why It's Important | Viable Substitution (and the catch!) |
|---|---|---|
| Confectioner's Sugar | Finely milled sugar creates a smooth texture. | None it’s the base. But ensure it's fresh and lump free. |
| Meringue Powder | Provides protein for stability and safe drying. | Pasteurized Egg Whites (Use 2 large whites, but be mindful of salmonella risk). |
| Water | Controls the consistency (thickening or thinning). | Use milk or flavourful juice for a softer glaze, but it won't dry as hard. |
| Vanilla Extract | Flavour! | Almond or Lemon Extract. Warning: Avoid oil-based extracts; they destabilize the royal icing. |
The Quality of Confectioner's Sugar Matters
If your powdered sugar is old, chunky, or stored near humidity, it will be impossible to achieve a truly smooth texture, even after sifting. I made this mistake early on and spent 45 minutes trying to pipe with lumpy icing.
Always use fresh, high-quality confectioner's sugar for the best frosting for decorating cookies.
Water Temperature: Why It's Crucial to Control
Using room temperature water helps the sugar and meringue powder dissolve faster when you first mix them. If you use ice-cold water, your whipping time will increase, and you risk a slightly grainier texture because the sugar doesn't fully hydrate immediately.
Using Flavor Extracts Correctly (And Avoiding Oil-Based)
I love adding almond or lemon extract to my sugar cookie icing base. It really brightens up the flavor of the plain sugar. But please, please, avoid any oil-based flavourings.
Even a tiny trace of oil or fat will break down the protein structure that the meringue powder is working so hard to build, turning your perfect icing into a sad, greasy puddle.
Can I Substitute Fresh Egg Whites for Meringue Powder?
You technically can, but I don't recommend it for the average home cook. Using fresh, pasteurized egg whites (about 2 large ones) instead of the powder and water will give you a similar result, but the consistency is harder to control, and the shelf life of the resulting icing is dramatically shorter.
Stick to the powder; it’s the foolproof method.
Master the Method: step-by-step Royal Icing Creation
This method delivers that beautiful, reliable sugar cookie icing that hardens every single time. Seriously, once you nail the consistency checks, you’ll feel like a professional.
- Sift Dry Ingredients: In your stand mixer bowl, rigorously sift the 4 cups of confectioner's sugar, the meringue powder, and the pinch of salt. That satisfying swish sound as the sugar falls through the sieve is the sound of success.
- Add Wet Ingredients: Pour the measured room temperature water and vanilla extract straight into the sifted ingredients.
- Combine on Low: Start the mixer on the lowest speed with the paddle attachment. Mix until everything is just combined and looks like a thick, shaggy paste we don’t want a powdered sugar cloud explosion! Scrape down the bowl thoroughly.
- Whip to Stiff Peaks: Increase the speed to medium high (4 6). Now, let the mixer work its magic. Beat for a solid 5 to 7 minutes. You are looking for volume, opacity, and a beautiful glossy finish. The sound of the motor will change as the icing thickens.
Chef's Note: The goal here is a thick, firm consistency, often called "Piping Consistency." It should hold a sharp peak when you lift the paddle attachment, similar to a dense marshmallow cream. This is your foundation for all detail work.
Achieving Perfect Consistency: The Two Essential Stages
Once you have your thick, glorious piping batch, the real artistry begins: turning some of it into thin flooding icing.
Step 1: Combining Dry Ingredients and Initial Mix
As covered, ensure everything is sifted and mixed slowly initially. This prevents any clumping and guarantees a smooth base before the intense whipping stage begins.
Step 2: Whipping to the Stiff Peak Stage
Remember that 5 7 minute whip time is crucial. If you under whip, your icing will lack strength, feel runny, and won't dry quickly. If you want a fun project for pairing, this makes a wonderful base for decorating cookies alongside my Sugar Cookie Recipe: Best Cut Out For Decorating .
Step 3: Achieving the 10 Second Flood Consistency
This is the make-or-break moment. You need to thin down the piping consistency using water, one teaspoon at a time . After mixing, use the 10 Second Rule: Drag a spoon through the icing. If the line disappears and the surface is perfectly smooth again in 8 to 10 seconds, you’ve nailed it.
If it takes 20 seconds, it’s still too thick for flooding. If it disappears instantly, you added too much water fix it by stirring in a teaspoon of your reserved thick piping icing.
Step 4: Separating, Colouring, and Bagging Your Batches
Once the consistencies are set, immediately put the icing into airtight containers. Then, divide your batches for colouring. Only use gel colours! Mix thoroughly to avoid streaking.
Transfer your thick outline icing to piping bags with a fine tip (PME 1.5 is my fave) and the thin flood icing into squeeze bottles or bags with a slightly larger tip for easy filling. This is the cookie icing recipe that turns out every time if you follow this staging.
Troubleshooting and Expert Secrets for Perfect Piping
Every decorator hits hiccups. I once thought my piping was fine, only to watch my beautiful flood icing sink into the middle of the cookie a total disaster. Here’s how we avoid that particular heartbreak.
Fixing Icing That Is Too Runny or Too Stiff
If your flooding batch is too thin (disappears in less than 5 seconds), stir in a teaspoon of your reserved, stiff piping consistency icing. Repeat until you hit that 10 second sweet spot.
If your piping icing is too stiff and cracking when you try to pipe, add water, a single drop at a time , until it flows smoothly but still holds its shape.
Preventing Cratering and Pinhole Bubbles on Your Cookies
Cratering happens when the surface dries faster than the bulk of the flood icing beneath it, causing the middle to sink. Two simple fixes: 1) Do not use too much water when thinning your flood icing. 2) Dry your cookies in a low-humidity, slightly warm place.
Using a dehydrator on a low setting (95°F) for the first hour works miracles. For those annoying pinhole bubbles, simply tap the cookie firmly on the counter a few times after flooding, and use a scribe tool or toothpick to gently pop any remaining bubbles.
How to Layer Wet-on-Wet Designs Successfully
If you want a marbled or blended look (like a tie-dye effect), you must drop the second color onto the wet flood icing immediately after the flood is applied. This technique, called "wet-on-wet," allows the colours to settle together and dry completely flat, resulting in one incredibly smooth surface.
This creates an unbelievably gorgeous finish for your sugar cookie icing .
Prepping Ahead: Storage and Shelf Life of Royal Icing
One of the great things about royal icing is how far in advance you can make it, as long as you treat it right.
Proper Short Term Storage Techniques (Up to One Week)
Always store royal icing at room temperature, but keep it absolutely airtight. Transfer the icing to a container and press plastic wrap directly onto the surface before sealing the lid. This prevents that horrid, instant crust from forming.
Do not refrigerate plain royal icing; the moisture fluctuation can break it down.
Reviving Stored Icing Before Use
If you’ve stored your icing for a few days, it will have separated slightly; the water will float to the top. Just grab a spatula and stir it vigorously to reincorporate. If it feels too stiff after stirring, add a drop or two of water to bring it back to the right consistency.
Can You Freeze Cookies Decorated with Royal Icing?
Yes, you absolutely can! Once the royal icing has cured completely (after 24 hours), the decorated cookies can be layered in an airtight container with parchment paper between layers and frozen for up to three months.
Thaw them slowly, still sealed in the container, at room temperature to avoid condensation forming on the icing surface, which can lead to colour bleed.
Presenting Your Masterpieces: Display and Transport
When using this reliable sugar cookie icing , your decorated cookies will be sturdy enough to stand up to almost anything. Just be sure they are fully cured before stacking them for your next party. This gives you that professional edge, whether you are making a batch of simple Lemon Meltaway Cookies: The Ultimate Buttery, Zesty, Easy Recipe or complicated holiday sets. This high-quality sugar cookie icing recipe is truly the secret weapon in a home baker's arsenal.

Recipe FAQs
How do I transition my icing from 'detail' consistency to 'flood' consistency?
Start by mixing the base recipe until you achieve the thick, piping consistency suitable for borders and detail work. To make the "flood" icing, gradually add water, drop by drop, into a portion of the detail icing while mixing very slowly.
The ideal flood consistency is usually referred to as "10-second icing," meaning a line dragged across the surface disappears and smooths out completely within 8 to 12 seconds.
Why is my icing separating, or why does it look grainy after mixing?
Separation (syneresis) or graininess typically occurs when the icing is overworked, or when too much water is incorporated too quickly. Ensure your powdered sugar is fully sifted to prevent lumps, and always mix the icing on a low speed once the ingredients are fully combined.
If separation occurs, try gently folding the icing with a spatula rather than mixing it further with a machine.
How long does the royal icing take to dry completely, and can I speed up the process?
Drying time is highly dependent on environmental humidity and the thickness of the application, but a thin flood layer usually sets hard within 6 to 8 hours. For optimal stability, especially for stacking cookies, allow a full 24 hours of air drying.
To speed up the process, place the cookies under a gentle fan or in a dehumidified environment.
Can I make this royal icing recipe vegan or egg-free?
Traditional royal icing, including the meringue powder version, is not vegan due to the egg whites used in the powder. A successful vegan alternative requires replacing the meringue powder with specialized ingredients like aquafaba (chickpea liquid) or a commercially available vegan royal icing mix.
Be aware that these substitutions will alter the flavor profile and final texture, often requiring longer drying times.
How should I properly store leftover royal icing?
Leftover royal icing stores very well when sealed correctly; place it in an airtight container with a piece of plastic wrap pressed directly onto the surface to prevent a crust from forming. The icing can be kept at room temperature for up to two weeks, or refrigerated for up to one month.
If stored in the fridge, let it return to room temperature and gently remix before using.
Why did my finished royal icing dry dull or spotty instead of glossy?
A dull finish is often caused by excessive humidity during the drying phase or by adding too much liquid, such as alcohol based flavor extracts, to the final mix. To ensure a beautiful, glossy shine, always allow the cookies to dry in a low-humidity, temperature stable environment.
Furthermore, ensure you are not over beating the icing, which incorporates too much air.
What is the best way to add color to royal icing without thinning it out?
Use high-quality gel food coloring instead of liquid watercolors, as gel concentrates the color without adding excess moisture. Always mix the color into the thick detail icing first before adding water for flooding consistency, as this ensures the color is evenly distributed and helps you better gauge the final required thickness.
Deep colors require longer mixing, which can slightly soften the icing.
Professional Sugar Cookie Icing Recipe

Ingredients:
Instructions:
Nutrition Facts:
| Calories | 800 kcal |
|---|---|
| Protein | 0.0 g |
| Fat | 0.0 g |
| Carbs | 211.5 g |
