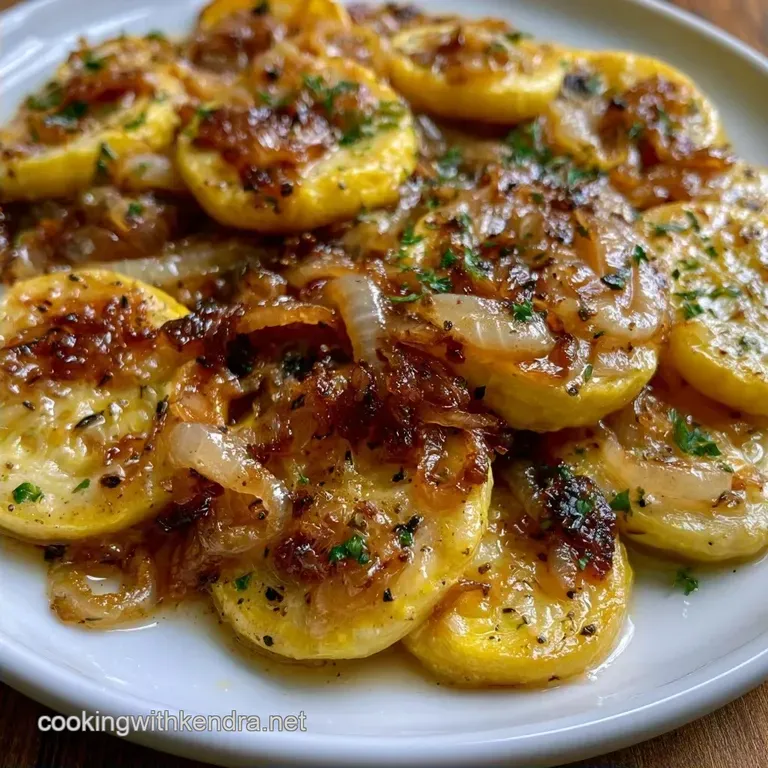
Sauteed Summer Squash and Onions with Garlic
- Time: 5 min active + 15 min cooking
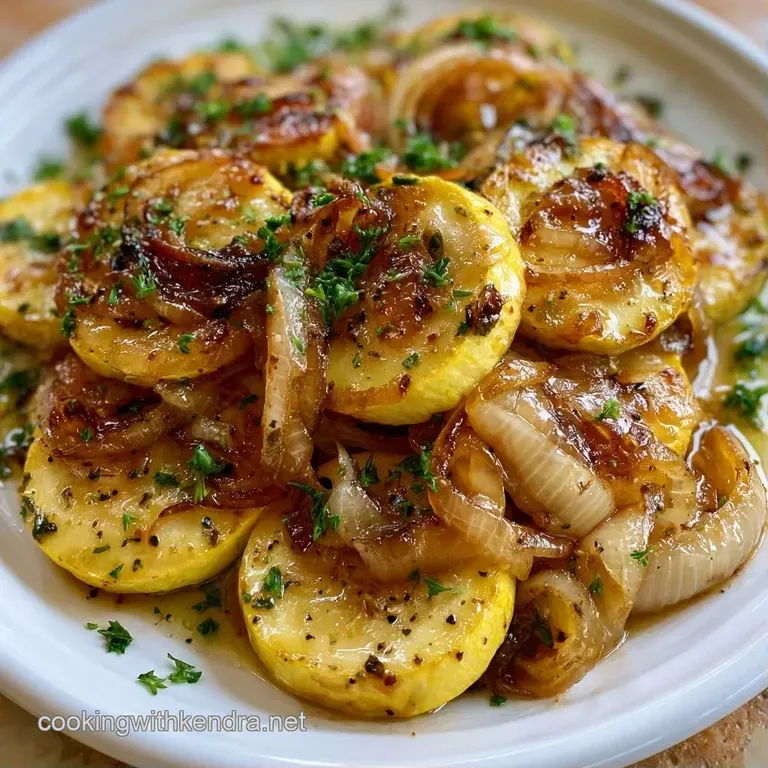
- Flavor/Texture Hook: Browned, buttery edges with a glossy finish
- Perfect for: Easy weeknight sides, budget meals, or summer BBQs
The smell of butter foaming in a hot skillet is usually where my favorite dinners start. There is something about the way a sweet onion softens and then catches a golden edge that makes the whole kitchen feel cozy.
For a long time, I just threw everything in the pan together and ended up with a watery, limp mess that looked more like a stew than a sauté.
I eventually figured out that the trick is all about heat management and patience. By searing the squash rounds quickly on high, you get that mahogany crust without the middle turning into mush. It's a simple shift that changes the whole dish from "okay" to something the family actually asks for.
You can expect a side that is rich and savory but still tastes like a garden. Sauteed Summer Squash and Onions shouldn't be complicated, so we're keeping the ingredient list short and the process fast.
Why This Recipe Works
- High Heat Searing: Cooking the squash fast on high heat browns the outside before the interior breaks down.
- The Deglaze: Adding a splash of broth at the end lifts the brown bits from the pan to create a glossy coating.
| Method | Time | Texture | Best For |
|---|---|---|---|
| Fast Sauté | 15 min | Crisp edges, tender core | Weeknight sides |
| Slow Braise | 40 min | Soft, jammy, uniform | Casseroles |
Ingredient Deep Dive
| Ingredient | What It Does | Best Swap |
|---|---|---|
| Yellow Squash | Provides the bulk and sweetness | Zucchini (1:1 ratio) |
| Sweet Onion | Adds a savory, caramelized base | Shallots (use 4-5 large) |
| Unsalted Butter | Creates the brown crust and flavor | Ghee or Vegan Butter |
| Chicken Broth | Deglazes the pan for a glaze | Vegetable broth or white wine |
Shopping List Breakdown
For this recipe, you don't need anything fancy. I usually grab the largest yellow squash I can find because they often have a bit more structure.
The Fresh Produce 2 lbs yellow summer squash Why this? Holds its shape better than zucchini. 1 large sweet yellow onion Why this? Higher sugar content for better browning. 3 cloves garlic Why this? Fresh garlic
Provides a sharper punch than powder.
The Pantry & Dairy 3 tbsp unsalted butter Why this? Controls the salt level perfectly. 1 tbsp olive oil Why this? Prevents butter from burning at high heat. 2 tbsp low sodium chicken broth Why this? Adds depth
Without oversalting. 1 tsp kosher salt 1/2 tsp freshly cracked black pepper 1/4 tsp smoked paprika Why this? Adds a subtle wood fired hint.
Necessary Kitchen Gear
You only need a few basics here. A large stainless steel or cast iron skillet is the way to go. Non stick works, but you won't get that same deep brown crust that comes from a heavy bottomed pan.
I also recommend a sharp chef's knife. Getting the squash into uniform 1/4 inch rounds is the only way to ensure they all cook at the same rate. If some are thick and some are thin, you'll have some raw pieces and some mushy ones.
The Cooking Process
Let's get into the actual cooking. Keep your heat steady and don't be afraid of the sizzle.
Phase 1: The Prep
Slice your yellow squash into 1/4 inch rounds. Thinly slice the onion into half moons. Make sure the squash is patted dry with a paper towel, as excess water prevents browning.
Phase 2: Searing the Aromatics
Place your skillet over medium high heat. Add the olive oil and 1 tbsp of the butter. Once the butter bubbles, add the sliced onions. Sauté for 5-7 minutes, stirring every so often, until they are translucent and showing golden brown edges.
Stir in the minced garlic. Cook for 30-60 seconds until the garlic smells fragrant but hasn't turned brown.
Phase 3: The over High heat Sauté
Crank the heat up to high. Add the remaining 2 tbsp of butter. Once it melts, add the squash rounds in a single layer.
Let them sear undisturbed for 2-3 minutes. You want to see a mahogany colored crust forming on the bottom. According to techniques used by Serious Eats, leaving the food alone in the pan is the only way to build a proper crust.
Toss the squash with the onions. Season everything with the salt, pepper, and smoked paprika. Sauté for another 3-5 minutes.
Phase 4: The Glaze and Finish
Pour in the chicken broth. Stir constantly for the final two minutes of cooking. This deglazes the pan and creates a smooth, glossy glaze that coats every piece of vegetable.
Chef's Note: If you want a bit more depth, add a pinch of brown sugar to the onions during Phase 2. It helps them caramelize faster if your onions aren't naturally very sweet.
Fixing Common Cooking Issues
It is easy to overcook squash because it's mostly water. If your pan looks like a soup, you probably overcrowded it or used too low of a heat.
Troubleshooting Common Issues
| Issue | Solution |
|---|---|
| Why Your Squash Is Mushy | This usually happens when the pan is too full. The vegetables release steam instead of searing, which boils the squash. Cook in two batches if your skillet is small. |
| Why the Onions Burnt | Garlic and onions have different burn points. If you add the garlic too early or use heat that is too high for the onion phase, they'll turn bitter. |
| Why the Pan Is Watery | Adding salt too early draws moisture out of the squash. Salt at the end of the searing process to keep the water inside the vegetable. |
Fun Variations and Swaps
This recipe is a great base. I often change it up depending on what's in the fridge. For a more colorful plate, try a mix of sauteed zucchini and yellow squash. They cook at the same rate, so you can just swap half the yellow squash for green.
If you want something heartier, try sauteed squash and onions with bacon. Fry two slices of chopped bacon first, remove them, and use the rendered fat instead of the olive oil. Stir the crispy bacon back in at the very end.
For a cheesy version, sprinkle 1/4 cup of grated Parmesan over the top in the final minute of cooking. This turns it into a rich side that pairs well with my Pasta Primavera for a full veggie feast.
You can also make sauteed summer squash and onions and tomatoes. Just add a handful of cherry tomato halves during the last 3 minutes of the sauté. They'll burst and create a natural sauce.
Storage and Freezing Tips
Fresh is always best for this dish, but leftovers are still great. Store the squash in an airtight container in the fridge for up to 3-4 days.
Reheating Guidelines Avoid the microwave if you can. It makes the squash rubbery. Instead, toss the leftovers back into a hot skillet for 2-3 minutes. Add a tiny knob of butter to bring back that glossy finish.
Freezing Instructions I generally don't recommend freezing sautéed squash. The cellular structure of summer squash is very fragile, and it usually turns into a puree upon thawing.
If you must freeze it, undercook the squash by about 3 minutes so it doesn't overcook when reheated.
Zero Waste Tips Don't throw away the squash ends. Toss them into a bag in the freezer with other veggie scraps (like onion skins and carrot tops). Once the bag is full, simmer them in water for an hour to make a quick vegetable stock for your next meal.
Best Ways to Serve
This is a versatile side, but it shines when paired with proteins that have a bit of char. Grilled chicken breasts or a seared salmon fillet work perfectly.
- As a Bed
- Place the squash under a piece of pan seared white fish.
- In a Bowl
- Mix it into a bowl of quinoa or farro for a healthy lunch.
- With a Twist
- Serve it alongside some Pickled Banana Peppers to add a sharp, vinegary contrast to the buttery squash.
Decision Shortcut If you want a smoky flavor, use smoked paprika. If you want a richer dish, add a tablespoon of heavy cream at the end. If you want a lighter side, swap the butter for extra olive oil.
Common Beliefs
Some people think you need to peel the yellow squash. This is not true. The skin is tender and helps the rounds keep their shape during the over high heat sear.
Another common idea is that searing "seals in" the nutrients or juices. In reality, searing is all about flavor. It creates a brown crust that adds a savory depth, but it doesn't actually create a waterproof seal on the vegetable.
Recipe FAQs
What seasoning goes well with summer squash?
Salt, black pepper, and smoked paprika. These simple spices highlight the natural sweetness of the squash and onions without overpowering the dish.
How to sauté squash and onions?
Sauté onions in olive oil and butter first, then sear the squash rounds on high heat. Finish by tossing them together and deglazing the pan with chicken broth for a glossy glaze.
How long do you saute summer squash?
Sear the rounds undisturbed for 2-3 minutes, then sauté for another 3-5 minutes. This timing ensures a mahogany colored crust while keeping the interior tender.
What oil is best for sautéing squash?
A combination of olive oil and unsalted butter. The oil prevents the butter from burning at high temperatures, while the butter provides richness and better browning.
How to prepare squash for cooking?
Slice the yellow squash into uniform 1/4 inch rounds and the onion into thin half moons. Consistent sizing ensures every piece cooks evenly in the skillet.
Can zucchini and onions be cooked together?
Yes, they pair perfectly. This side dish complements savory mains like Bratwurst Sandwiches.
Is it true that adding salt early helps the squash sear better?
No, this is a common misconception. Adding salt too early draws moisture out of the squash, which makes the pan watery and prevents proper searing.
Sauteed Summer Squash And Onions

