Beet Hummus Platter
- Time: Active 15 minutes, Passive 45 minutes, Total 1 hour
- Flavor/Texture Hook: Silky smooth with a zesty, earthy finish
- Perfect for: Global inspired brunches and healthy meal prep
- The Magic Behind This Platter
- Component Analysis
- Quick Reference for Home Cooks
- The Alchemy of Earthy Ingredients
- Tools for a Silky Blend
- Steps for a Vibrant Dip
- Fixing Common Hummus Texture Issues
- Stovetop vs Oven Prep
- Swaps for Global Flavor Profiles
- Kitchen Myths Debunked
- Storage and Zero Waste Tips
- Creative Ways to Style Platters
- Recipe FAQs
- 📝 Recipe Card
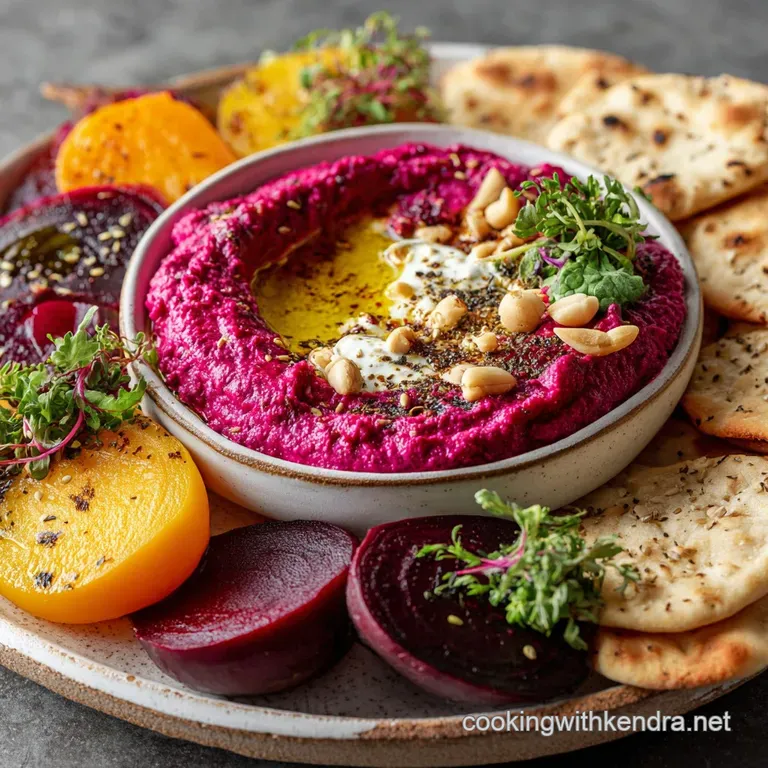
Have you ever walked into a room and been completely stopped in your tracks by a dish? That happened to me the first time I saw a properly made Beet Hummus Platter. The color is almost neon, a deep magenta that looks like it belongs in an art gallery rather than a kitchen.
It is a total conversation starter, but honestly, it’s the flavor that keeps people coming back for a second scoop.
I used to think that just tossing a boiled beet into a blender with some store-bought hummus was the way to go. I was wrong. It ended up watery, kind of grainy, and honestly a bit dull.
After a lot of trial and error in my plant based kitchen, I realized that the secret lies in how we treat the beets and the order in which we blend the fats. We are looking for that velvety, cloud like consistency that makes people ask for the recipe before they even finish their first pita wedge.
Right then, let's get into the details of how to make this vibrant, nutritious masterpiece. We are going to focus on building layers of flavor, starting with the concentrated sweetness of roasted beets and finishing with the sharp brightness of fresh lemon. If you love these earthy notes, you might also want to try my Beetroot Tart with recipe for another way to celebrate this beautiful vegetable.
The Magic Behind This Platter
The secret to a successful dip isn't just about the ingredients, it is about the physics of the blend. When we talk about plant based cooking, we often focus on flavor, but texture is what dictates how we perceive that flavor.
Starch Gelatinization: Cooking chickpeas until they are nearly falling apart allows the starches to absorb liquid, which creates a creamier base when processed. Anthocyanin Stability: The vibrant pigments in beets are sensitive to pH changes, so adding lemon juice early helps preserve that stunning magenta hue.
When we roast the beets, we are essentially performing a slow dehydration. This concentrates the natural sugars and creates a more intense "beet" flavor without the excess water that often makes dips runny. If you have ever had a watery hummus, it is usually because of too much liquid in the vegetables or not enough fat to stabilize the emulsion. For a solid foundation on the basics, you can check out my classic Hummus Recipe The to see how the traditional version differs.
We also use the power of temperature. Ice cold water is one of my favorite tricks for aeration. When cold water hits the warm, blended fats of the tahini, it creates a light, whipped texture that feels much more sophisticated than a heavy, dense paste.
It is a small detail, but it makes a massive difference in the final mouthfeel of your Beet Hummus Platter.
Component Analysis
| Ingredient | Science Role | Pro Secret |
|---|---|---|
| Red Beets | Flavor & Color | Roast them in foil to trap steam and make peeling effortless. |
| Chickpeas | Protein Base | Remove the skins for a texture that is significantly silkier. |
| Tahini | Emulsifier | Use a runny, high-quality sesame paste to ensure a smooth bind. |
| Lemon Juice | pH Regulator | Keeps the beet color from turning brown or dull during storage. |
Choosing the right chickpeas makes a big difference. I usually prefer the 15 oz cans for convenience, but the liquid inside (aquafaba) is gold. We reserve 2 tbsp of it because it contains proteins that act as a natural foaming agent, helping our hummus stay light and fluffy even after it sits in the fridge for a few days.
When it comes to the tahini, look for brands where the oil hasn't separated into a solid brick at the bottom. You want something that pours easily. The fat in the tahini is what carries the flavor of the garlic and cumin across your palate, so don't be afraid of it.
Quick Reference for Home Cooks
Before you start, make sure you have everything measured out. Precision matters when we are trying to balance the acidity of the lemon with the earthiness of the beets.
- Yield: 8 servings
- Active Time:15 minutes
- Total Time: 1 hour
- Calories: 158 kcal per serving
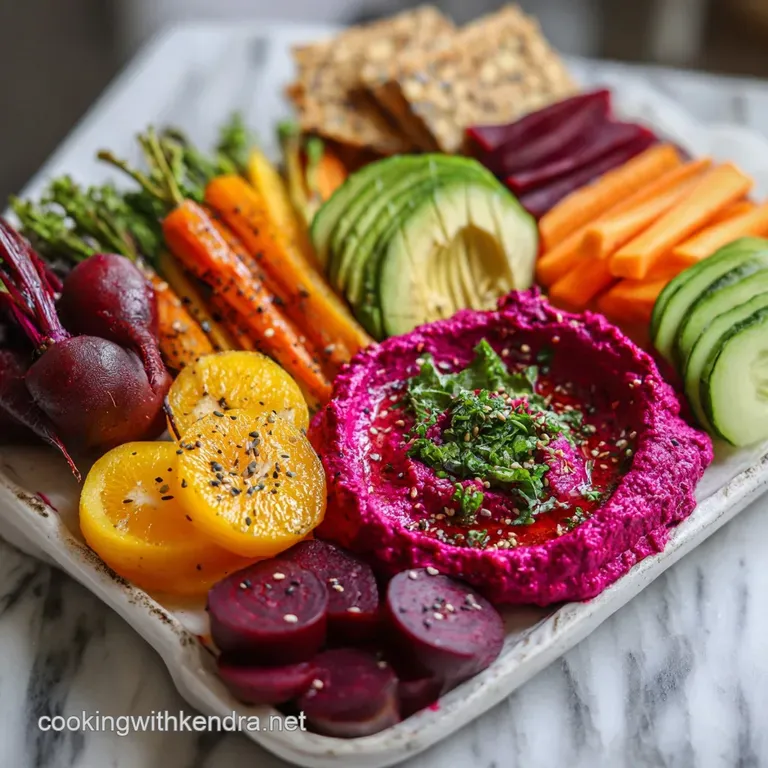
This dish is designed to be a centerpiece. While the hummus is the star, the English cucumber, rainbow carrots, and radishes provide the necessary crunch. The sugar snap peas add a pop of green that looks stunning against the pink background.
If you are serving a crowd, this platter is naturally vegan and gluten-free (if you use gluten-free pita), making it a safe and inclusive choice for global gatherings.
The Alchemy of Earthy Ingredients
To get the best results, every component needs to be high-quality. We aren't hiding behind a lot of oil here, so the natural flavors of the vegetables really shine through.
- 2 medium red beets: Scrubbed and stems removed. Why this? Roasting these provides the deep color and sweet flavor profile.
- 1 can (15 oz) chickpeas: Drained and rinsed. Why this? They provide the creamy, protein rich structure for the dip.
- 1/3 cup high-quality tahini: Runny consistency is best. Why this? It adds a nutty depth and essential fats for emulsification.
- 1/4 cup freshly squeezed lemon juice: Why this? The acidity balances the beet's sweetness and preserves the color.
- 2 cloves garlic: Smashed and peeled. Why this? Provides a sharp, aromatic backbone to the earthy dip.
- 1 tsp ground cumin: Why this? Adds a warm, global aroma that cuts through the richness.
- 1/2 tsp sea salt: Why this? Enhances all the other flavors and balances the tahini's bitterness.
- 2 tbsp ice cold water: Why this? Creates an airy, whipped texture through rapid cooling of fats.
- Platter Accents: 1 English cucumber, 4 rainbow carrots, 6 radishes, 1 cup sugar snap peas, and 1/2 cup toasted pita wedges.
If you don't have fresh beets, you can use pre cooked, vacuum sealed beets. Just make sure they aren't pickled in vinegar, or it will throw off the pH of the recipe. For the carrots, the rainbow variety really adds to the "wow" factor of the final presentation.
Tools for a Silky Blend
You don't need a professional kitchen, but a few specific tools will make your life much easier.
- Food Processor or High Speed Blender: A food processor (like a Cuisinart) is actually better for hummus than a blender because it allows for more aeration without getting stuck.
- Aluminum Foil: Essential for roasting the beets. It creates a small steam oven for each beet, making the skins slide right off.
- Fine Mesh Sieve: For rinsing the chickpeas and ensuring no excess liquid enters the mix.
- Chef's Knife: For slicing your rainbow carrots and English cucumber into those perfect dipping shapes.
Chef's Tip: Freeze your garlic for 10 minutes before grating it into the mix if you want a more mellow, less aggressive garlic flavor. Also, try adding a pinch of espresso powder to your cumin to deepen the savory notes of the beets.
Steps for a Vibrant Dip
1. Concentrate the Beet Flavor
Preheat your oven to 400°F. Wrap the 2 medium red beets tightly in aluminum foil. Place them on a baking sheet and roast for 45 minutes until a knife slides easily into the center. Note: The smell should be sweet and reminiscent of a garden after rain.
2. Prepare the Beets
Allow the beets to cool enough to handle. Use a paper towel to rub the skins off; they should slip away easily. Chop the beets into quarters. Be careful not to stain your wooden cutting boards by using a plastic or glass one for this step.
3. Process the Aromatics
In your food processor, combine the 1/4 cup lemon juice, 1/3 cup tahini, 2 garlic cloves, 1 tsp cumin, and 1/2 tsp sea salt. Pulse for 1 minute until the mixture looks pale and thickened. Note: This creates the base emulsion.
4. Add the Beets
Add the chopped beets to the processor. Blend for 2 minutes until the mixture is bright pink and no large chunks remain. Note: You want the beets fully integrated before adding the chickpeas.
5. Incorporate the Chickpeas
Add the 15 oz of chickpeas and the 2 tbsp of reserved chickpea liquid. Process for 3 minutes, scraping down the sides halfway through. Note: The mixture will start to look heavy at this point.
6. The Ice Water Trick
While the processor is running, slowly drizzle in the 2 tbsp of ice cold water. Watch as the hummus turns from a dense paste into a light, whipped mousse. Note: This is the moment the texture becomes professional grade.
7. Prep the Platter
Slice the English cucumber into diagonal rounds and the 4 rainbow carrots into long sticks. Thinly slice the 6 radishes into rounds. Keep the vegetables in ice water until serving to ensure they stay incredibly crispy.
8. Assemble the Platter
Spread the beet hummus into a shallow bowl, using the back of a spoon to create "swooshes." Drizzle with a little extra tahini if you like. Arrange the sugar snap peas, radishes, carrots, cucumber, and 1/2 cup toasted pita wedges around the bowl.
9. Final Flourish
Sprinkle a tiny bit more sea salt or a few sesame seeds over the top. The aroma of the fresh lemon and cumin should be the first thing your guests notice. Note: Serve immediately for the best texture.
Fixing Common Hummus Texture Issues
Sometimes things don't go exactly as planned. But don't worry, most hummus "disasters" are easy to fix with a little science.
Achieving a Velvet Texture
If your hummus feels gritty, it is usually because the chickpea skins were too tough. You can fix this by adding a tiny pinch of baking soda to the chickpeas if you are boiling them from scratch, or simply by processing the mixture for an extra 3 to 4 minutes.
Heat from the blades can actually help soften the fibers.
Balancing the Earthy Taste
Beets can sometimes taste a bit like "dirt" to some people. This is caused by a compound called geosmin. To fix this, you need more acid. Increase the lemon juice by half a tablespoon at a time. The acid cuts through the geosmin and brings out the sweetness of the beet.
| Problem | Root Cause | Solution |
|---|---|---|
| Grainy Hummus | Chickpea skins are too firm | Process for 2 extra minutes or peel the chickpeas. |
| Runny Consistency | Too much liquid or beets were boiled | Add another tablespoon of tahini to thicken the emulsion. |
| Dull Pink Color | pH is too high (not enough acid) | Add more lemon juice to brighten the magenta hue. |
Wait, I once made the mistake of using roasted garlic instead of fresh. While it was okay, the hummus lost that "zing" that makes it so refreshing. Trust me on this, use the fresh cloves but smash them first to release the oils.
Stovetop vs Oven Prep
When preparing your beets, you have two main options. I always recommend the oven, but the stovetop works if you are in a rush.
| Method | Time | Result |
|---|---|---|
| Oven Roasting | 45 minutes | Concentrated sugars, deep flavor, easy peeling. |
| Stovetop Boiling | 25 minutes | Higher water content, milder flavor, slightly muted color. |
Roasting is the way to go for this recipe. Boiling introduces too much water into the vegetable, which can lead to a thinner hummus. If you do boil them, make sure to dry them thoroughly before adding them to the food processor.
Swaps for Global Flavor Profiles
If you want to change things up, this recipe is very forgiving. You can swap out the main components to fit whatever is in your pantry.
| Original Ingredient | Substitute | Why It Works |
|---|---|---|
| Red Beets | Roasted Golden Beets | Milder flavor and a beautiful bright yellow color. |
| Lemon Juice | Lime Juice | Adds a tropical, sharper acidity great for Mexican inspired platters. |
| Tahini (1/3 cup) | SunButter (1/3 cup) | Nut free and seed based. Note: Adds a slightly more toasted, bitter note. |
Swapping the Base
If you want an oil free version, you can replace the tahini with half an avocado. It won't have that same nutty depth, but it will provide a similar creaminess and a boost of healthy fats. Just keep in mind that avocado oxidizes, so you'll need to eat it much faster.
Decision Shortcut
- If you want it fluffier, add one extra tablespoon of ice water and process for 60 seconds longer.
- If you want it spicier, add 1/2 teaspoon of smoked paprika or a pinch of cayenne pepper.
- If you want it sweeter, add a teaspoon of maple syrup to balance the tahini.
Kitchen Myths Debunked
Many people believe that you must peel every single chickpea to get smooth hummus. While it helps, it isn't strictly necessary if you have a high powered processor. The real key is the order of ingredients.
Blending the tahini and lemon juice first creates a "base foam" that holds the rest of the ingredients in suspension.
Another myth is that you need to add olive oil into the blender. Traditional hummus actually relies on the fat from the tahini. Adding oil directly into the blend can sometimes lead to a heavy, greasy mouthfeel. Save the high-quality olive oil for drizzling on top right before you serve it.
Finally, some say you can't use canned chickpeas for "authentic" results. While dried chickpeas have a better texture, a can of high-quality chickpeas, rinsed well and processed correctly, will get you 95% of the way there with 100% less effort.
Storage and Zero Waste Tips
This hummus stays fresh in the fridge for up to 5 days. Keep it in an airtight glass container. You might notice a little liquid separation after a day or two; just give it a quick stir to re emulsify the fats. I don't recommend freezing it, as the texture can become grainy once thawed.
For a zero waste approach, don't throw away those beet greens! They are incredibly nutritious and taste very similar to Swiss chard. You can sauté them with a little garlic and olive oil as a side dish.
Also, that leftover chickpea liquid (aquafaba) can be whipped into a vegan meringue or used as an egg replacer in baking. Even the carrot tops can be turned into a pesto to drizzle over your Beet Hummus Platter!
Creative Ways to Style Platters
Presentation is everything with a dish this colorful. I like to use a large, flat wooden board or a slate platter to make the pink pop. Start by placing the hummus in the center and then build out in concentric circles or "waves" of color.
Think about the textures. You have the silky hummus, the snappy peas, the crunchy carrots, and the soft, toasted pita. If you want to take it to the next level, add some pomegranate arils on top of the hummus. They look like little jewels and add a burst of sweetness that works perfectly with the cumin.
Right then, you are all set. This Beet Hummus Platter is going to be the star of your next gathering. It’s vibrant, it’s nutritious, and most importantly, it’s absolutely satisfying to eat. Let me know how yours turns out!

Recipe FAQs
What goes well with beet hummus?
A variety of crunchy and fresh items. Think pita wedges, vegetable sticks like carrots and cucumber, radishes, and sugar snap peas. For a sweet contrast, a few pomegranate seeds also work beautifully.
How to present hummus on a plate?
Spread it into a shallow bowl, creating swirls with a spoon. Arrange accompanying dippers like pita and vegetables around the hummus. For added visual appeal, a drizzle of tahini or a sprinkle of seeds makes a great finishing touch.
Does beetroot go with hummus?
Yes, absolutely! The earthy sweetness of beetroot complements the nutty tahini and bright lemon of traditional hummus perfectly. This combination is what gives beet hummus its signature vibrant color and unique flavor profile.
Is it healthy to eat beetroot hummus?
Yes, it's quite healthy. Beetroot is rich in vitamins, minerals, and antioxidants, while chickpeas provide fiber and protein. The tahini offers healthy fats, making it a nutrient dense and satisfying dip.
Can I make beet hummus ahead of time?
Yes, it can be made a day or two in advance. Roast the beets and peel the chickpeas up to 2 days ahead of time. The fully blended hummus will keep in an airtight container in the refrigerator for up to 5 days.
My beet hummus is too thick, what can I do?
Slowly drizzle in more ice cold water while processing. Start with a tablespoon at a time until you reach your desired consistency. This technique helps create an airy, whipped texture similar to what you might achieve with a stable emulsion in recipes like Avocado Hummus Recipe Extra Creamy Dip Ready in Just 10 Minutes.
What's the secret to vibrant beet hummus color?
Adding lemon juice early in the blending process helps stabilize the anthocyanins. These are the pigments responsible for the beet's brilliant magenta hue. Proper roasting of the beets also concentrates their natural sugars, contributing to both color and flavor intensity.
Beet Hummus Platter

Ingredients:
Instructions:
Nutrition Facts:
| Calories | 158 kcal |
|---|---|
| Protein | 5.4 g |
| Fat | 6.8 g |
| Carbs | 19.4 g |
| Fiber | 5.2 g |
| Sugar | 5.8 g |
| Sodium | 192 mg |
